
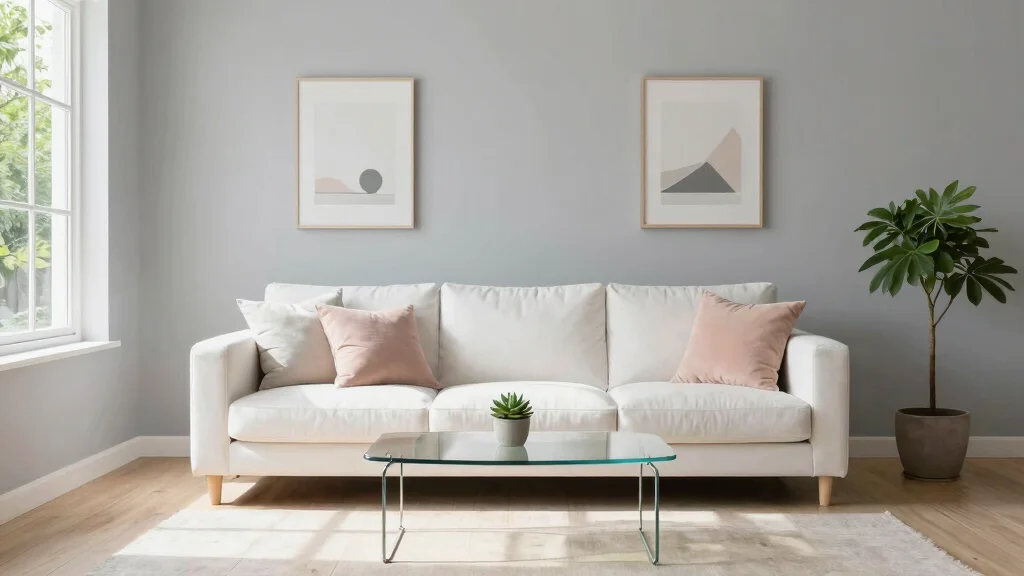
Creating a stunning living room doesn’t have to break the bank. With the rise of DIY culture, you can transform your space into a luxurious haven without spending a fortune. This post is all about sharing 17 DIY wall art living room ideas that look expensive but are surprisingly easy and affordable to create. Whether you’re looking for a statement piece or simply want to add personal touches to your walls, I’ve got you covered.
If you’re a home decor enthusiast or just someone wanting to spruce up your living space, this guide is perfect for you. You’ll find inspiration that speaks to your style, whether you prefer modern minimalism or bohemian flair. Each idea focuses on using accessible materials and creative techniques that anyone can tackle, ensuring that your living room feels unique and stylish.
By the end of this post, you will have a treasure trove of DIY wall art ideas that will inject personality into your living room. Not only will you learn how to create pieces that look high-end, but you’ll also discover the joy of crafting something with your own hands. Let’s dive in and explore how you can elevate your living room decor!
Key Takeaways
– Discover 17 DIY wall art projects that add an expensive touch to your living room décor.
– Learn affordable techniques and materials for creating stunning wall art.
– Find inspiration for modern wall art designs that fit various personal styles.
– Get practical tips for transforming small living spaces with creative wall art ideas.
– Enjoy the satisfaction of making personalized decor that reflects your taste and enhances your home.
1. Minimalist Geometric Canvas
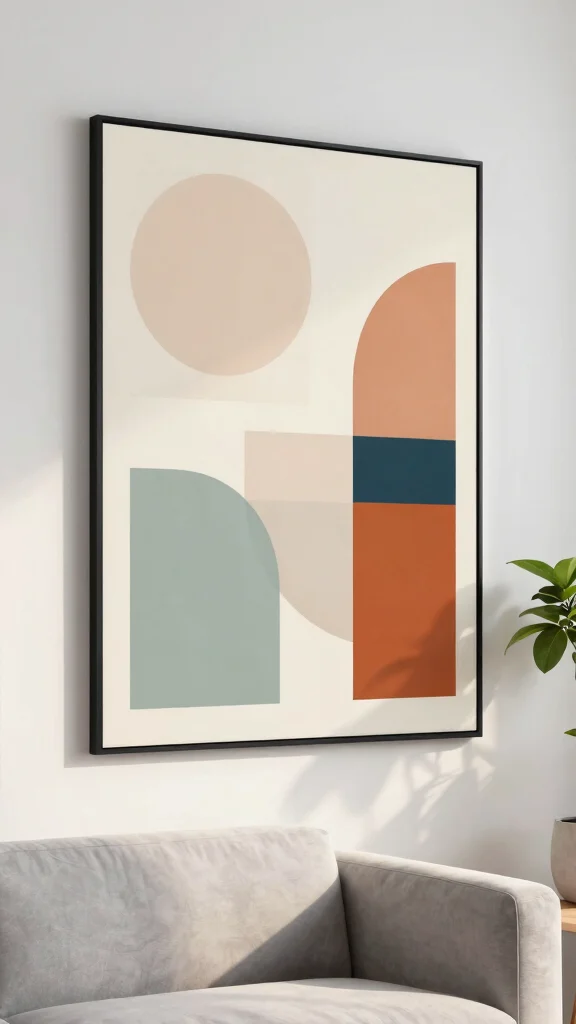
Embrace the modern charm of a minimalist geometric canvas to elevate your living room decor. This design principle thrives on simplicity and balance, creating visual harmony that appeals to the eye. Select a large canvas and some painter’s tape to achieve precision in your geometric design. Choose a color palette that complements your space, such as soft pastels or bold jewel tones, pairing them in creative patterns for a striking effect. The outcome? A sophisticated piece that feels contemporary yet timeless.
To bring this project to life, consider sourcing affordable canvases and paints from local craft stores. You can even explore online retailers for budget-friendly options. This DIY project aligns with the current trend of personalized art, allowing you to express your creativity while enhancing your living space.
Consider these ideas to inspire your creation:
– Pair painter’s tape with muted colors for subtle elegance
– Install contrasting shades for added depth and interest
– Use a sleek wood frame to elevate the final look
This art piece not only beautifies your walls but also infuses your space with a modern vibe that feels warm and inviting.
2. Framed Botanical Prints
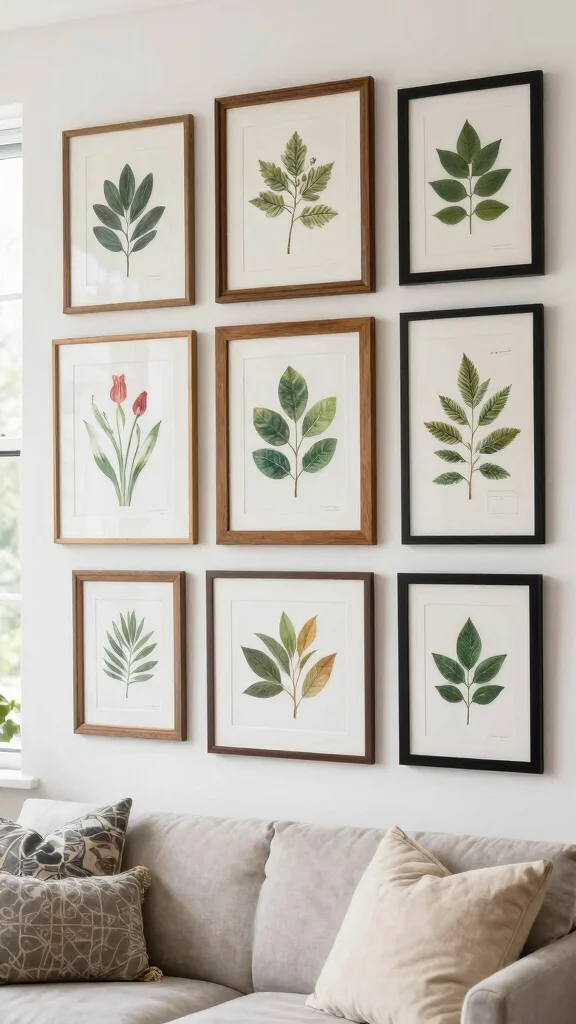
Bring the beauty of nature indoors with elegantly framed botanical prints that breathe life into your living room. This timeless decor style enhances your space with freshness and sophistication, making it feel welcoming and vibrant. Gather your favorite botanical illustrations or photographs and have them printed at a local shop. Utilize matching or eclectic frames to create an inviting gallery wall that showcases your unique taste.
For a budget-friendly option, consider printing images at home or sourcing prints online. Arrange them thoughtfully for a curated look that mirrors current design trends while adding a personal touch that resonates with your experiences.
Implement these ideas for a stunning display:
– Pair different frame styles for an eclectic gallery
– Install a grid layout for a clean, structured appearance
– Use personal plant photographs for an intimate vibe
This approach not only enhances the aesthetic of your living space but also connects you to nature, creating a soothing atmosphere.
3. DIY Fabric Wall Hanging
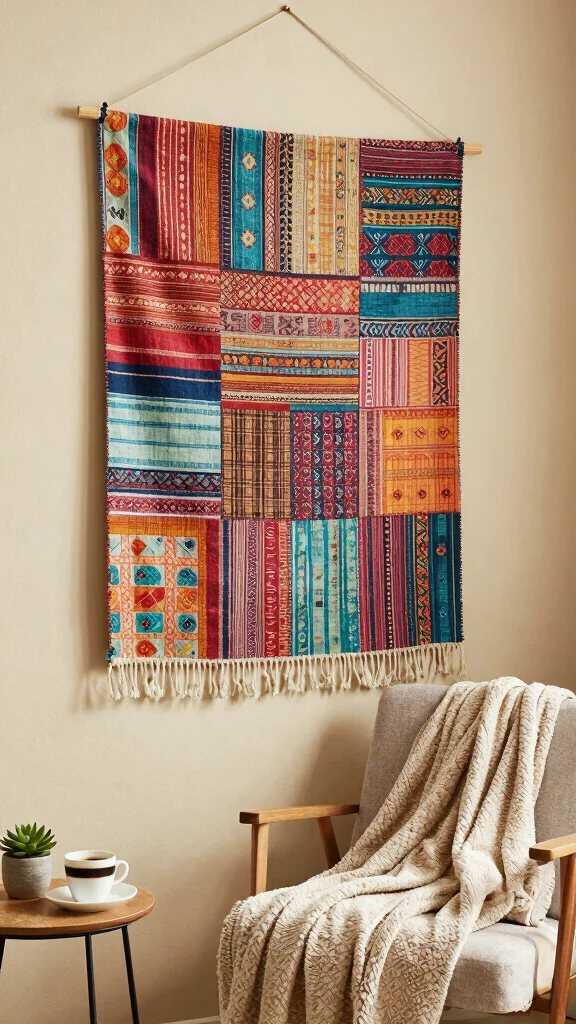
Add a soft, inviting touch to your living room with a DIY fabric wall hanging. This project allows you to express your personal style through fabric choices, whether opting for bold patterns or gentle textures. Cut the fabric to your desired size and hang it using a wooden dowel or a natural branch for an organic feel. This simple addition can warm up your space without overwhelming it.
To keep costs low, visit local fabric stores or check out clearance sections for beautiful materials. Layering different fabrics can enhance the visual interest and align with the trend of mixing textures in home decor.
Here are some ideas to get started:
– Pair soft fabrics with vibrant colors for contrast
– Install using Command strips for easy wall attachment
– Use various textures for a dynamic look
This fabric wall hanging not only adds depth but also brings a cozy ambiance to your living area.
Turn your DIY wall art living room into a cozy moment with a fabric wall hanging you love. Pick bold patterns or soft textures, cut to size, and hang it from a wooden dowel or a natural branch for instant warmth. Pro tip: check clearance fabrics to save money.
4. Upcycled Wooden Pallet Art
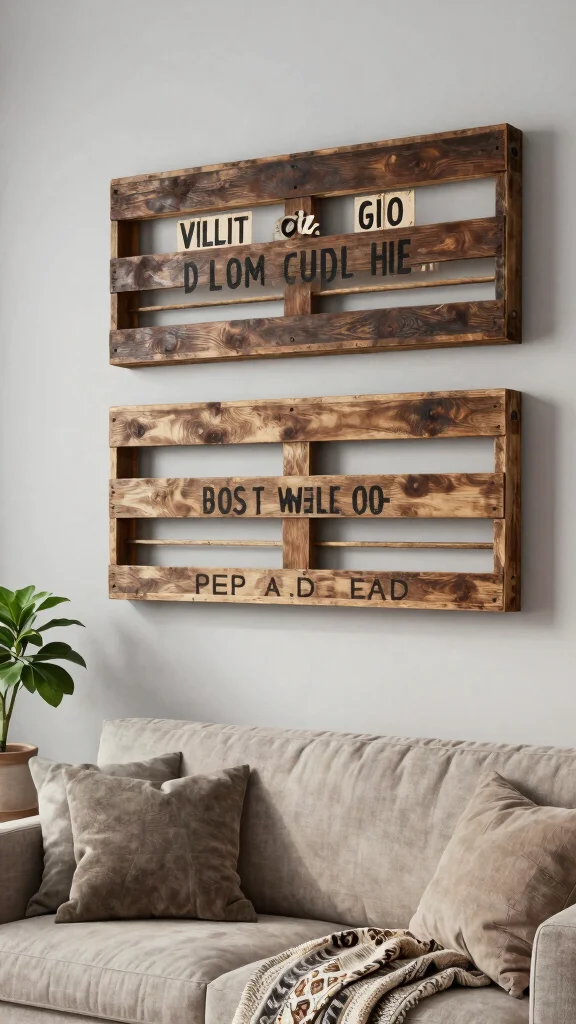
Transform old wooden pallets into rustic wall art that infuses your living room with character. This eco-friendly project gives new life to discarded materials while showcasing your creativity. Sand down the pallets for a smooth finish, then paint or stain them to enhance their natural beauty. You can incorporate stencils or personal quotes to make the piece uniquely yours.
For a budget-friendly approach, search local shops or websites for free pallets. Mixing different wood finishes can create a layered look that aligns with the trend of rustic-chic decor.
Try these tips to create your piece:
– Pair stencils with complimentary colors for personalization
– Install securely with brackets for safety
– Experiment with different wood textures for interest
This art not only acts as a conversation starter but also adds a lived-in warmth to your living space.
🎨 Transform Your Space Like a Pro
Unlock the secrets to luxurious DIY wall art that elevates your living space without breaking the bank.
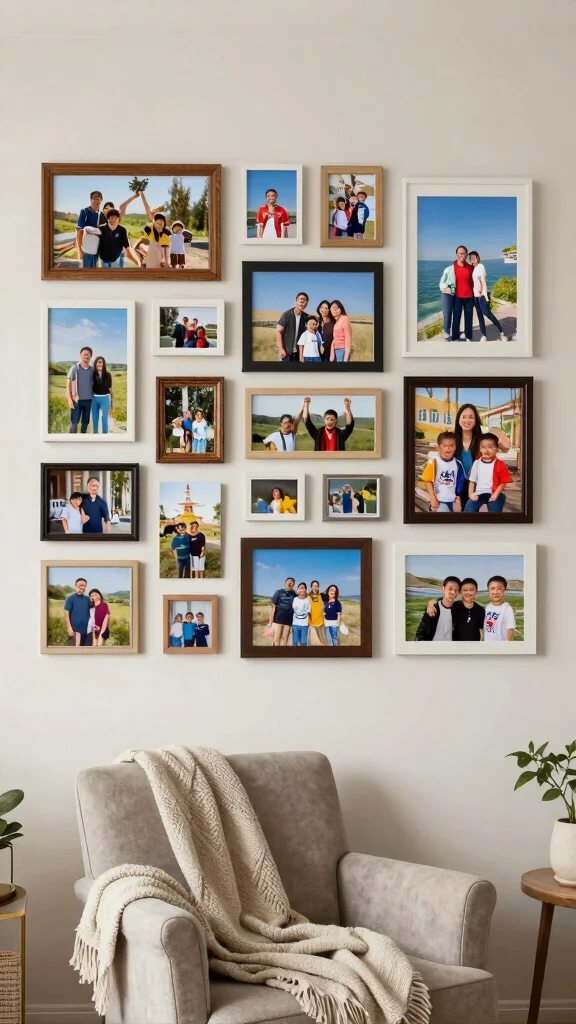
5. Gallery Wall of Travel Memories
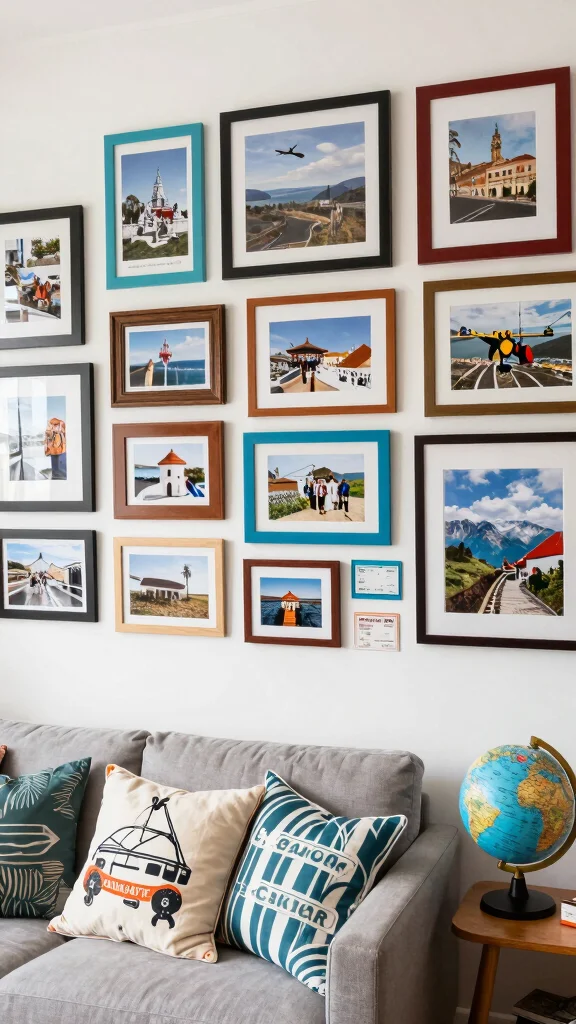
Create a gallery wall that celebrates your travel adventures, turning memories into stunning art. Frame your favorite photographs, ticket stubs, and postcards to craft a personal narrative on your wall. Mixing different frame styles enhances the eclectic feel and brings a unique character to your living room. This decor not only beautifies your space but also serves as a constant reminder of joyful experiences.
For a cost-effective solution, use inexpensive frames from thrift stores or even DIY your own. Arranging your pieces thoughtfully can connect with current design trends while sparking conversations every time you pass by.
Consider these ideas for your gallery wall:
– Start with a focal piece and build around it
– Incorporate decorative items like globes for added interest
– Use a cohesive color palette for a unified look
This gallery wall not only personalizes your living area but also invites warmth and nostalgia into your home.
6. Canvas Print with a Personal Touch
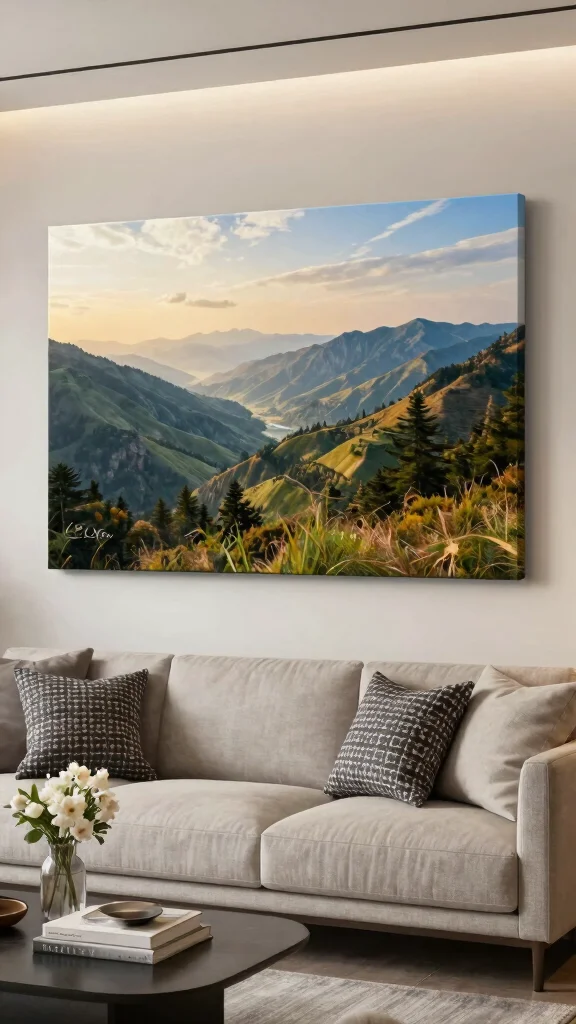
Make your living room truly yours by transforming a cherished photo into a large canvas print. This personal touch serves as a breathtaking focal point, inviting warmth and memories into your space. Many online services make it easy to upload and customize your images. Choose a high-resolution photo that evokes happiness, ensuring it captures your style and personality.
To keep this project budget-friendly, opt for online discounts or local printing shops that offer sales. A black-and-white version can create a timeless appeal, while vibrant colors infuse energy into the room.
Here are some tips to enhance your canvas print:
– Pair with coordinating decor for a cohesive look
– Hang at eye level for maximum impact
– Experiment with different sizes for a modern gallery feel
This print serves not only as art but as a heartfelt representation of your story and experiences.
DIY wall art living room magic: a cherished photo on canvas instantly turns your space into something personal yet polished. Upload a high-res image and choose a size—watch a budget-friendly focal point emerge. Easy, affordable luxury for small spaces.
Difficulty Rating & Requirements
Overall Difficulty Rating: Medium
Creating DIY wall art for your living room can be a fun and rewarding task. The difficulty level varies based on the specific project you choose. Most of the ideas listed range from medium to hard, requiring some crafting skills and creativity. This makes it suitable for those with a bit of experience, but beginners can also jump in with projects that are more straightforward, like simple stencil art or fabric wall hangings.
Time Estimate:
⏱ Estimated time: 2 to 8 hours
The time commitment will vary based on the complexity of the project you choose. Here’s a rough breakdown:
– Planning and Design: 1-2 hours to brainstorm and sketch ideas.
– Gathering Materials: 1 hour, depending on availability and sourcing.
– Execution: 2-5 hours for the actual crafting, depending on the project complexity.
– Finishing Touches: 1 hour for any additional details like framing or hanging.
Skill Requirements:
– Required skills: Basic crafting, painting, measuring, and design skills
– Beginner-friendly: Yes, with some projects like fabric wall hangings or stenciling being very approachable for beginners. More intricate designs will require more experience.
– Skills that can be learned: Techniques like painting, stenciling, or basic sewing can be picked up easily. However, projects requiring woodwork or advanced art skills may need prior experience.
Tools & Materials Needed:
🧰 Essential items checklist:
– Canvas or Wood Panels: Required for most projects
– Paints (acrylic or watercolor): Required for painting projects
– Brushes and Tools (scissors, glue, etc.): Required for crafting
– Framing Supplies: Optional, but recommended for a polished look
– Fabric or Textiles: Required for fabric wall hangings
– Stencils or Templates: Optional for detailed designs
– Hanging Hardware: Required to display your art
– Protective Gear (gloves, tarp): Optional, but helpful for mess control
Step-by-Step Overview:
1. Planning and Design (1-2 hours): Choose your project and sketch your design. Decide on colors and materials.
2. Gathering Materials (1 hour): Shop or gather all necessary materials. Check your home for any reusable items.
3. Execution (2-5 hours): Follow your design to create your wall art. Take your time to ensure details are perfect.
4. Finishing Touches (1 hour): Add any final details. Frame your art if desired and prepare it for hanging.
Professional vs DIY:
Professional costs: Hiring an artist or decorator can range from $200 to $1,000 depending on the project complexity and artist reputation.
DIY costs: You can typically complete a DIY wall art project for under $50, depending on the materials you choose. If you enjoy crafting and want a personal touch, DIY is a great way to save money while adding charm to your space.
Take your time and enjoy the creative process. With a little effort, you can craft stunning wall art that makes your living room feel luxurious without breaking the bank!
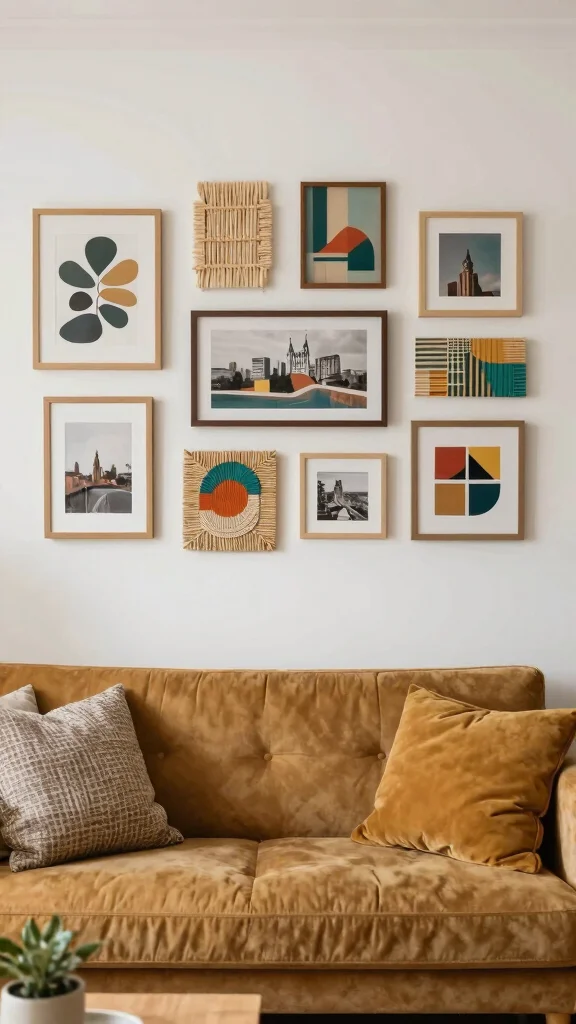
7. Macramé Wall Art
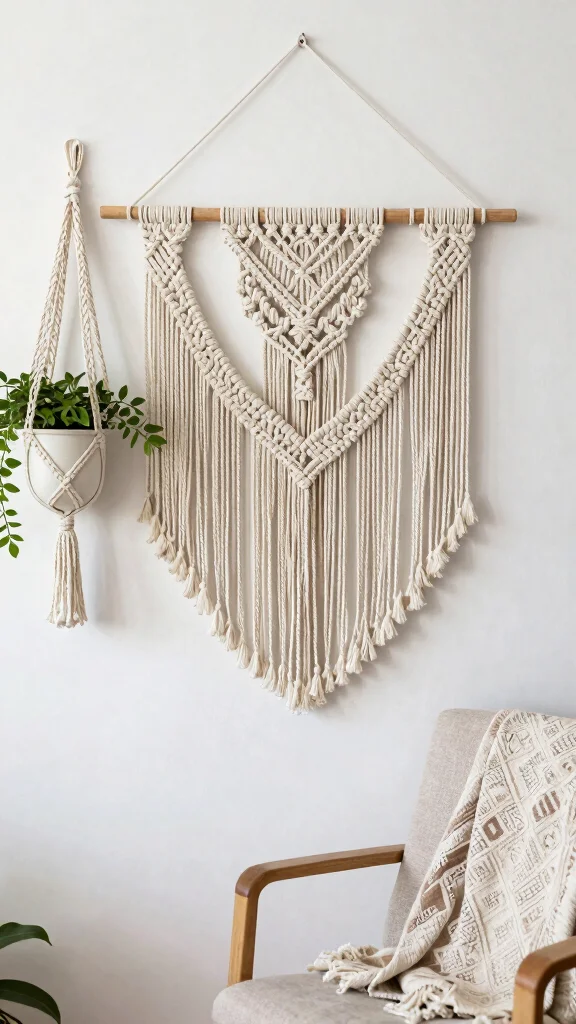
Macramé wall art is making a stylish comeback, perfect for adding texture and a bohemian flair to your living room. With just cotton cord and a wooden dowel, you can create intricate designs that enhance the room’s atmosphere. There are countless free tutorials online to guide you in crafting a piece that resonates with your personal style.
To keep this project accessible, consider purchasing cord from budget-friendly craft stores. Pair your macramé with potted plants to amplify a lush, earthy feel that aligns with current decor trends.
Start with these ideas to create your macramé:
– Use simple patterns for an easy introduction
– Install alongside greenery for a vibrant touch
– Experiment with various cord colors for a unique look
This art piece adds a charming, handmade quality to your space, perfect for softening the overall atmosphere.
You might also like
8. Abstract Art with Watercolors
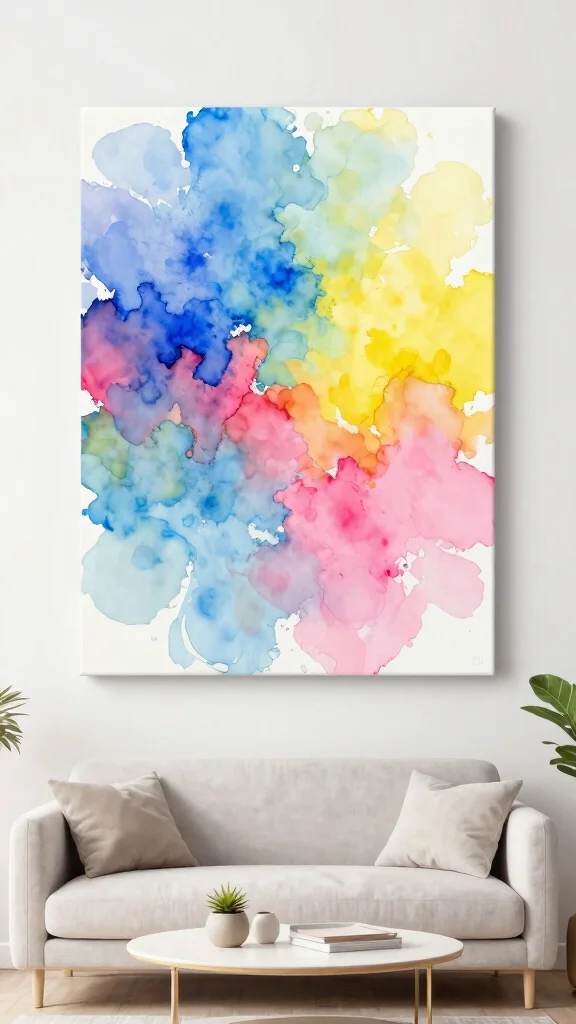
Unleash your creativity by diving into the world of abstract art with your own watercolor masterpiece. All you need are quality watercolors, brushes, and paper to let your emotions guide your artistic expression. Mix colors freely until you find combinations that resonate with you, then frame your artwork for a polished finish. This vibrant piece will not only enhance your wall but also serve as a wonderful conversation starter.
For budget-conscious creators, consider using watercolor sets available at local craft stores. Displaying a set of two or three pieces together creates a cohesive look that aligns well with current design trends.
Here are some tips for your watercolor project:
– Experiment with wet-on-wet techniques for unique patterns
– Hang pieces together for a gallery feel
– Choose colors that complement your existing decor
This art not only beautifies your space but also adds a splash of personality and creativity to your living room.
9. Statement Mirror with Artistic Frame
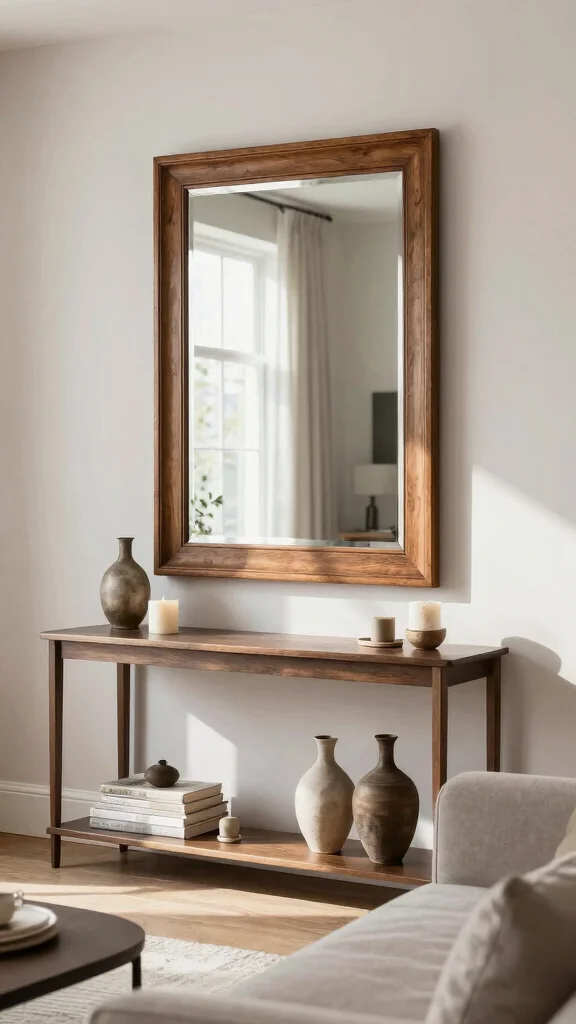
A statement mirror adds both functionality and elegance to your living room, making it feel larger and brighter. Create your own artistic frame using materials like wood or paint to express your unique style. Opt for a distinctive shape or design that reflects your personality, enhancing the visual appeal of your space.
For a cost-effective approach, explore thrift stores for affordable mirrors or upcycle old ones. Positioning your mirror opposite a window maximizes natural light, aligning with the trend of creating bright, airy interiors.
Consider these ideas for your statement mirror:
– Choose an ornate design for a dramatic effect
– Install a minimalist frame for a sleek look
– Hang at eye level to create impact
This mirror not only serves a purpose but also elevates the overall aesthetic of your living area.
10. Creative Wall Stencil Art
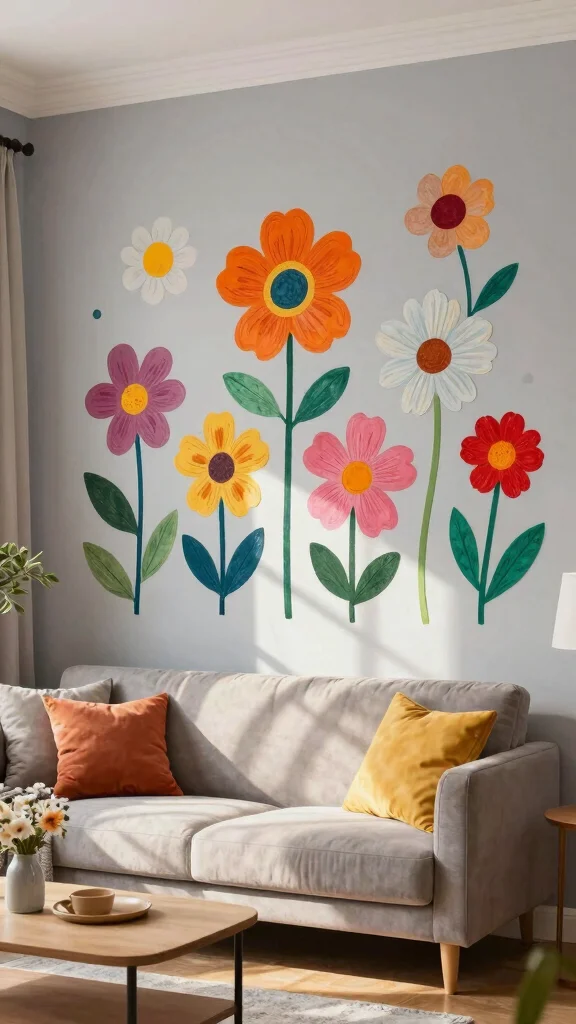
Revitalize your walls with creative wall stencils that express your style. Select designs that resonate with you—floral, geometric, or abstract—and either stencil an entire wall or create smaller accent areas. This approach adds flair without the commitment of permanent fixtures, allowing for easy customization to match your decor.
For budget-friendly options, use stencils made from cardboard or purchase affordable ones at craft stores. Testing your technique on cardboard beforehand ensures a smooth application, making it easier to achieve your desired look.
Try these ideas to enhance your stencil decor:
– Use contrasting colors for a striking effect
– Experiment with different patterns for variety
– Create a feature wall for a bold statement
This stencil art not only beautifies your walls but also offers a playful touch to your living space.
11. Custom Photo Collage
Craft a custom photo collage that captures your favorite moments and personalizes your living space. Gather photographs from various occasions and print them in different sizes for visual interest. Arranging them on a large board or within a set of frames transforms your wall into a gallery of cherished memories, perfect for sparking conversations.
For a cost-effective approach, consider printing photos at home or using online services with discounts. This eclectic display allows you to align with current trends while showcasing your unique journey.
Here are some tips for your collage:
– Lay everything out first to find the best arrangement
– Use themed colors for a cohesive look
– Incorporate decorative elements for added charm
This collage not only serves as art but also enriches your space with nostalgia and warmth.
12. Colorful Paper Mache Wall Art
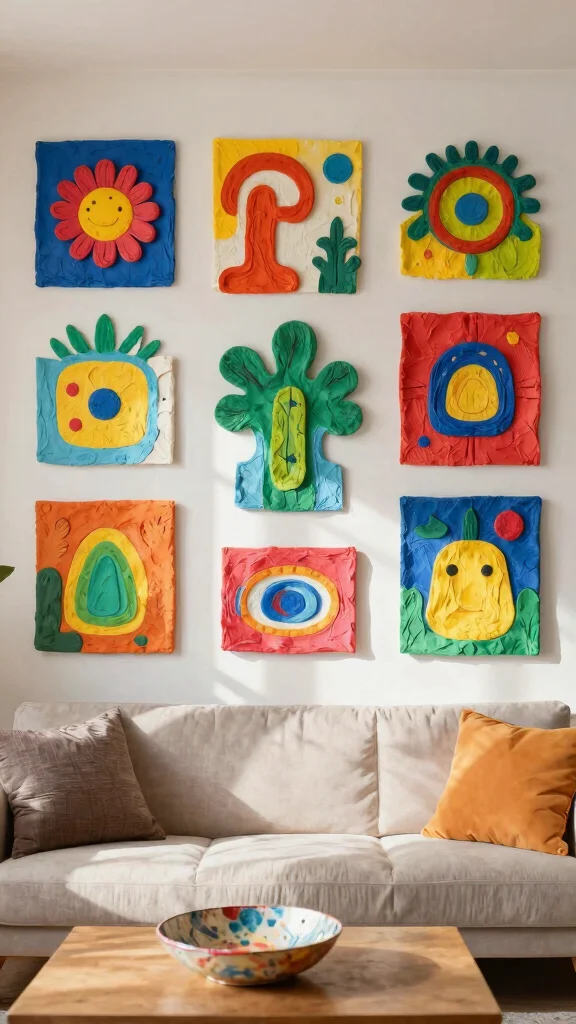
Explore the world of paper mache as a stunning medium for wall art. Create colorful sculptures or abstract forms using paper strips and glue to add depth to your living room. Once dried, paint them in vibrant hues that reflect your personality, and hang them for an eye-catching display. This three-dimensional art piece showcases your creativity while adding a fun element to your space.
To keep costs low, gather materials from recycling or craft stores. Mixing different paper types can enhance texture and visual interest, keeping your decor aligned with current trends.
Consider these ideas for your paper mache project:
– Create clusters for a dynamic look
– Experiment with colors for variety
– Incorporate different shapes for intrigue
This colorful art not only brightens your walls but also celebrates your artistic flair.
13. Vintage Vinyl Record Display
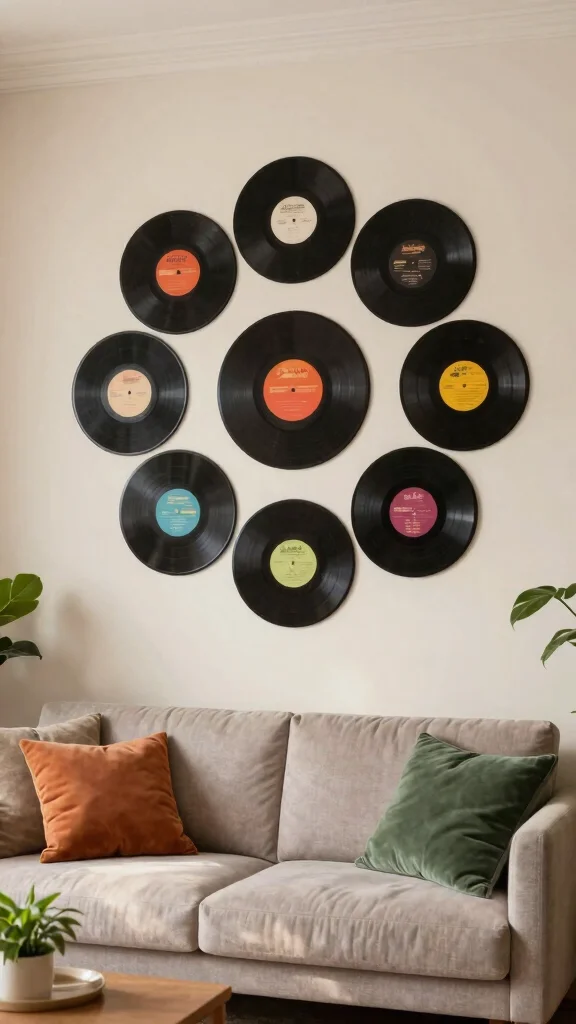
Celebrate your love for music by creating art from your favorite vintage vinyl records. Select records with appealing cover art to display on your wall using record hangers or floating shelves. This creative project adds a nostalgic touch to your living room while showcasing your passion for music.
For a budget-friendly option, explore thrift stores for affordable records. Mixing these with framed band posters creates a cohesive theme that resonates with current design trends.
Here are some tips for displaying your records:
– Secure records properly to ensure safety
– Mix album covers for visual interest
– Hang at eye level for maximum impact
This display not only adds character but also transforms your space into a celebration of your musical journey.
You Might Also Like
14. Textured Wall Panels

Textured wall panels offer an upscale look to your living room without breaking the bank. Using wood, fabric, or wallpaper, you can create panels that add depth and interest to your space. Choose a large panel with a geometric design or a rustic wood finish that complements your decor style.
For an affordable option, consider DIYing your panels using reclaimed materials or inexpensive fabrics. Layering these panels with your wall art enhances the visual appeal and aligns with the trend of creating dynamic interiors.
Implement these ideas for your panels:
– Use adhesive for simple installation
– Paint in colors that harmonize with your decor
– Incorporate lighting to highlight the textures
This approach not only adds sophistication but also enriches the overall aesthetic of your living area.
15. Upcycled Frame Collage
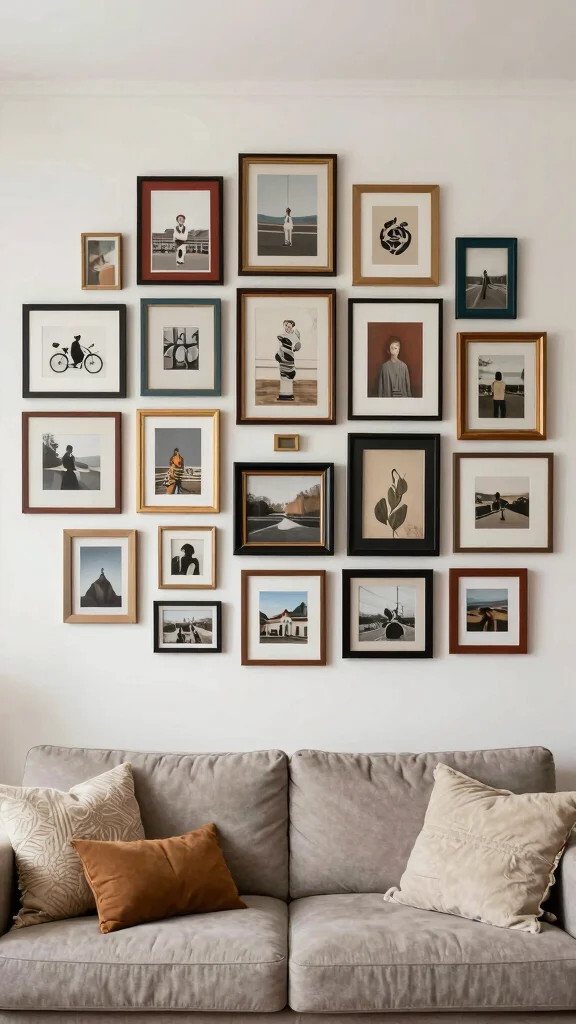
Turn old frames into a unique collage that tells your story through art and memories. Collect frames from thrift stores, then paint or leave them as-is for a charming mix. Fill each frame with artwork, photos, or fabric swatches to create an eclectic display that adds character to your living room.
For a budget-friendly project, look for free frames or upcycle those you already have. Mixing different colors and finishes keeps the display lively and aligns with current decor trends.
Try these ideas for your frame collage:
– Arrange frames on the floor before securing them
– Use a mix of sizes for visual interest
– Incorporate personal touches to make it unique
This collage not only serves as art but also creates a fun and engaging focal point in your space.
16. DIY Woven Wall Art
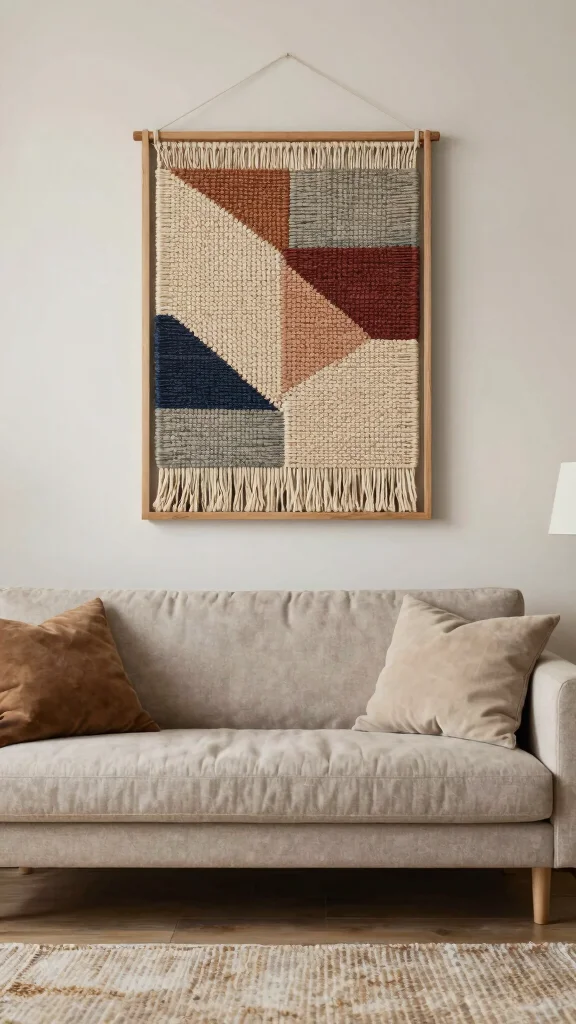
Woven wall art is a fantastic way to add texture and warmth to your living room. With just a simple frame, yarn, and a loom, you can create beautiful pieces tailored to your style. Experiment with colors and weaving patterns to craft something unique, adding a handmade touch that store-bought decor often lacks.
To keep it accessible, source yarn from budget-friendly craft stores. Playing with different techniques can provide variety, aligning your decor with current trends.
Here are some ideas for your woven art:
– Use a simple frame for a clean look
– Experiment with various yarn colors for a vibrant piece
– Hang using dowels or clips for easy updates
This woven art brings a cozy, personal quality to your living space, enhancing its overall warmth.
Fun fact: DIY woven wall art can transform a small living room for under $25 in supplies. A simple frame, yarn, and loom unlock endless color patterns and texture. It’s practical, shareable, and adds handmade luxury to your diy wall art living room.
17. DIY Chalkboard Art

Transform a blank wall into a functional masterpiece with chalkboard paint. You can create a large chalkboard wall or a smaller framed area to write quotes, doodle, or display your weekly agenda. This interactive art piece adds a playful touch while personalizing your living space.
For a budget-friendly project, use chalkboard paint available at local hardware stores. Sealing your chalkboard ensures easy cleaning and maintenance, making it practical and fun.
Consider these ideas for your chalkboard art:
– Use colored chalk for vibrant designs
– Create a framed chalkboard for added style
– Update your designs regularly for freshness
This chalkboard art not only serves as a decorative element but also enhances the functionality and charm of your living room.
Conclusion
Revamping your living room with DIY wall art doesn’t just enhance your space; it also allows you to express your personal style without spending a lot. Each of these ideas offers a unique blend of creativity, affordability, and that upscale look you crave. Embrace the joy of crafting and let your living room reflect who you are!
Frequently Asked Questions
What are affordable diy wall art living room ideas that still look luxurious in a small space?
Here are some affordable diy wall art living room ideas that still feel luxe in small spaces. Start with a cohesive color palette anchored to your wall color. Create a three-piece gallery using different sizes of framed prints or canvases in a monochrome or limited palette; this reads expensive even if you thrift the frames.
For a high-end touch, mix in metallic accents like a thin gold leaf edge on one piece or a metallic frame to catch the light. You can also craft texture with textiles: a fabric wall hanging or fabric collage adds depth without breaking the bank. Finally, consider leaning one oversized piece—like a painted canvas or a large framed print—to anchor the wall while keeping costs down.
How do I pick colors and textures for luxury-inspired diy wall art living room in a small space?
Start with a restrained palette: 2-3 colors max. Pair neutrals with one rich accent to keep the space feeling open. Add texture through materials like matte paint with a glossy frame, or fabric, jute, or brushed metal to create depth. Keep backgrounds light and walls uncluttered to maximize the sense of space; use metallics sparingly for a luxe touch. Build a quick mood board and test color swatches in different lighting. For the vibe, lean toward modern wall art designs and living room decoration tips to guide your choices.
What materials and supplies are best for creating modern wall art designs on a budget?
You don’t need to break the bank to get chic results. Start with simple basics: canvas boards or plywood, acrylic paints, painter’s tape for sharp shapes, stencils, washi tape, and affordable frames. Try these budget-friendly ideas: 1) geometric painted canvases using tape to form shapes, 2) string art on a thin wooden board, 3) fabric collage mounted on foam board, 4) pressed leaves in a clear frame. Plan your layout first, measure wall space, sketch shapes, then execute in a few hours. This is all about creative wall art projects that deliver big impact with affordable wall decor.
How should I arrange and hang diy wall art to maximize space and impact in a small living room?
Begin by planning the layout on the floor with paper cutouts or painter’s tape on the wall. Group pieces at eye level and decide between a grid for a formal look or a salon-style cluster for a more dynamic vibe. Anchor the arrangement with one large piece, then add smaller pieces around it to create balance without crowding. Leave generous negative space and keep frames cohesive to read as a single, curated artwork. Finally, use lightweight mounting options like picture-hanging strips in a pinch or a slim wall shelf to rotate pieces as you refresh your diy wall art living room setup.
What quick, beginner-friendly diy wall art projects can I finish in an afternoon?
Yes—these projects are doable in a day and still feel luxe. Try: 1) geometric paint on canvas using masking tape (45–60 minutes), 2) a simple fabric collage mounted in a slim frame (30–60 minutes), 3) printable art in affordable frames you swap seasonally (15–30 minutes), 4) a small string-art piece on wood (30–60 minutes). Pick 1-2 ideas to start, gather supplies, and you’ll have fresh affordable wall decor that elevates your space. These are classic creative wall art projects you can reuse across rooms.
Related Topics
DIY wall art
luxury decor
affordable art
living room style
modern designs
creative projects
small space solutions
beginner friendly
easy DIY
wall decor trends
home decoration tips
artistic wall ideas