
Sprucing up your living room with unique wall art is not just a trend; it’s a way to express your personality and creativity. As we spend more time at home, the desire to create an inviting and visually appealing space has only grown. This post is born out of that passion to inspire you to transform your walls into a canvas of your imagination with 15 wall art living room DIY ideas. Whether you’re an experienced DIYer or a curious beginner, these projects will spark your creativity and help you make your living area truly your own.
If you love home decor and want a space that reflects your style, you’ll find these ideas perfect for your needs. You care about affordability and sustainability, and you want to avoid generic decor that lacks character. This post provides a variety of DIY wall art projects that are not only creative but also friendly to your wallet. By using upcycled materials, you can create stunning creative home accents that tell a story while being budget-conscious.
Get ready to explore 15 fabulous DIY wall art ideas that will bring warmth, style, and a personal touch to your living room. Each idea offers a fun and engaging way to refresh your decor without the hefty price tag of store-bought art. So grab your tools and let’s dive into the world of DIY wall art living room projects that will inspire and excite you.
Key Takeaways
– Discover 15 unique DIY wall art ideas that utilize upcycled materials to create affordable home decor.
– Projects range from framed fabric panels to painted canvas art, providing options for all skill levels.
– Learn how to personalize your space with creative accents like macrame wall hangings and photo collages.
– Each project is designed to be budget-friendly, allowing you to beautify your living room without breaking the bank.
– Unleash your creativity by experimenting with different styles and materials to make your living space uniquely yours.
1. Framed Fabric Panels
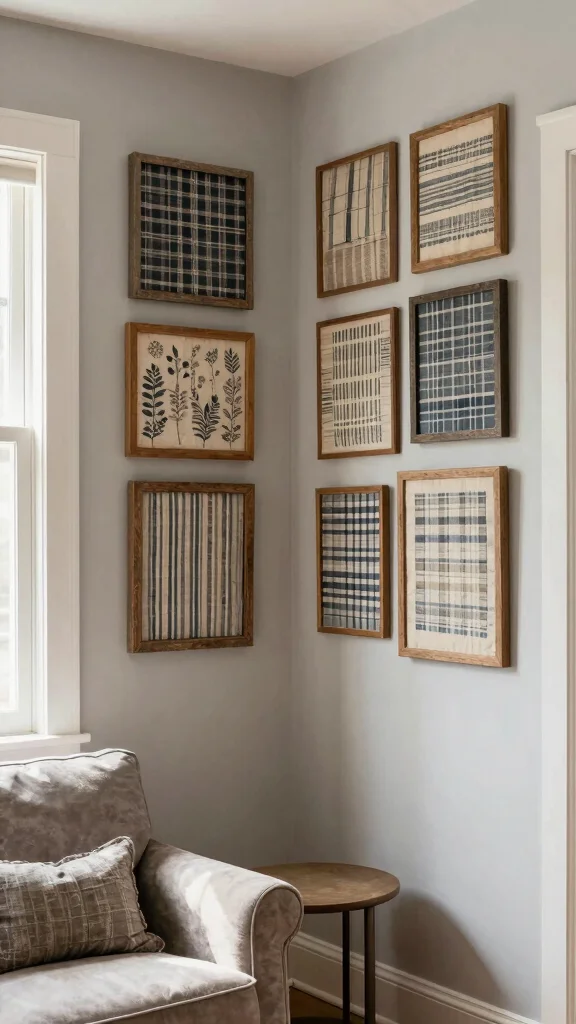
Framed fabric panels are a delightful way to introduce color and texture into your living room. This design element works beautifully as it allows you to showcase vibrant prints or soothing neutrals that align with your style. For instance, a bright floral fabric can energize a muted space, while soft beige tones can create a serene atmosphere. Simply stretch fabric over foam boards or old frames to create charming wall art pieces that can be hung in clusters or individually for a more understated effect.
To implement this idea, consider exploring local fabric stores for unique prints or even checking your own fabric stash for hidden gems. If you’re on a budget, thrift shops often have frames that can be repainted or refurbished. This project connects with the broader trend of sustainable decor while offering a creative outlet that reflects your personality.
Consider these tips to enhance your fabric panel display:
– Pair bold prints with neutral backgrounds for balance
– Install a gallery wall for an eclectic look
– Use contrasting frame colors to make panels pop
– Incorporate various textures like linen or velvet for depth
This approach not only beautifies your walls but also brings warmth and character to your living space, making it feel truly inviting.
Did you know that framing fabric panels can transform a room in under 60 minutes? This upcycled wall art living room diy uses foam boards, fabric, and simple frames—swap fabrics seasonally for fresh color.
2. Painted Canvas Art

Creating painted canvas art is an exciting way to express your creativity and add a personal touch to your living room. This approach works well because abstract designs and simple shapes can evoke emotions and draw attention without requiring advanced skills. Use vibrant acrylic paints to layer colors or create unique textures, and don’t hesitate to use brushes, sponges, or even your hands for an artistic flair.
For a budget-friendly option, consider purchasing canvases from discount stores or even using leftover paint from other projects. You might also explore local art supply shops for sales on canvases. Abstract art is a popular trend that not only decorates but also allows your mood and style to shine through each piece.
Here are some practical tips to get started:
– Experiment with different brush techniques for varied textures
– Use painter’s tape to create geometric shapes
– Layer colors for a more dynamic look
– Add personal quotes or messages for extra meaning
This DIY project not only enhances your decor but also invites conversation, making your living room a true reflection of your artistic spirit.
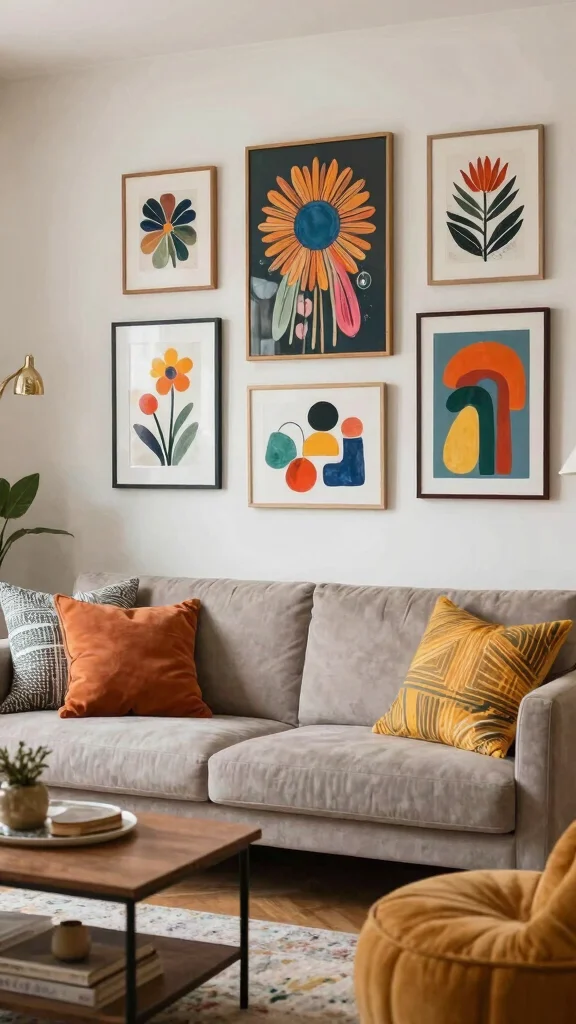
3. DIY Photo Collage
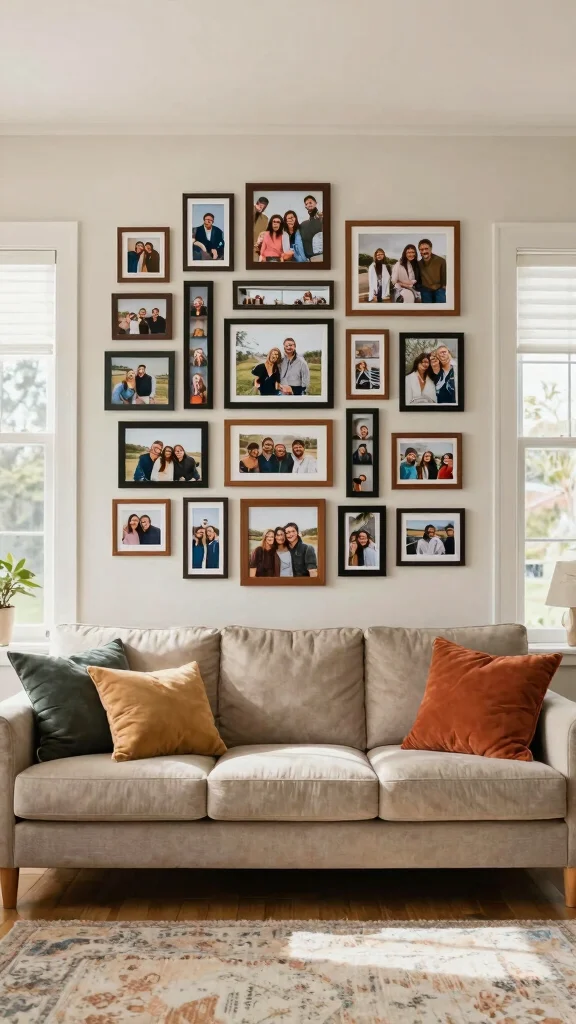
Crafting a DIY photo collage is a heartfelt way to celebrate your favorite moments while decorating your living room. This idea shines because it transforms ordinary photos into a beautiful gallery that tells your story. Mix various frame sizes and styles to create a visually captivating layout, showcasing cherished memories from travels, family gatherings, or everyday life.
Start by gathering your favorite photos and experimenting with different arrangements on the floor before making it permanent on your wall. If you’re on a budget, consider using thrifted frames or printing photos at home. This collage not only serves as decor but also evokes nostalgia and warmth, making your living space feel more like home.
Here are some tips to help you create your collage:
– Arrange frames in a grid or freeform pattern for interest
– Incorporate decorative elements like quotes or art
– Use a mix of colors to tie the theme together
– Opt for black-and-white photos for a classic touch
This project personalizes your walls and creates a cozy atmosphere, inviting guests to share in your cherished experiences.
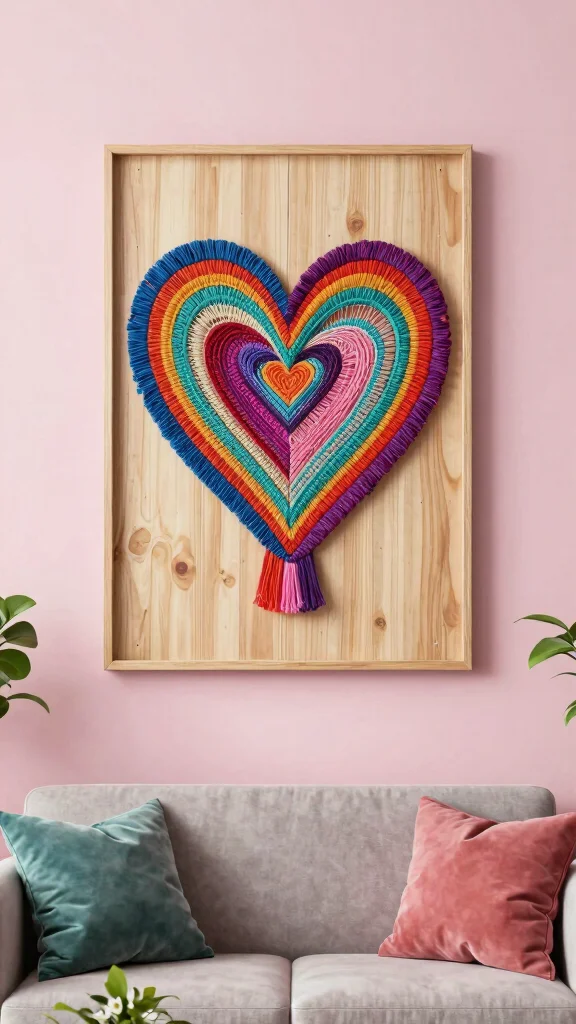
4. Macrame Wall Hanging
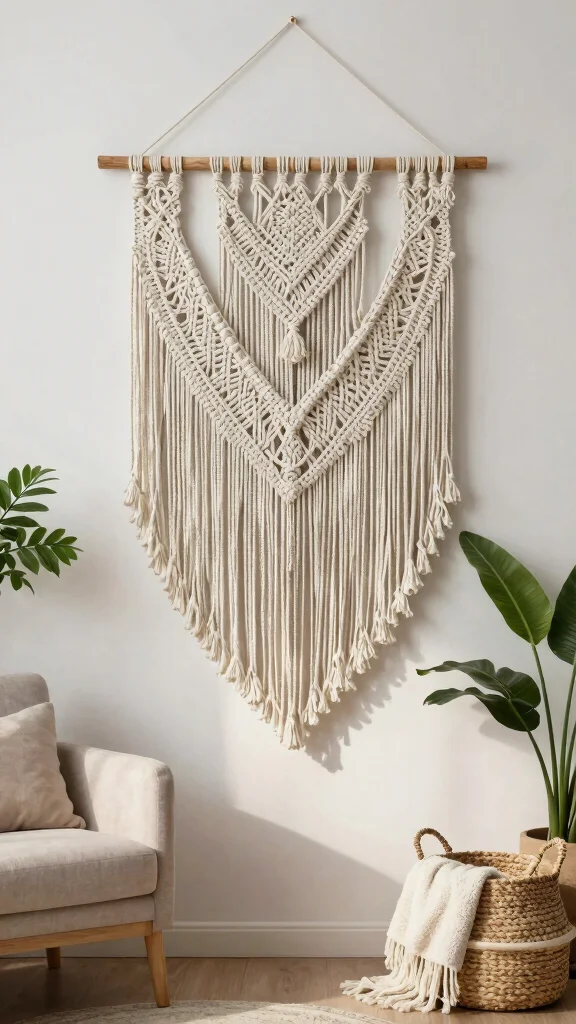
Macrame wall hangings are making a stylish comeback, adding a soft, bohemian touch to your living room. This design choice is appealing as it combines intricate craftsmanship with a relaxed aesthetic that enhances any space. Using cotton cord, you can create stunning patterns and shapes that draw the eye and add warmth to your walls.
To start your macrame project, gather some basic supplies and explore online tutorials that cater to your skill level. If you’re looking for budget-friendly options, craft stores often sell cotton cord in various colors and sizes. Macrame aligns with the current trend of natural materials, offering a unique way to showcase your creativity.
Check out these tips for your macrame wall hanging:
– Create a simple pattern for your first attempt
– Use a wooden dowel for a polished finish
– Incorporate beads or feathers for added flair
– Hang it above a couch or chair for maximum impact
This DIY project not only beautifies your space but also serves as a conversation starter, making your living room feel warm and inviting.
5. Repurposed Window Frame
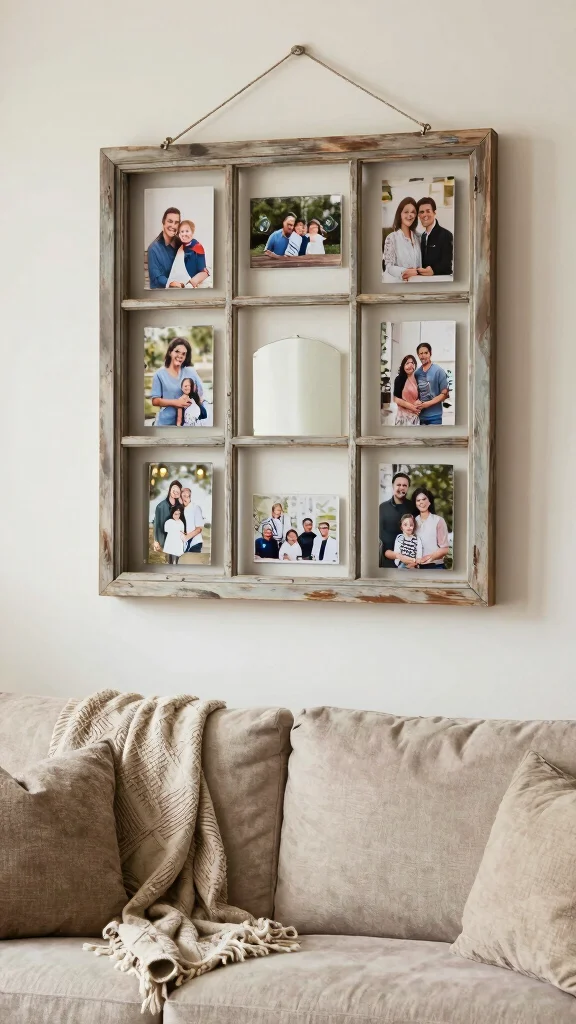
Transforming an old window frame into wall art is a charming way to blend vintage style with modern decor. This idea stands out because it adds character while showcasing your creativity. Paint the frame to match your decor and fill the panes with personal touches like photos, postcards, or decorative mirrors, creating a lovely focal point.
When sourcing materials, check local flea markets or thrift stores for unique window frames. For a budget-friendly twist, consider using leftover paint or even stencils to customize the frame. This crafting project not only supports sustainability but also infuses your living space with history and charm.
Here are some tips to enhance your repurposed window frame:
– Customize with stencils or decoupage for a unique look
– Arrange items in a visually pleasing way within the panes
– Use contrasting colors to make the frame pop
– Hang it in a prominent position for maximum impact
This creative endeavor not only beautifies your walls but also tells a story, making your living room feel more personal and inviting.
🎨 Transform Your Space Creatively
Unlock your inner designer with this DIY guide filled with innovative, budget-friendly decor ideas for every room.
Difficulty Rating & Requirements
Overall Difficulty Rating: Medium
Creating wall art for your living room is a rewarding project, but it does require some planning and effort. You can expect a mix of simple and more complex tasks depending on the specific DIY projects you choose. This is suitable for anyone with a basic understanding of crafting and DIY, as well as those looking to level up their home decor skills.
Time Estimate:
⏱ Estimated time: 5-10 hours
Breakdown of time for major phases:
– Planning and gathering materials: 1-2 hours
– Crafting your wall art pieces: 3-6 hours
– Installation and finishing touches: 1-2 hours
Skill Requirements:
– Required skills: Basic crafting, painting, and measuring skills
– Beginner-friendly: Yes
You don’t need advanced skills to start with these DIY wall art projects. Many techniques can be learned through online tutorials, while others may require a bit of practice for best results.
Tools & Materials Needed:
🧰 Essential items checklist:
– Canvas or wood panels (required)
– Paints or fabrics (required)
– Scissors (required)
– Glue or adhesive (required)
– Hammer and nails or wall anchors (required)
– Ruler or measuring tape (required)
– Crafting tools (optional)
– Stencils or templates (optional)
Step-by-Step Overview:
1. Planning Your Design (1 hour): Decide on the type of wall art you want to create. Gather inspirations and jot down some ideas. Consider your living room’s color scheme and theme.
2. Gathering Materials (1-2 hours): Buy or upcycle materials needed for your chosen DIY art. Visit local thrift shops or craft stores to find unique items that fit your style.
3. Creating Your Art (3-6 hours): Follow your design plan to craft each piece. Take your time and enjoy the creative process. Remember to let paint or glue dry as needed.
4. Installation (1-2 hours): Once your art pieces are ready, hang them on your walls. Use a level to ensure they are straight. Step back and admire your handiwork!
Professional vs DIY:
Rough cost comparison: A professional might charge anywhere from $300 to $800 for custom wall art, depending on size and complexity. In contrast, you can create similar pieces for as little as $50 to $150, especially if you use upcycled materials. Hiring a professional may be ideal for those who want a polished look without the effort. However, if you’re creative and enjoy crafting, DIY can be a fun and affordable way to personalize your living room!
6. Geometric Wooden Art
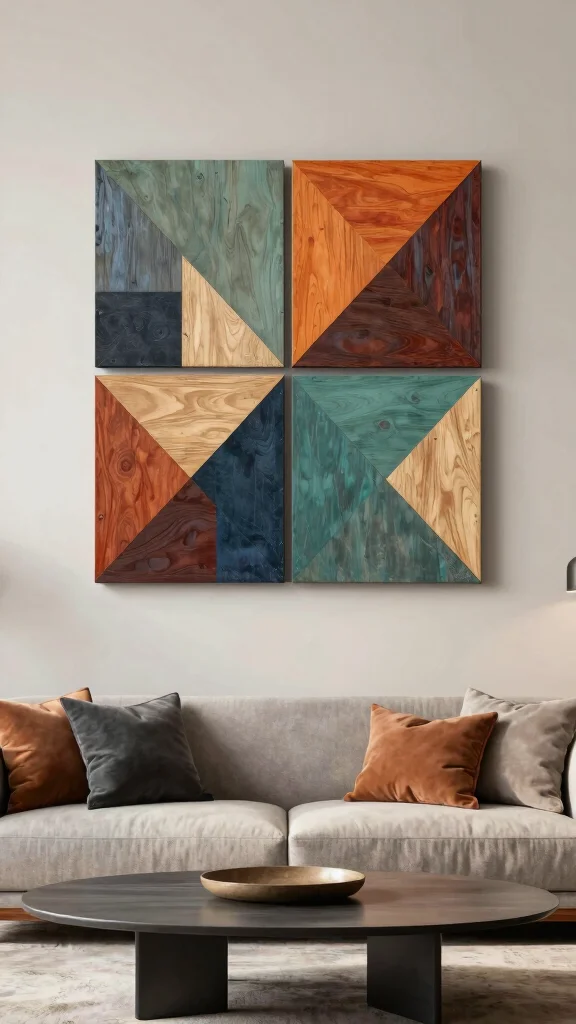
Crafting geometric wooden art from scrap wood is a fantastic way to add a modern touch to your living room. This concept works wonderfully as it combines natural materials with contemporary design, creating eye-catching visuals. Cut wood into various shapes and sizes, then paint them in complementary colors for a striking display that can be arranged directly on your wall or on a larger board.
To gather materials, check your garage for scrap wood or visit local hardware stores for offcuts. For a budget-friendly approach, consider using paint samples to create your color palette. This project taps into the trend of minimalist decor, allowing you to express your creativity while adding dimension to your walls.
Consider these tips when creating your geometric art:
– Use a saw for precise cuts and shapes
– Arrange pieces in a pattern before attaching
– Paint in shades that complement your existing decor
– Use adhesive or nails to secure the pieces in place
This DIY project not only enhances your living space but also adds a unique three-dimensional quality that transforms your walls into a work of art.
7. Upcycled Tin Can Art
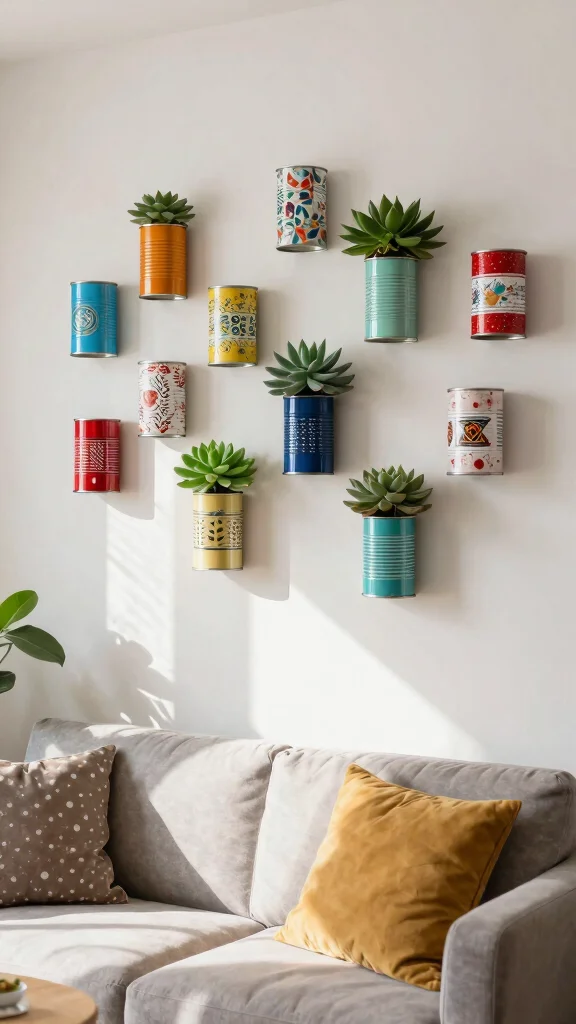
Don’t toss those tin cans! They can be creatively transformed into charming wall art. This idea is appealing because it turns everyday items into delightful decor. Paint the cans in vibrant colors or cover them with decorative paper, then arrange them in an artistic pattern or fill them with small succulents for added dimension on your wall.
To start, ensure the cans are clean and labels are removed. You can find paint at craft stores or use leftover supplies from other projects to save money. This eco-friendly approach not only promotes sustainability but also adds a playful touch to your living space.
Here are some ideas to help you with your tin can art:
– Paint in complementary colors for visual harmony
– Arrange cans in a cluster for a bold statement
– Fill with plants for a fresh touch
– Use wire to hang them creatively on the wall
This project not only beautifies your space but also showcases your creativity and resourcefulness, making your living room feel lively and inviting.
You might also like
8. Cork Board Art
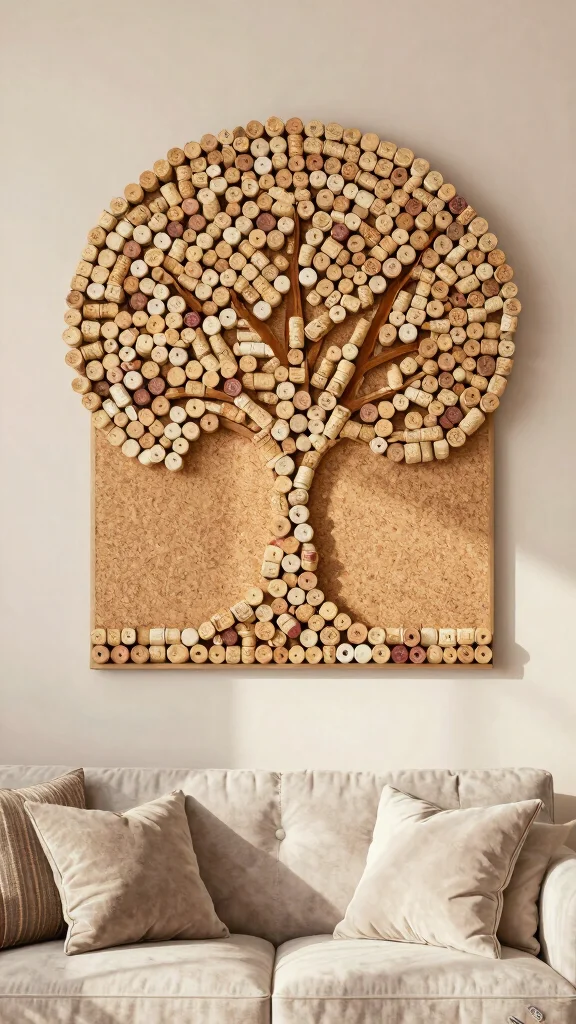
Transform old wine corks into whimsical cork board art! This idea shines because it combines creativity with functionality. Arrange the corks in fun shapes—like a heart or a tree—gluing them to a sturdy board for both decoration and a practical bulletin board.
Gather corks from wine bottles or ask friends to save theirs for you. If you’re on a budget, consider using a piece of cardboard as your backing. This project connects with the trend of upcycling while adding a rustic touch to your decor.
Here are some tips to enhance your cork board art:
– Paint the board a solid color for a polished look
– Mix in decorative elements like photos or quotes
– Use a hot glue gun for secure adhesion
– Hang it in your kitchen or dining area for easy access
This creative endeavor not only serves as decor but also adds a personal touch, making your living room feel warm and inviting.
9. Painted Rocks Display
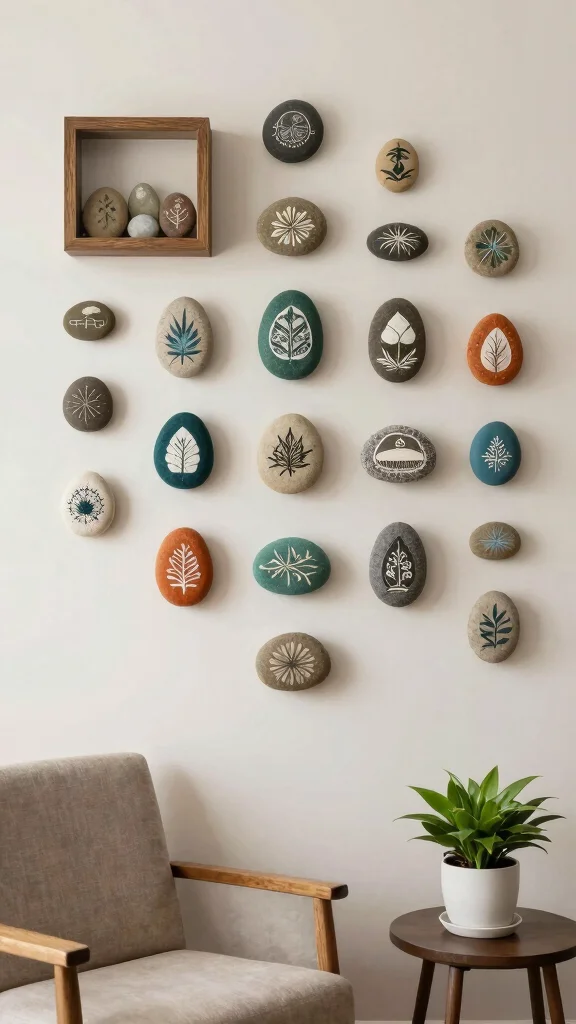
Get crafty with nature by turning painted rocks into charming wall art! This idea is a delightful way to bring the outdoors inside, as smooth, flat stones can be transformed with colorful designs, quotes, or patterns. Arrange these rocks in a shadow box or directly on the wall for an earthy, artistic vibe.
When collecting rocks, look for smooth ones on your next nature walk or visit local craft stores for supplies. Use non-toxic paint to ensure safety, especially if kids are involved in the project. This DIY not only beautifies your home but also connects you to nature.
Consider these tips for your painted rocks display:
– Use bright colors for a cheerful look
– Arrange rocks in groups for visual impact
– Incorporate inspirational quotes for motivation
– Seal with a protective coating for longevity
This project adds a charming touch to your living space, making it feel warm and inviting while showcasing your creativity.
10. Repurposed Door Art
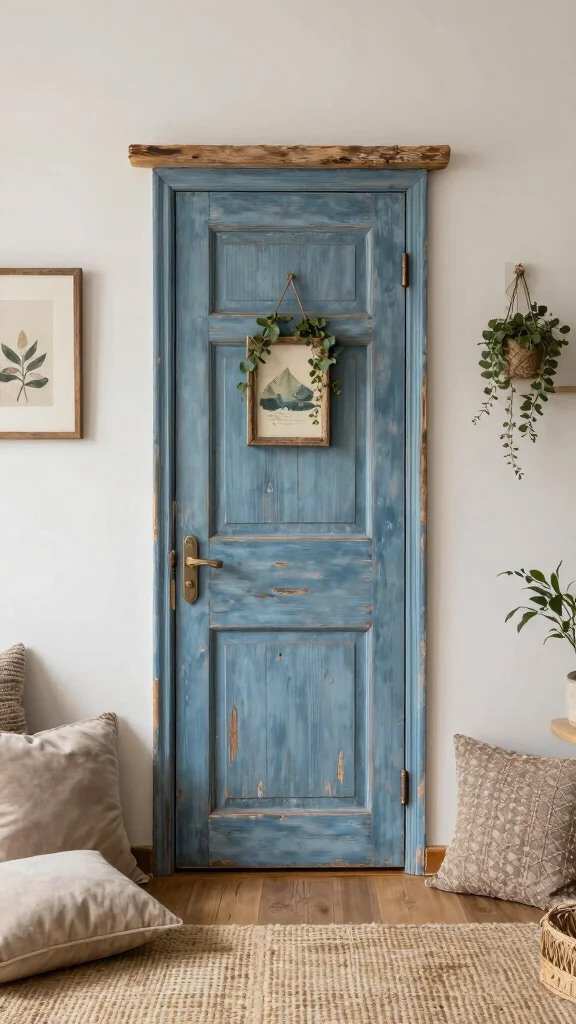
An old door can be reimagined into stunning wall art! This creative idea stands out because it adds character while serving as a statement piece. Sand the door down, paint it a vibrant color, and hang it on your wall as a unique backdrop for other art or as a standalone feature.
To find a suitable door, check local salvage yards or online marketplaces. This budget-friendly option can often be found at little to no cost. Repurposing doors taps into the trend of vintage decor, adding depth and history to your living space.
Here are some tips for your repurposed door art:
– Choose a contrasting paint color for a striking look
– Hang it at eye level for maximum impact
– Use it as a backdrop for smaller artwork
– Add hooks to make it functional for hanging items
This unique project not only enhances your walls but also serves as a conversation starter, making your living room feel truly special.
11. Decorative Baskets
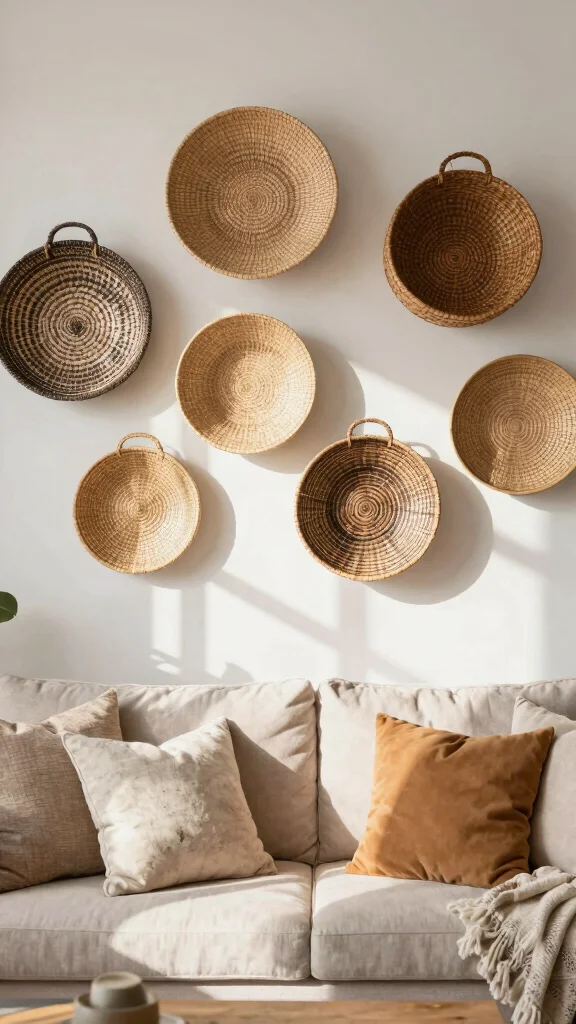
Decorative baskets are not just for storage; they can also be a beautiful wall display! This idea works wonderfully because it adds texture and depth to your living space. Choose a variety of sizes and shapes, arranging them in an eye-catching pattern that enhances your decor.
To gather materials, visit local craft stores or explore online shops for unique woven baskets. This budget-friendly option allows you to showcase your style while keeping your space organized. Hanging baskets taps into the trend of natural decor, giving your home a cozy vibe.
Here are some tips for creating your decorative basket display:
– Mix colors and textures for visual interest
– Arrange baskets in a playful pattern on the wall
– Use wall hooks for easy hanging
– Incorporate seasonal elements for a fresh look
This design approach not only beautifies your walls but also adds a warm, inviting touch to your living room.
Fun fact: using five varied decorative baskets on a wall can boost texture and depth by up to 30% in a living room. Mix sizes and shapes for an eye-catching pattern that makes your wall art living room diy feel cohesive and budget-friendly.
12. String Art
String art is a fun and creative way to personalize your wall decor! This project works well because it combines artistry with craftsmanship, allowing you to create stunning designs using simple materials. Start with a wooden board, hammer in some nails in a pattern, and weave string or thread to form shapes or words.
To get started, gather supplies from craft stores or use items you already have at home. This budget-friendly project is perfect for spending quality time with friends or family while crafting together. String art taps into the handmade trend, making your home feel more personal and unique.
Consider these tips for your string art project:
– Sketch your design lightly on the board before nailing
– Use contrasting colors of string for added impact
– Incorporate meaningful words or phrases
– Hang it in a prominent spot for all to see
This creative endeavor not only beautifies your walls but also serves as a cherished reminder of your artistic journey.
String art is where craft meets charm—pull the string tight, hammer a few nails, and suddenly your living room becomes a canvas for personal style. This simple wall art living room diy proves you don’t need a big budget to create a statement.
You Might Also Like
13. Wall Mounted Shelves
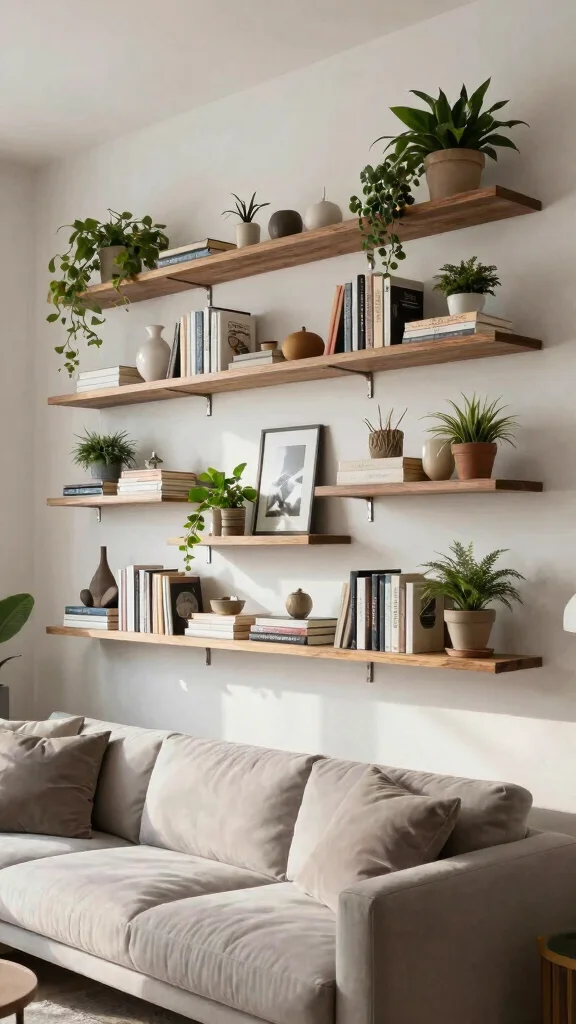
Wall-mounted shelves can beautifully serve as art displays in your living room! This idea is appealing because it combines functionality with aesthetics, allowing you to showcase your favorite books, plants, or decorative objects. Arrange them creatively to create visual interest and keep your space organized.
To source materials, look for stylish shelving options at home improvement stores or online. This budget-friendly option can be easily customized to suit your taste. Wall-mounted shelves align with the trend of maximizing vertical space while adding character to your decor.
Here are some tips for arranging your wall-mounted shelves:
– Mix shelf sizes and heights for dynamic appeal
– Use decorative objects that reflect your style
– Incorporate plants for a fresh touch
– Change items seasonally for an updated look
This approach not only enhances your space but also keeps it organized while adding a personal touch to your living room.
14. Wall Decals and Stickers
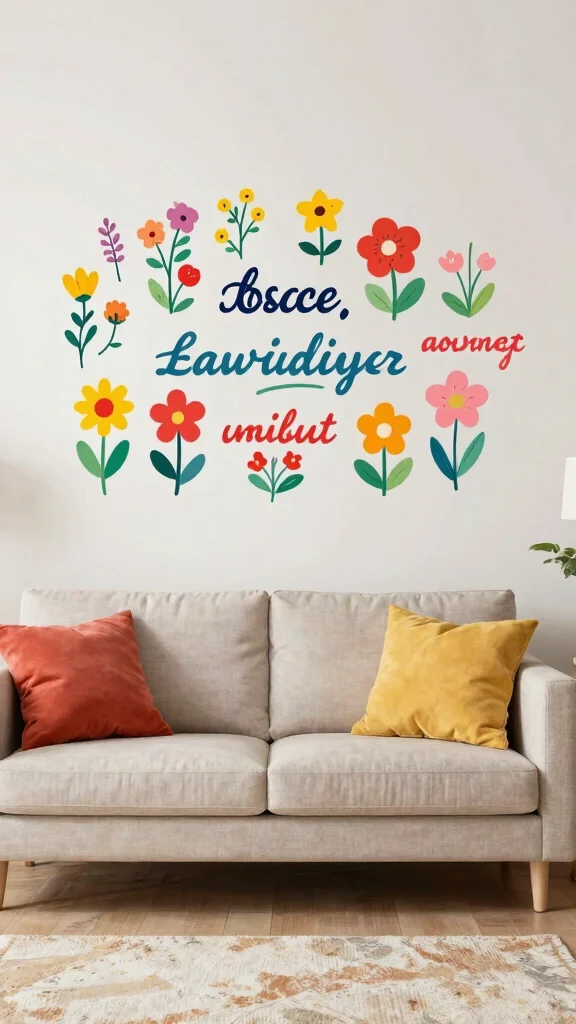
Wall decals and stickers offer a quick and easy way to refresh your living room decor! This option works beautifully because it allows for temporary changes without the commitment of paint. Choose from a variety of designs, from inspiring quotes to beautiful nature scenes, that resonate with your style.
When selecting decals, consider local craft stores or online retailers where you can find a range of options. This budget-friendly idea is particularly great for renters who want to personalize their space without making permanent changes. Wall decals tap into the trend of easy, removable decor, making it simple to change your look whenever you desire.
Here are some tips for applying wall decals:
– Clean the wall surface before application for better adhesion
– Measure and plan your layout before sticking
– Use a level to keep designs straight
– Choose removable options for future flexibility
This decorative approach not only enhances your aesthetic but also allows for creative freedom, making your living room feel fresh and inviting.
15. Quilted Wall Art
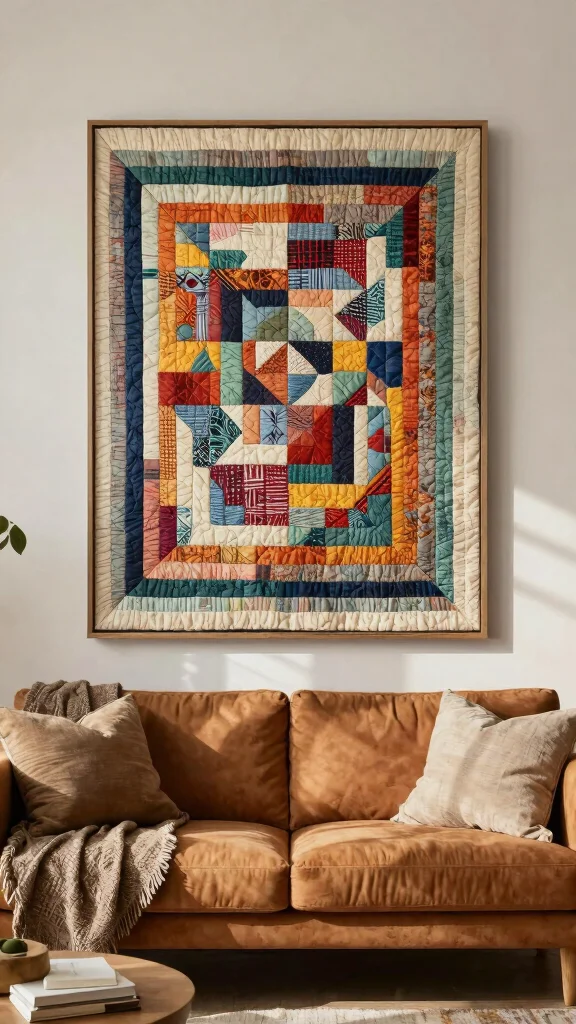
Combine your love for sewing with home decor by creating quilted wall art! This project works beautifully because it showcases craftsmanship while adding warmth to your living space. Use fabric scraps to design a stunning quilted piece and frame it for a unique focal point in your living room.
To get started, gather fabric scraps that complement your existing decor, and use a sewing machine to piece together your design. This budget-friendly project allows you to repurpose materials while expressing your creativity. Quilted wall art taps into the trend of handmade decor, making your home feel inviting and personal.
Consider these tips for your quilted wall art:
– Choose a color palette that ties in with your decor
– Frame your quilted piece for a polished look
– Incorporate various fabric textures for depth
– Hang it where it can be admired
This beautiful project not only enhances your living space but also carries a sense of warmth and nostalgia, making your living room feel truly heartfelt.
Conclusion
These 15 wall art DIY ideas prove that creating a stunning living room doesn’t have to be expensive or complicated. Upcycled materials, a bit of creativity, and some elbow grease can turn your walls into a canvas of self-expression. Choose one or several projects to make your space uniquely yours and watch as your living room transforms into a haven of creativity.
Frequently Asked Questions
What are some beginner-friendly wall art living room diy ideas?
Getting started with wall art living room diy can be fun and affordable. Try beginner-friendly ideas that reuse items you already have: a gallery wall using thrifted frames, canvases painted with leftover paints, a cork art piece from wine corks, and a simple fabric tapestry mounted on a painted board. You can also create wall art from old maps, typography prints, or pressed leaves in resin.
Before you start, pick a cohesive color palette and measure your wall space. Prep surfaces (clean, sand lightly, or prime) and plan the layout on the floor before hanging. Start with one focal piece and build a balanced gallery over time for a unique living room decor that feels creative but cohesive.
These wall art living room diy ideas are practical, affordable wall art options that adapt to your current living room decor and space.
What materials and tools are ideal for affordable DIY wall art projects?
For affordable DIY wall art projects, stock up on versatile, upcycled supplies: thrifted frames, canvas or plywood, acrylic paints, Mod Podge, painter’s tape, decorative paper, fabric scraps, and hot glue. Add texture with cardboard cutouts, magazine collages, or pressed leaves in resin to keep things interesting.
Plan a simple process: prep surfaces, sketch a layout, and complete one project per weekend to keep things doable. This approach yields a cohesive look for your living room decor without overspending.
With these basics, you can transform spaces with wall art living room diy that feels personal and affordable.
How can I choose colors and styles to match my living room decor?
Choosing colors and styles for your DIY wall art starts with your current living room decor and creative home accents. Pick a color palette (2–3 colors) that ties everything together and decide on the overall mood—calm neutrals, warm earthy tones, or bold pops of color.
Test palettes on swatches or printed photos of your space to visualize results, then assemble a small mood board before you start. For wall art living room diy, balance contrast with texture so your pieces complement rather than clash with your living room decor.
How should I hang and display DIY wall art to protect walls and maximize impact?
Plan your display like a mini gallery: choose hardware that supports the wall type and the frame weight, using picture hooks, wall anchors, or a French cleat for heavier pieces.
Layout on the floor first, measure spacing, and mark positions on the wall with painter’s tape. Use a level to keep lines straight, and mix frame sizes and orientations for visual interest while keeping consistent spacing (about 2–4 inches). This approach makes your wall art living room diy feel intentional and stylish within your living room decor.
How can I customize upcycled wall art to reflect my personal style on a budget?
Make it personal by incorporating photos, quotes, or meaningful icons from magazines or family keepsakes. Colorize frames to match your palette, swap mats, or repaint pieces to unify the look. Try decoupage with fabric or wallpaper rem remnants to add texture without overspending.
Most projects can be completed in a weekend, and you can refresh them seasonally to keep your wall art living room diy feeling fresh and aligned with your home decor ideas.
Related Topics
wall art living room diy
upcycled decor
creative home accents
affordable wall art
DIY wall art projects
living room decor
beginner friendly
easy DIY
home decor ideas
personalized art
vintage style
bohemian decor