Are you ready to add some serious sparkle to your nails?
Nail art can transform your hands into a dazzling canvas, and adding embedded sparkles and glitter effects can turn your manicure into a true work of art.
From subtle shimmering designs to bold, eye-catching patterns, this collection of nail inspiration will elevate your beauty game and have you experimenting with styles that are as unique as you are. Let’s dive into these scrumptious nail art ideas that will have everyone asking about your fabulous fingertips!
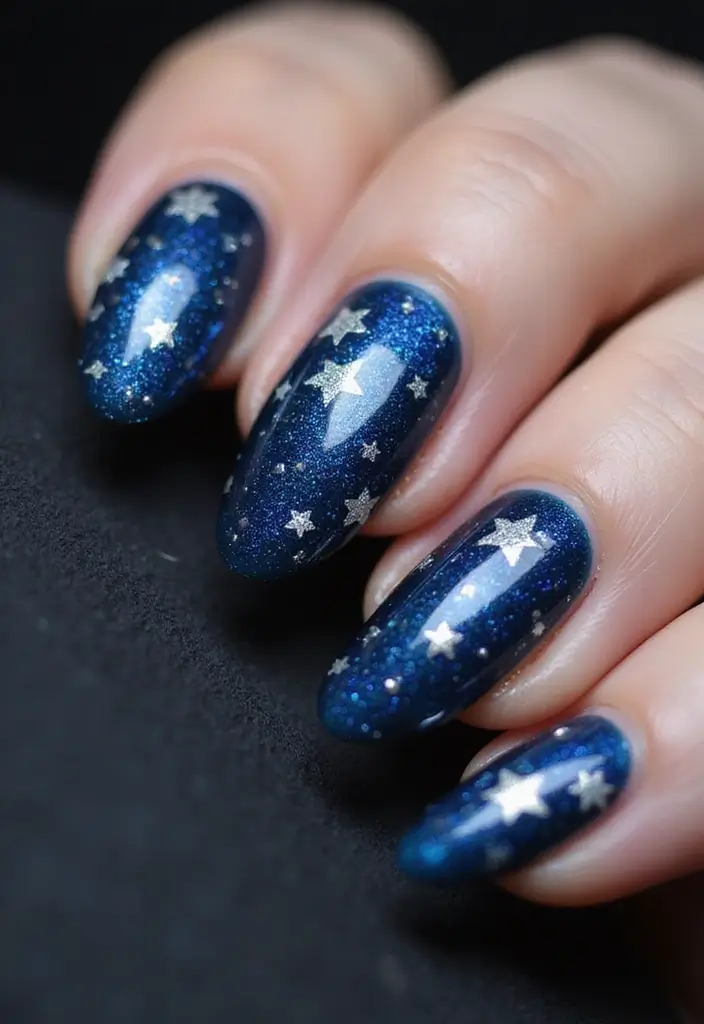
1. Galaxy Dreams
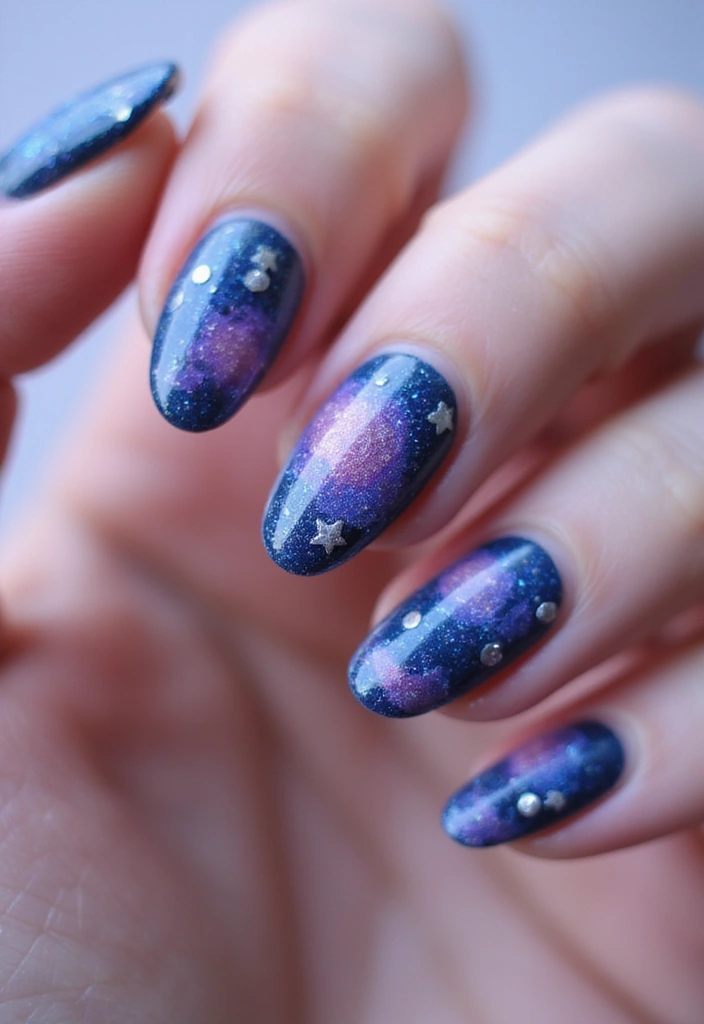
Who doesn’t love a little outer space inspiration? The Galaxy Dreams nail art design features mesmerizing swirls of blue, purple, and black, paired with sparkling silver and iridescent glitter to mimic stars and planets.
To get this look, start by painting your nails with a deep navy base.
Next, use a sponge to blend lighter shades of blue and purple, creating a nebula effect. Finish off with fine glitter sprinkled on top to add depth and sparkle.
– Use a top coat that enhances the shine of your glitter.
– For added charm, try using tiny star-shaped sequins embedded in the design for a more cosmic feel.
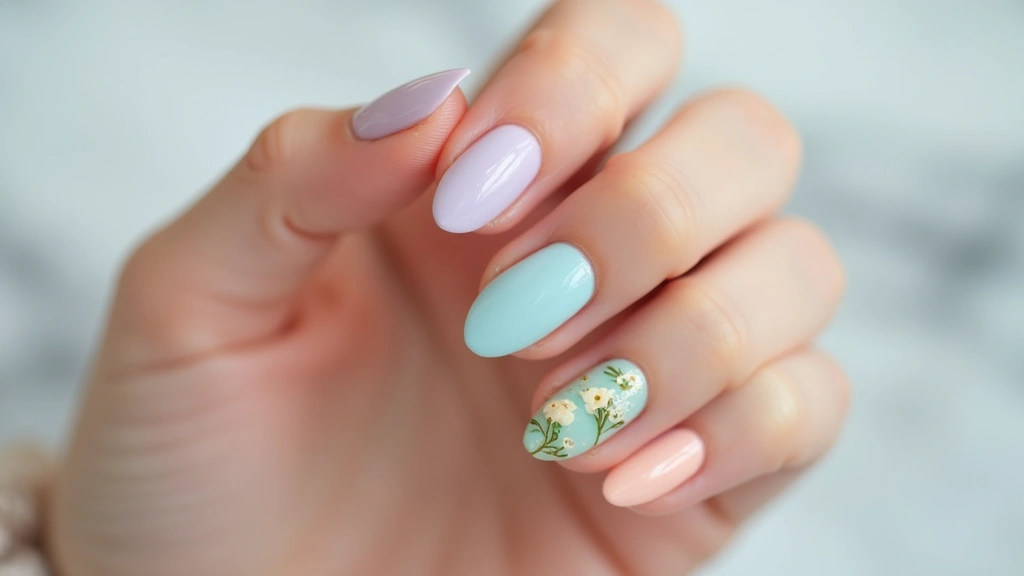
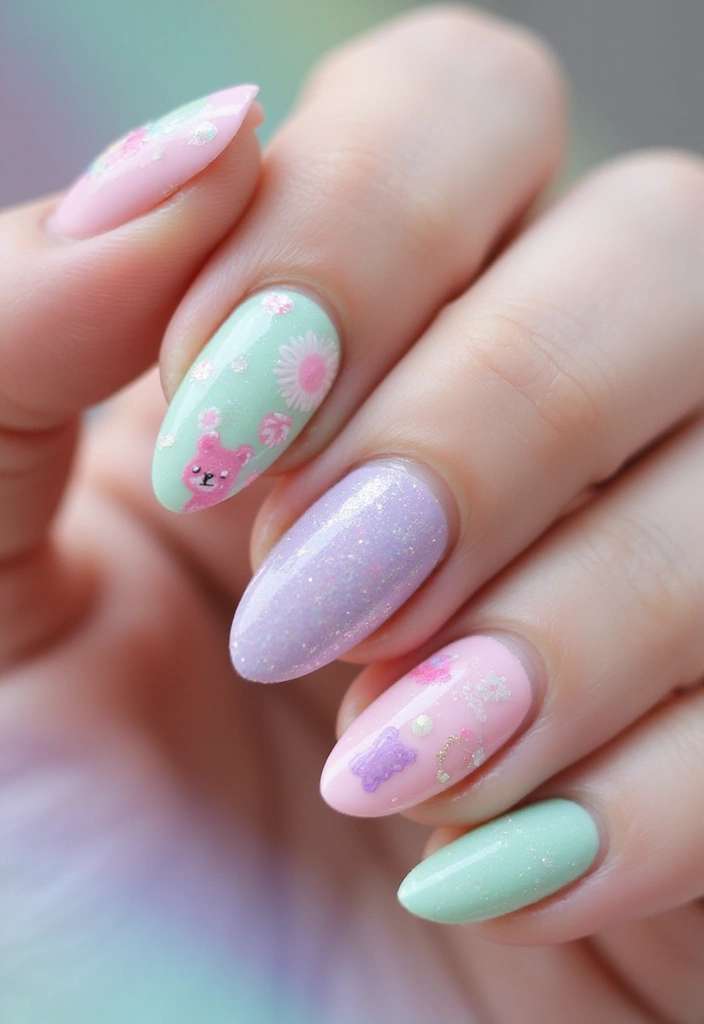
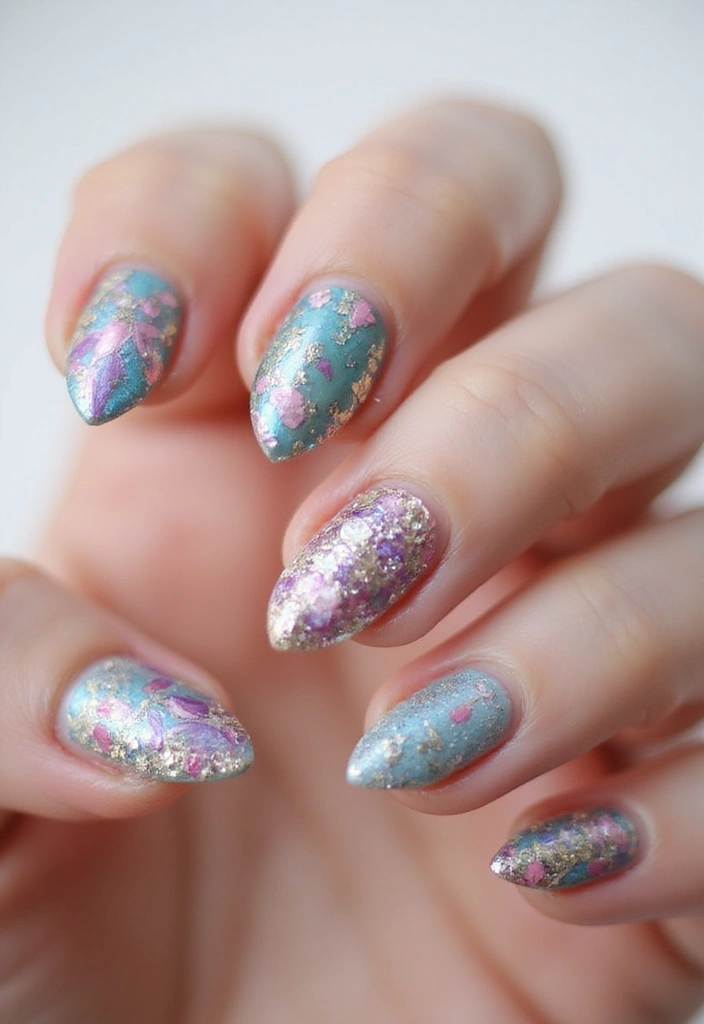
2. Floral Sparkle
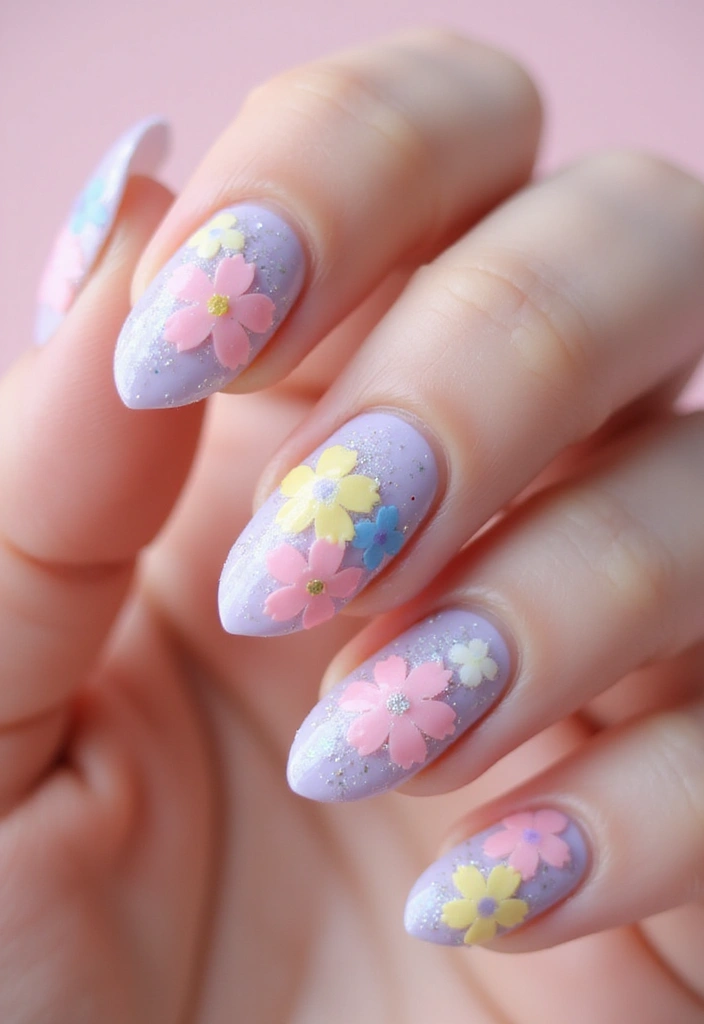
Bring spring to your fingertips with Floral Sparkle designs!
This cheerful nail art combines pastel colors like mint green, soft pink, and lavender with delicate flower patterns and embedded sparkles.
Begin with a light base coat, and use a thin brush to create flower petals in various colors.
Top it off with tiny glitter dots in the center of each flower, adding dimension and shine.
Suggestions:
– Use a matte top coat for the base and a glossy coat for the flowers to create a striking contrast.
– Feel free to mix and match flower designs on different nails.
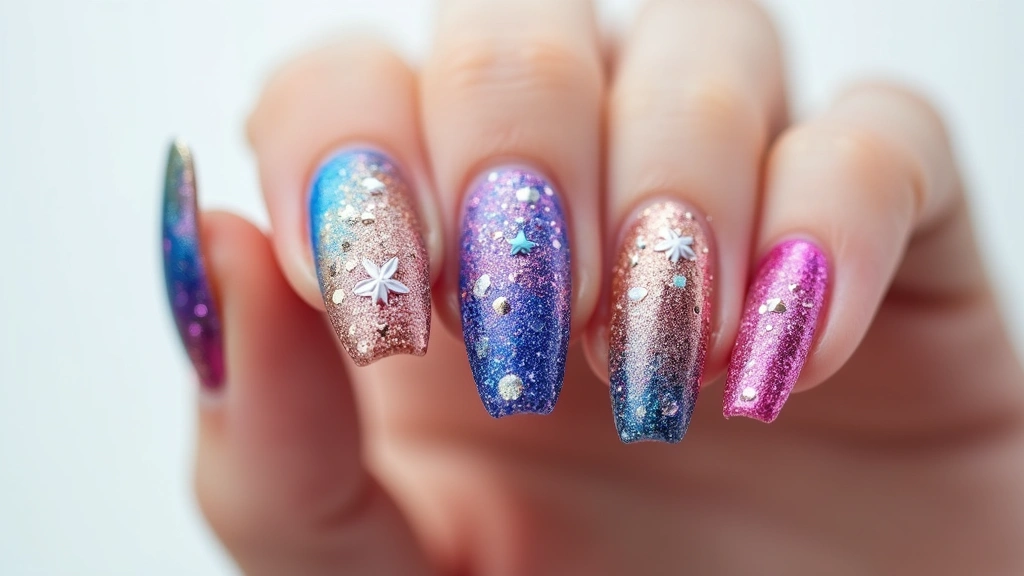
3. Ombre Glitter
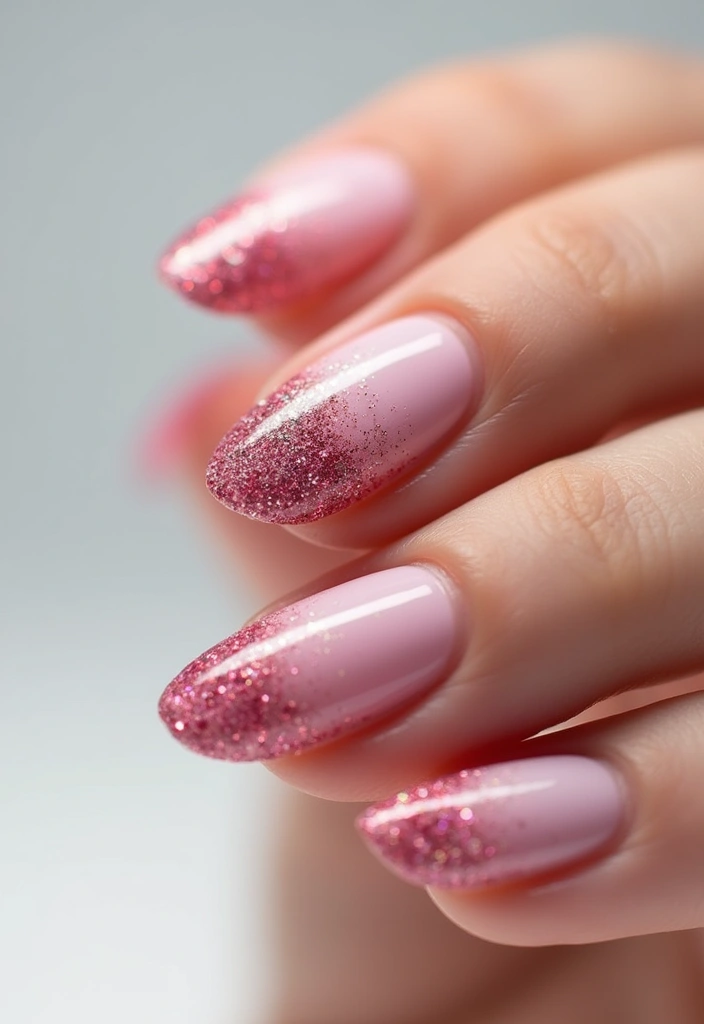
Ombre styles never go out of trend, and when you add glitter to the mix, you get pure magic!
The Ombre Glitter design starts with a gradient effect, transitioning from a light shade to a dark shade, with a sprinkle of glitter that catches the light beautifully.
Start with a base color like soft pink, and gently blend a deep rose at the tips. Apply loose glitter on the tips while the polish is still wet to let it adhere.
Best practices:
– Use a makeup sponge for a more seamless ombre effect.
– Consider different color combinations, like bold reds to oranges or soft blues to purples.
Embrace the magic of Ombre Glitter! With a simple gradient and a sprinkle of sparkle, you can transform your nails into a dazzling masterpiece that catches every light.✨
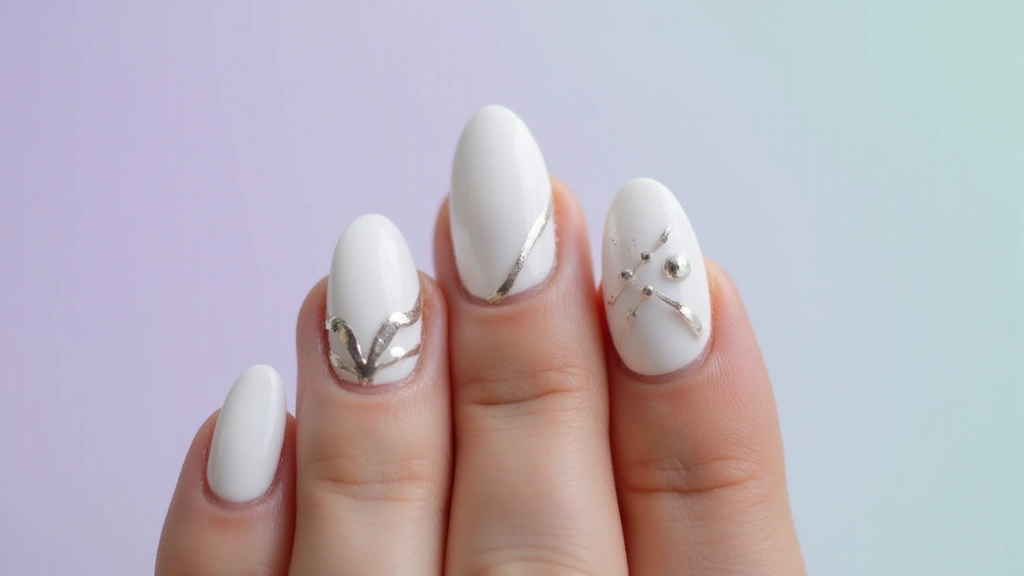
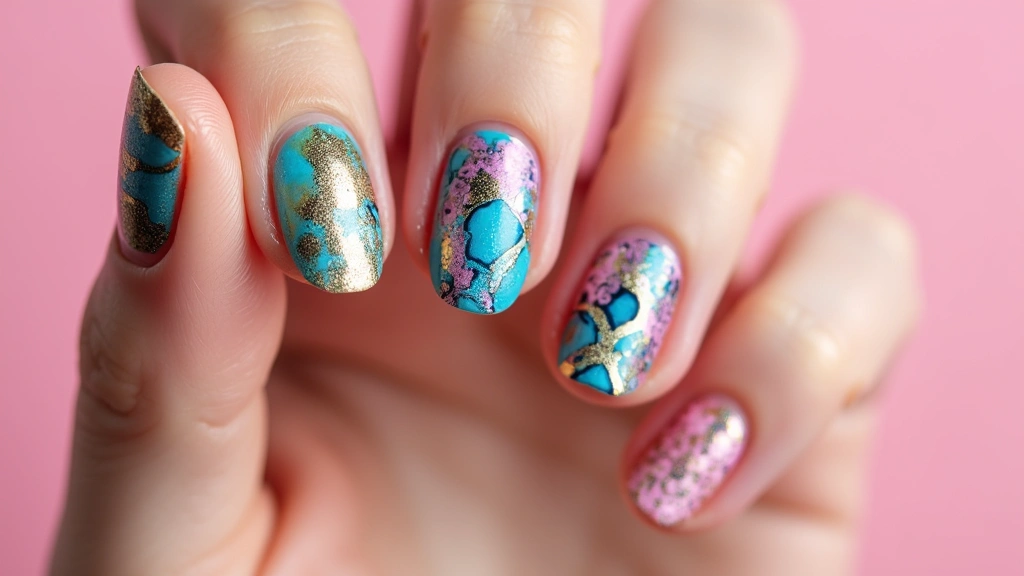
4. Metallic Magic

Get ready to shine with Metallic Magic!
This nail art trend features bold metallic hues paired with glitter accents, creating a striking and modern look.
Choose a metallic base color, like gold or silver, and apply a layer of glitter on top or alongside for a stunning contrast.
For added flair, try mixing metallics on different nails or adding geometric patterns.
Insightful tips:
– Use nail tape to create clean lines for geometric designs.
– A matte top coat over metallics can create a unique twist.
5. Tropical Vibes
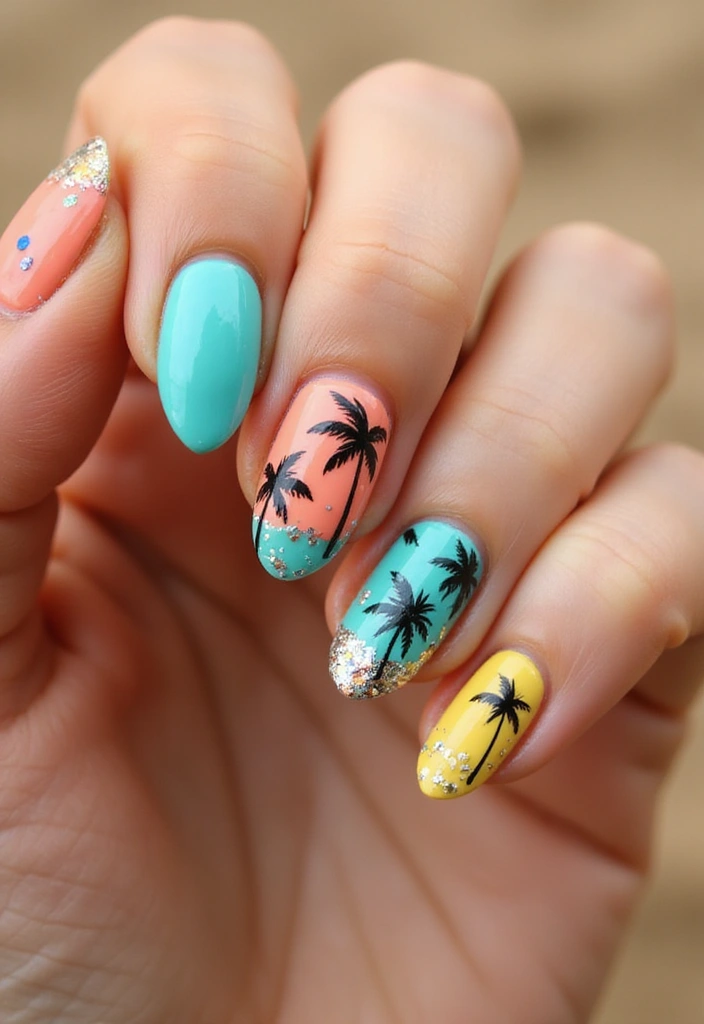
Bring the beach to your fingertips with Tropical Vibes nail art!
This design features bright colors inspired by summer fruits like oranges, yellows, and greens, incorporating palm trees and sun motifs along with glitter for that perfect seaside sparkle.
Start with a bright yellow base, and using a fine brush, paint palm leaves in dark green, finishing with golden glitter accents.
For a fun touch, you can try adding tiny rhinestones to mimic coconuts.
Creative ideas:
– Use a sponge to create a sunset background for a layered effect.
– Mix in some fruit decals for extra flair!
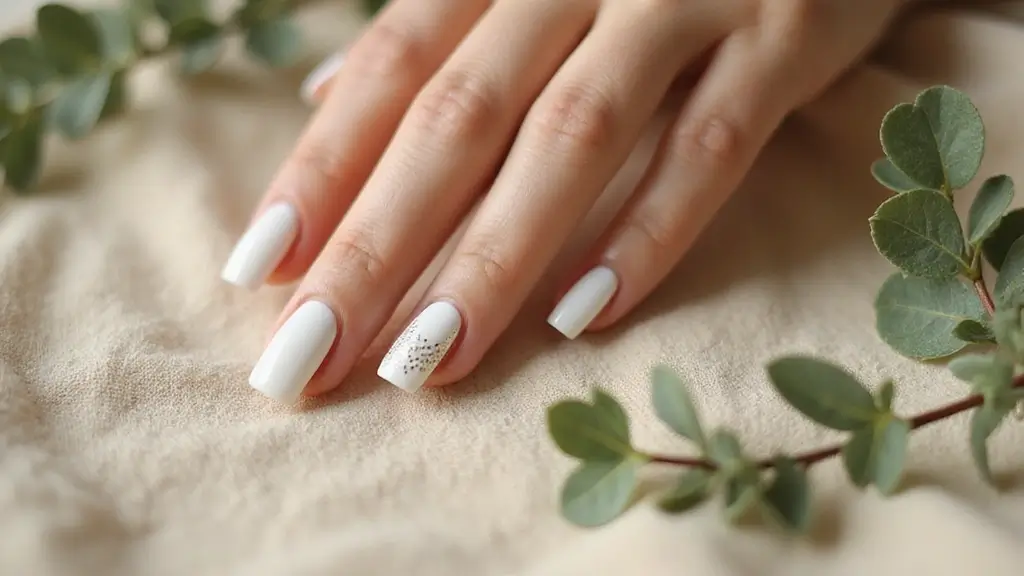
6. Chic Marble
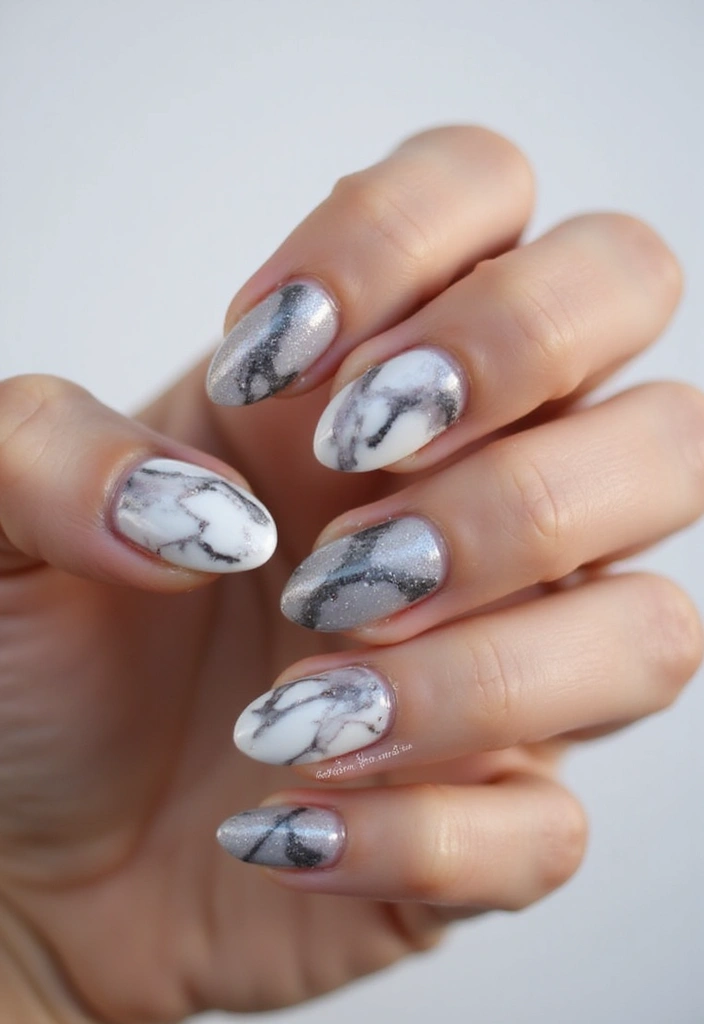
Marble nail art is all about elegance and sophistication.
By combining white, grey, and black with hints of gold or silver glitter, you can achieve a chic marble effect that’s perfect for any occasion.
Start with a white base, then use a thin brush to swirl black and grey polishes. Sprinkle with fine glitter for that touch of glamour.
Suggestions:
– Try using a toothpick for more intricate swirls.
– Finish with a glossy top coat to give it a polished look.
7. Bright Confetti
Bring out your playful side with Bright Confetti nails!
This cheerful design features vibrant colors and fun confetti patterns with glimmering glitter, making your nails a celebration.
Start with a clear or nude base, then use a dotting tool to create colorful dots in various sizes. Add a sprinkle of glitter over the top for sparkle.
Useful tips:
– Ensure to let each layer dry before adding the next for a neat finish.
– You can also use ready-made confetti or rhinestones for a more festive look.
8. Jewel Tones
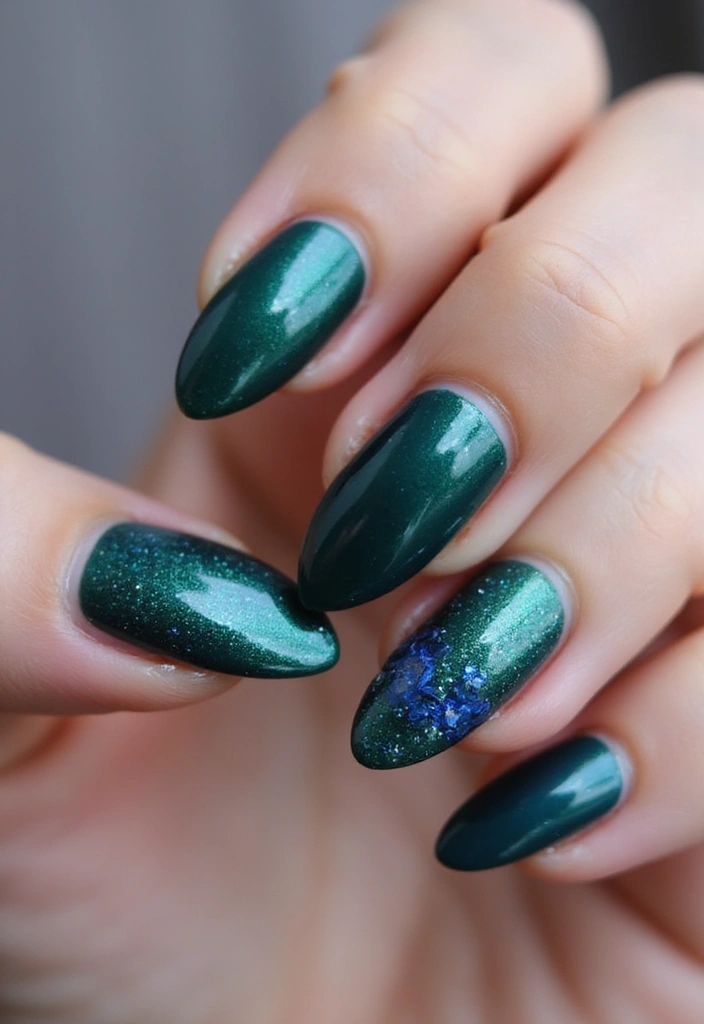
Tap into your inner royalty with Jewel Tones nail art!
Deep hues such as emerald green, sapphire blue, and amethyst purple paired with shimmering glitter will surely make a statement.
Start with a rich base color, and then strategically apply glitter at the tips or in geometric designs for a luxurious touch.
Ideas to remember:
– Use a makeup sponge to create a textured finish with glitter.
– Pair with gold or silver accents for that extra flair.
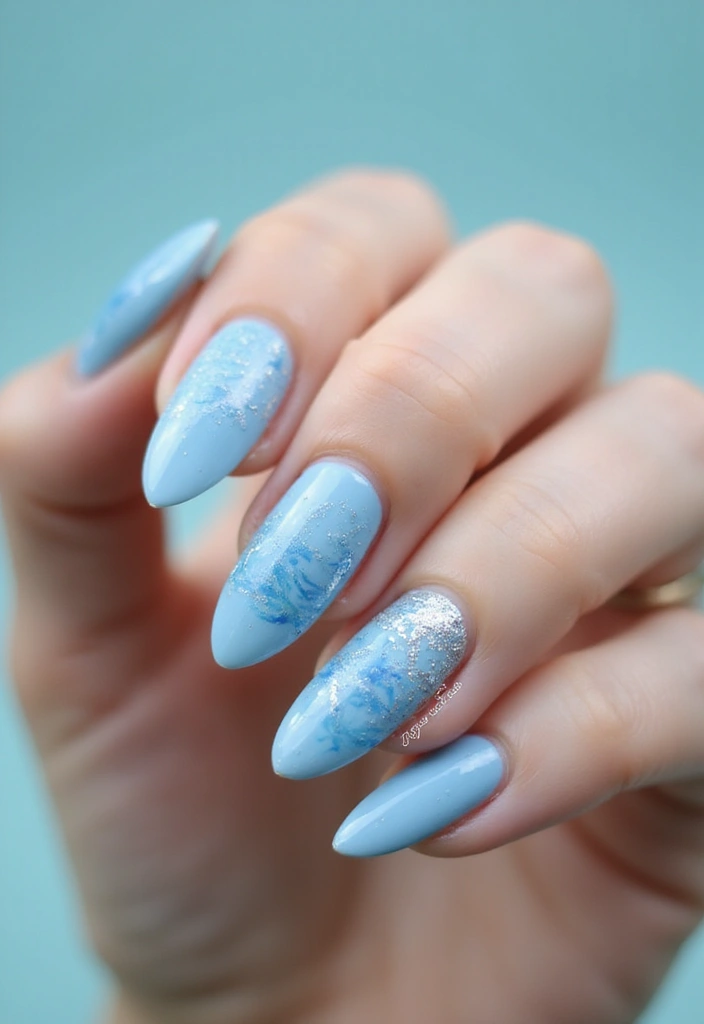
9. Textured Waves
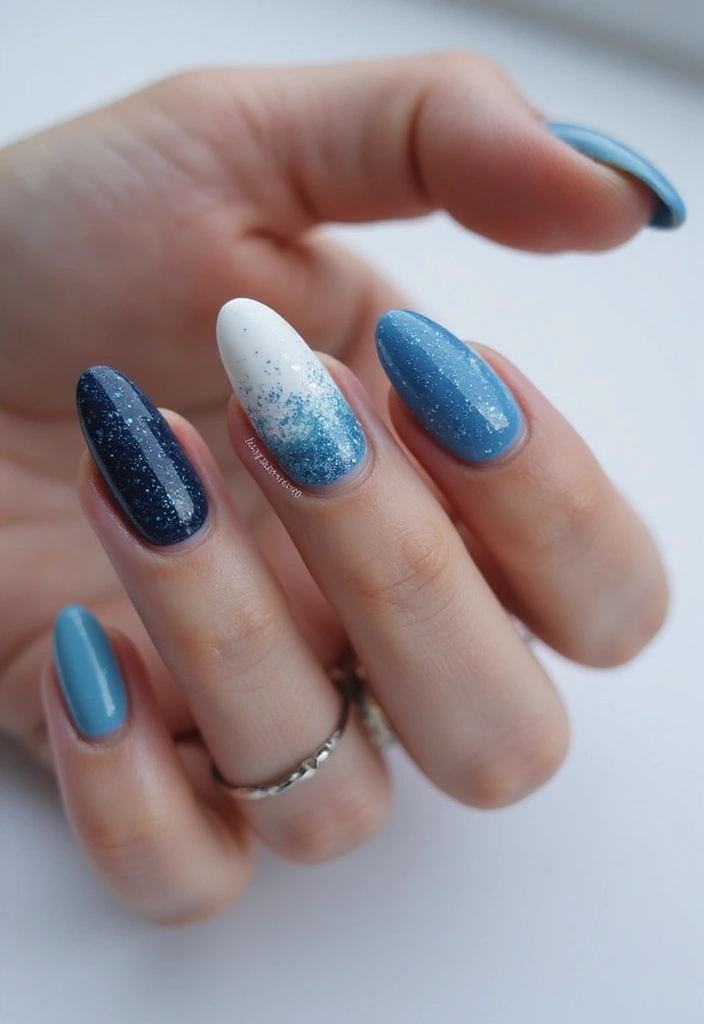
Create movement on your nails with Textured Waves!
This design mimics the gentle waves of the ocean using different shades of blue combined with glitter to capture the essence of water.
Start with a light blue base, and blend darker shades towards the tips to create the wave effect. Use fine glitter to represent the glistening waters.
for success:
– Use a fan brush to create wave patterns.
– Incorporate tiny seashell charms for a playful touch!
10. Artistic Splashes
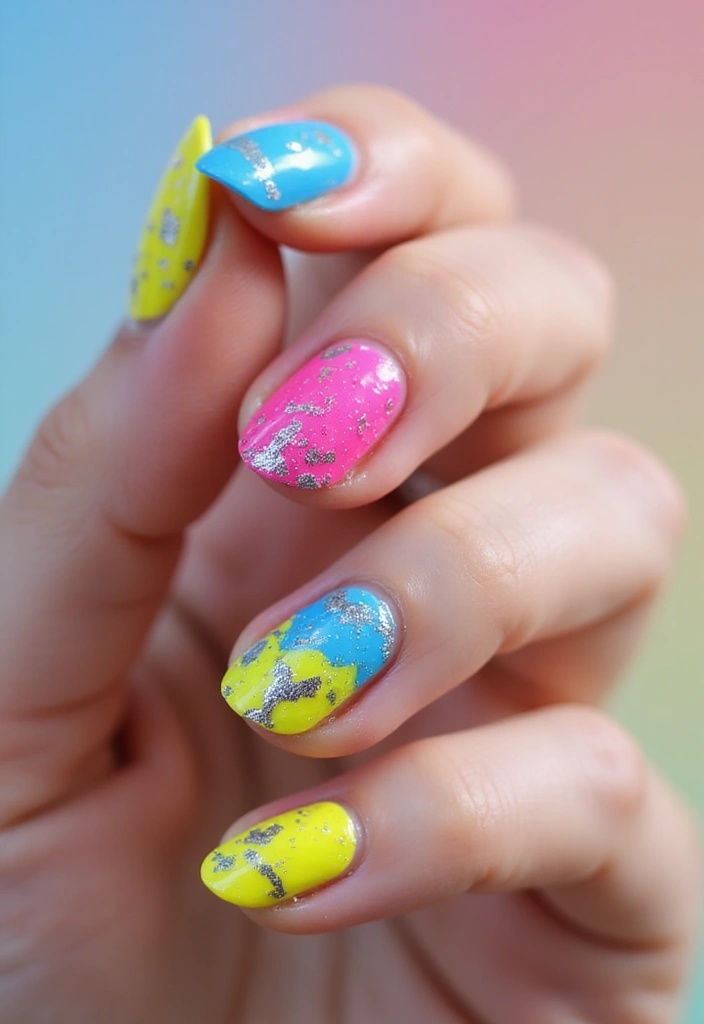
Unleash your creativity with Artistic Splashes!
This design celebrates abstract art, featuring bright colors splashed together with glitter to create a lively, artistic effect.
Start with a white or nude base, and use a brush or sponge to randomly apply different colors. Add glitter in certain areas to enhance the vibrancy.
Creative tips:
– Try using a straw to blow paint for an even splatter look.
– Experiment with colors that resonate with your mood or personality.
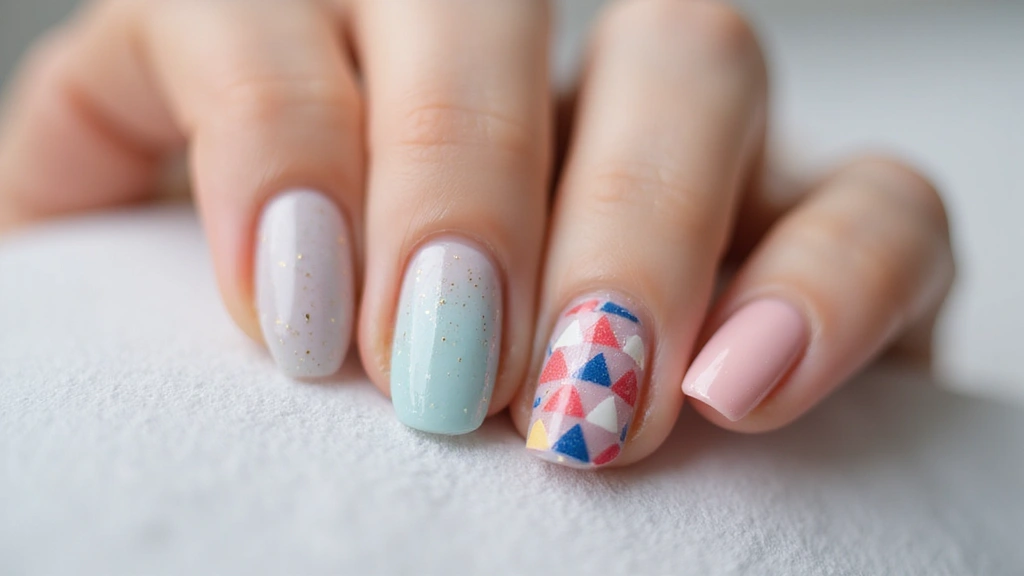
11. Geometric Glam
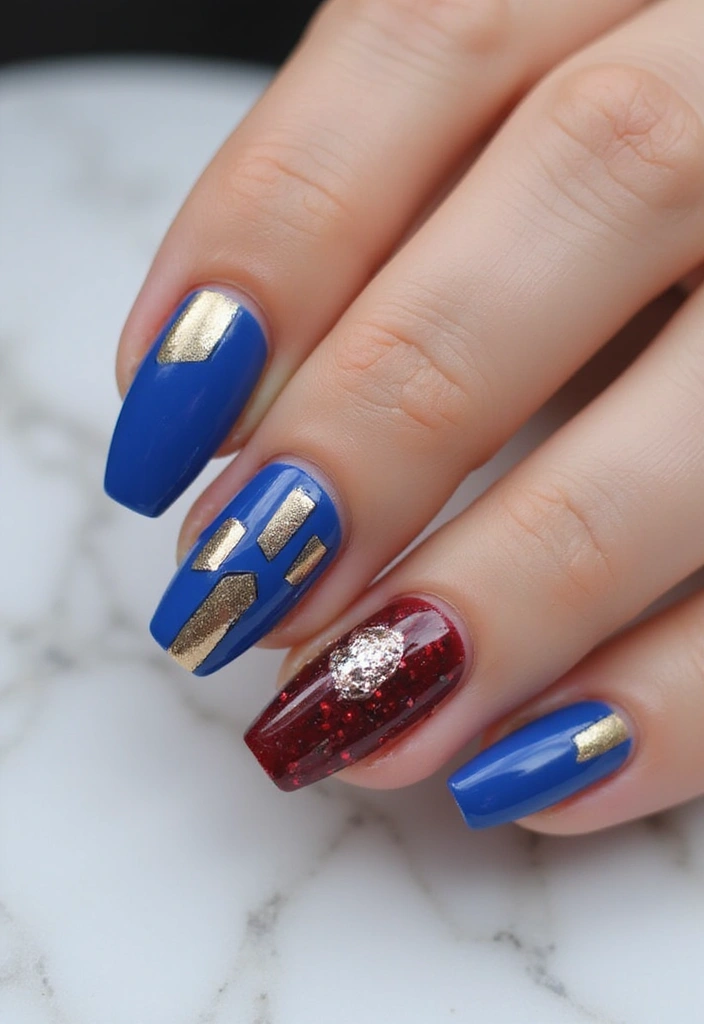
Geometric shapes never fail to impress!
This nail art design combines various shapes and lines with glitter for a modern, edgy look.
Choose a base color and use nail tape to create sections. Paint each section in different bold colors and sprinkle glitter on top for a sparkling finish.
Unique suggestions:
– Experiment with different shapes like triangles, squares, and lines.
– For an even bolder look, mix matte and glossy finishes.
12. Rainbow Connection
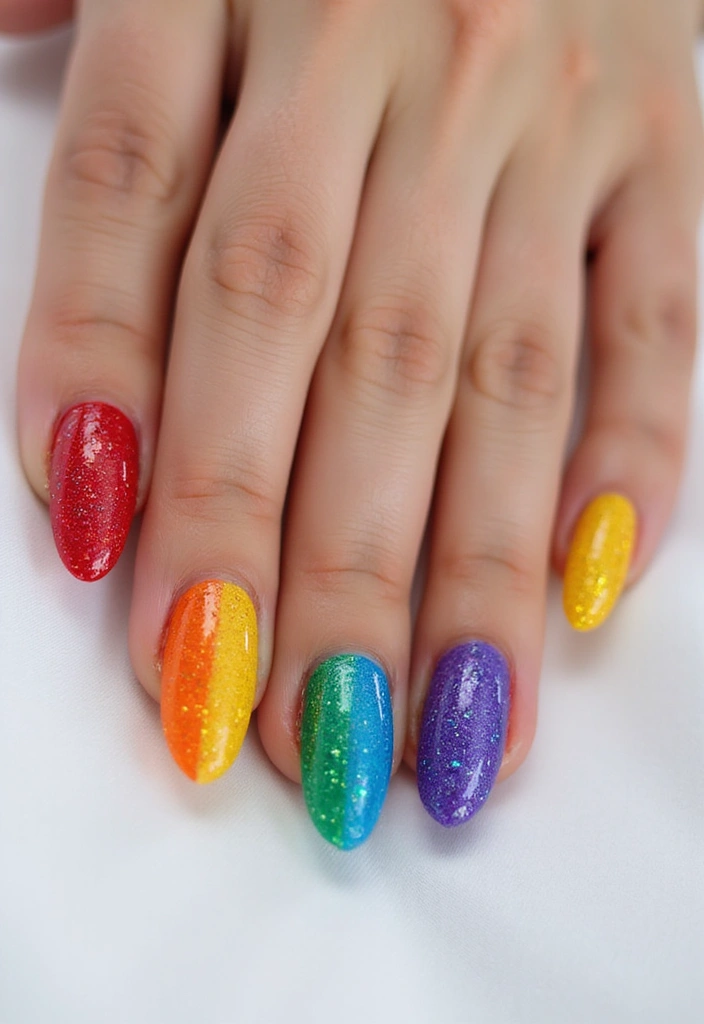
Brighten up your day with the Rainbow Connection nail art!
This colorful design features all the shades of the rainbow, enhanced with glitter for extra shine.
Start from the base with a clear coat and paint each nail a different color of the rainbow, finishing with a layer of glitter over the top.
Fun tips:
– Use a fine brush for clean lines between colors.
– You can also paint a rainbow design on accent nails for more flair.
13. Under the Sea
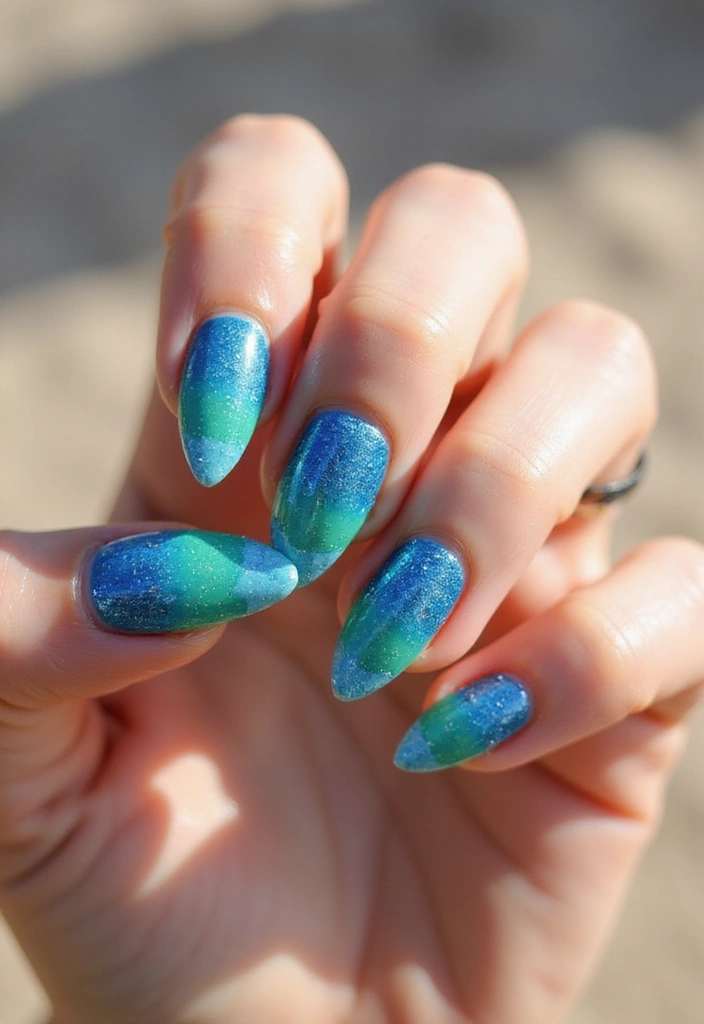
Dive into creativity with Under the Sea nail art!
This design features shades of blue and green with glitter that evokes the tranquil ocean.
Start with a blue or teal base, then use a sponge to add deeper colors, and sprinkle glitter to mimic the shimmering waves.
To enhance the look, you can add tiny starfish or seashell charms.
Creative ideas:
– Use a matte top coat for the base to create contrast with glossy glitter.
– Play with different glitter shapes for a unique touch.
14. Sweet Candy Coated
Indulge in a sugary treat with Sweet Candy Coated nails!
This design features pastel colors and glitter that resemble your favorite candy.
Start with pastel pink, mint green, or baby blue as your base. Add swirls of white and sprinkle glitter for a sweet finish.
For a playful touch, incorporate tiny candy charms or nail decals.
– Layer different thin coats of bright colors for added depth.
– Use a matte top coat for a fun twist.
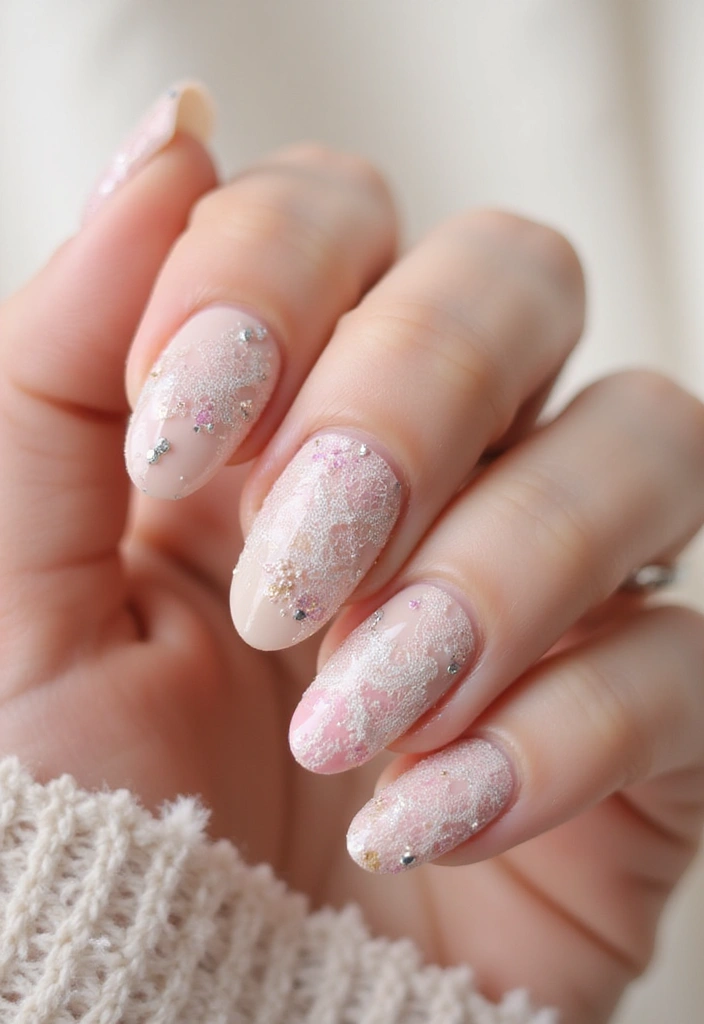
15. Blushing Ombre Flowers
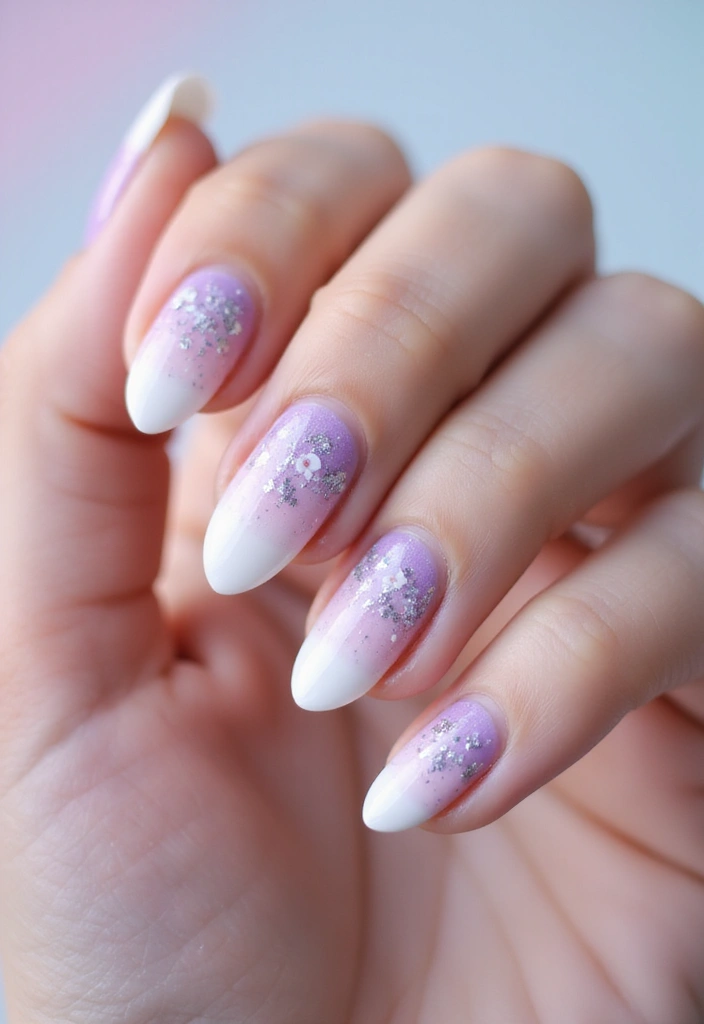
Combine the beauty of flowers with the softness of ombre in your nail art!
The Blushing Ombre Flowers design starts with a pastel ombre background that transitions from pink to white, accented with delicate flower patterns and glitter.
Create an ombre effect on each nail, and then paint tiny flower designs in white or pastel shades.
Finish with glitter to add sparkle and dimension.
– Use a dotting tool to create the perfect flower centers.
– Experiment with different flower shapes for variety!
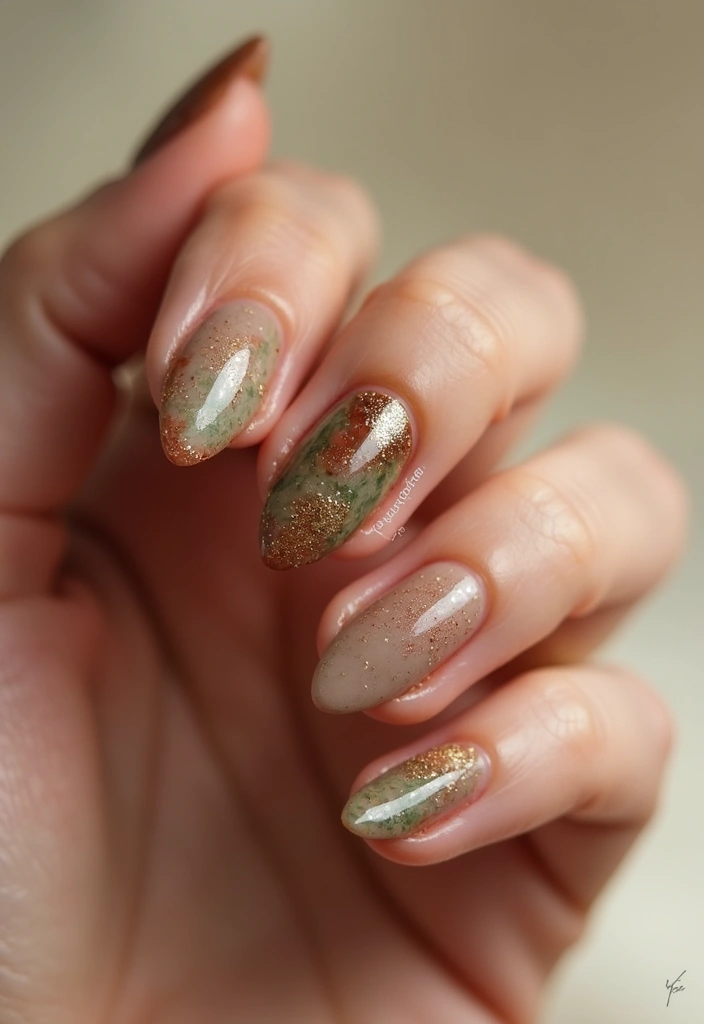
16. Rustic Charm
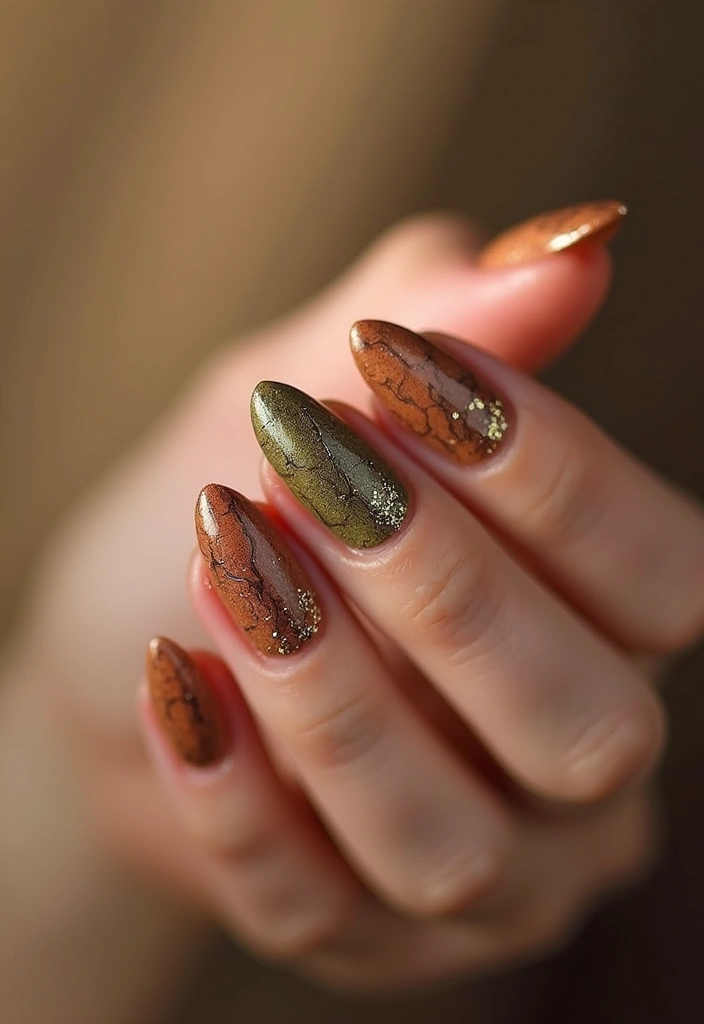
Celebrate the beauty of nature with Rustic Charm nail art!
This design features earthy tones, wood textures, and a touch of glitter.
Start with a nude or taupe base, and use a fine brush to create wood grain patterns. Sprinkle glitter sparingly to highlight certain areas.
Suggestions:
– Use matte top coat for the base and glossy for the wood designs for contrast.
– Incorporate leaf decals for an added natural touch.
17. Vintage Lace
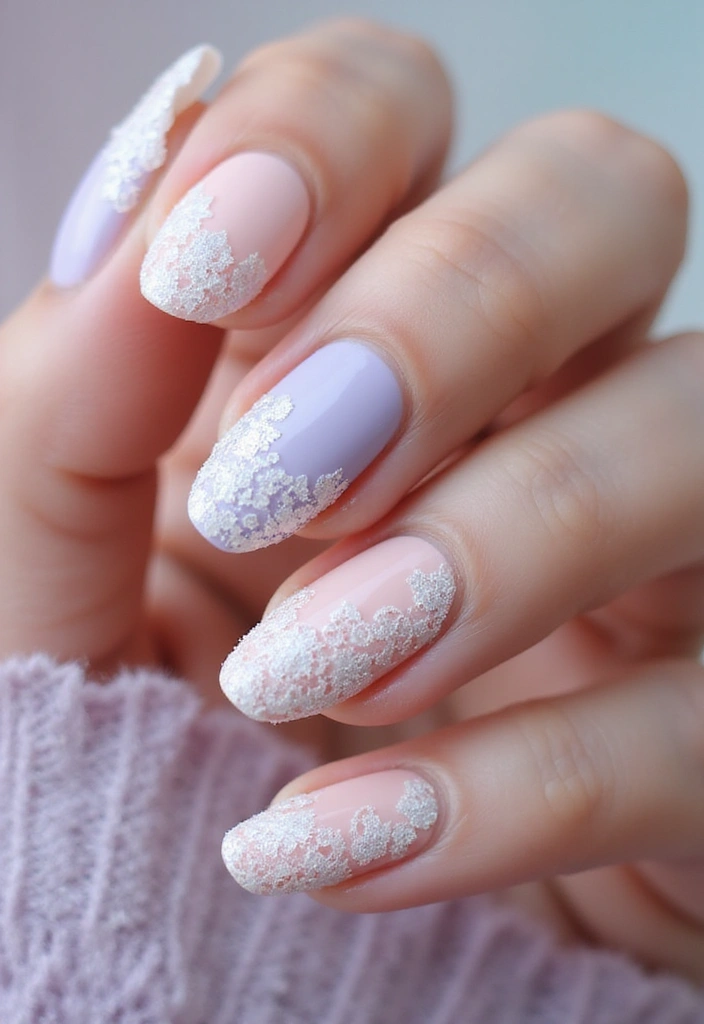
Add a touch of elegance with Vintage Lace nail art!
This design features soft colors with lace patterns and glitter for a classic look.
Start with a light pastel base, and use a fine brush to create intricate lace designs in white or cream. Finish with subtle glitter for added glamour.
Creative suggestions:
– Use lace tape for cleaner edges.
– Experiment with different lace designs to create variety.
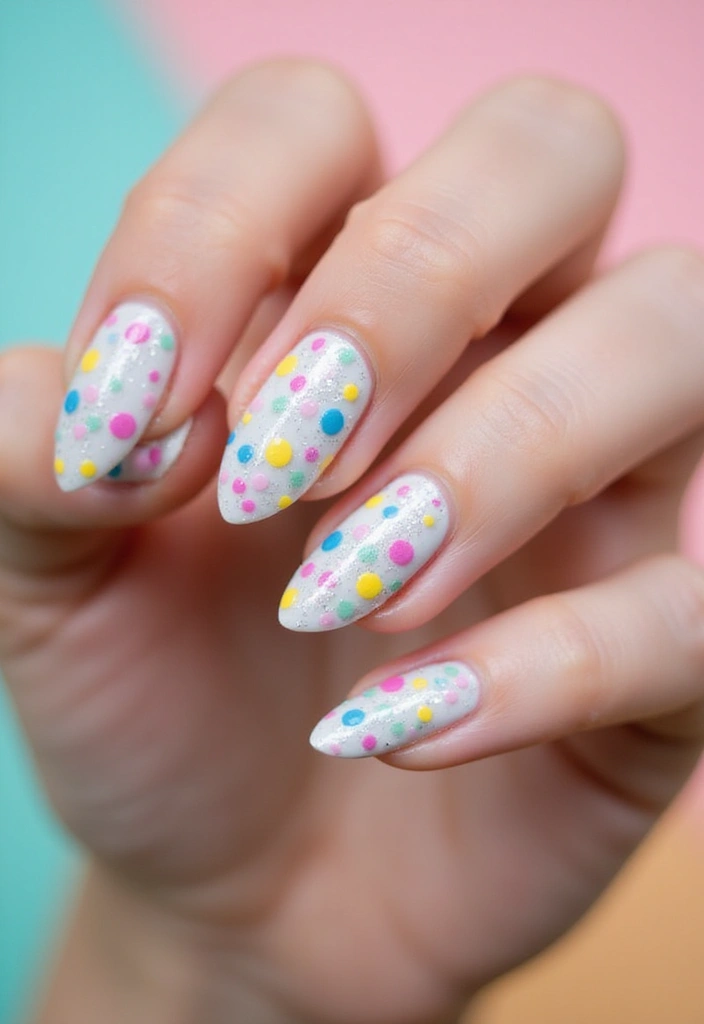
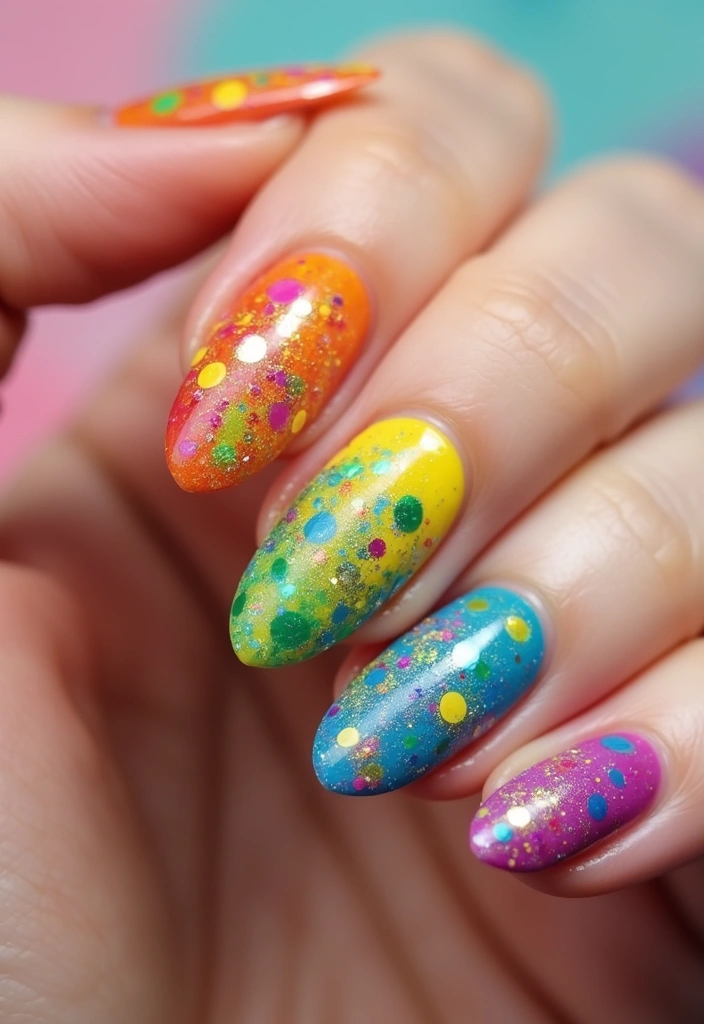
18. Whimsical Dots
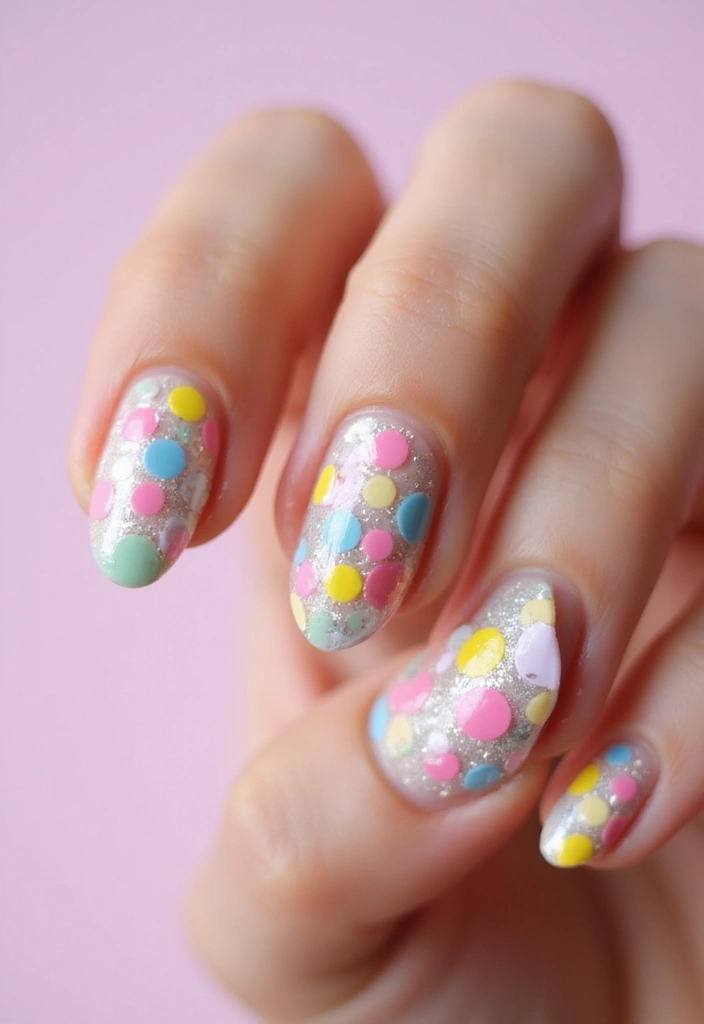
Go playful with Whimsical Dots nail art!
This fun design features colorful dots and embedded glitter that will make your nails stand out.
Choose a light or pastel base and use a dotting tool to create variously sized colorful dots across your nails. Finish with a sprinkle of glitter for that added sparkle.
Fun tips:
– Arrange the dots in patterns or random placements for a fun twist.
– Try using neon colors for a bold look!
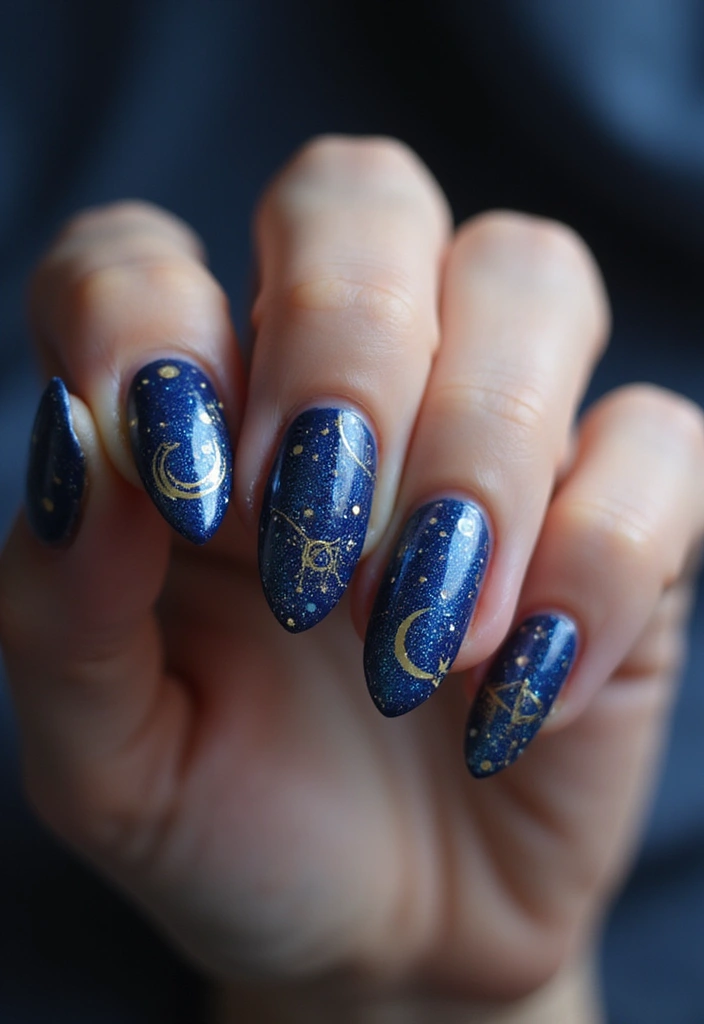
19. Starry Night
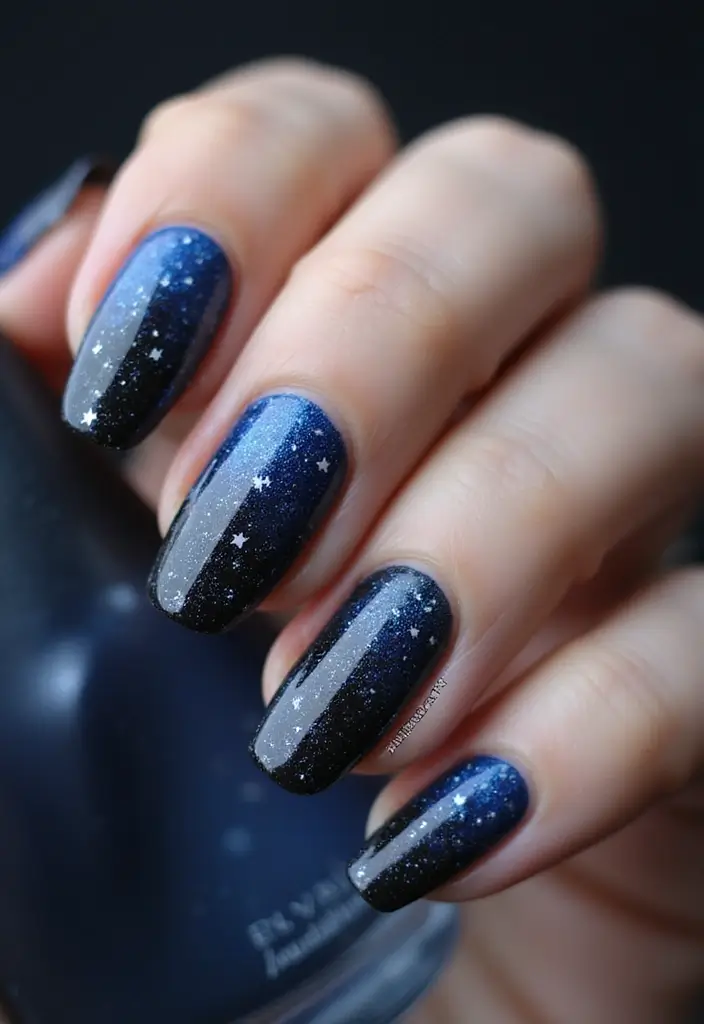
Transform your nails into a starry sky with Starry Night nail art!
Using deep blues and blacks, create a captivating night sky design with glittering stars.
Start with a dark base and use a sponge to add lighter blues and whites for the stars and moon. Sprinkle glitter throughout to mimic twinkling stars.
Unique tips:
– Use a fine brush to paint tiny stars and a larger dotting tool for planets.
– Add glow-in-the-dark elements for a night-time effect!
20. Edgy Leather
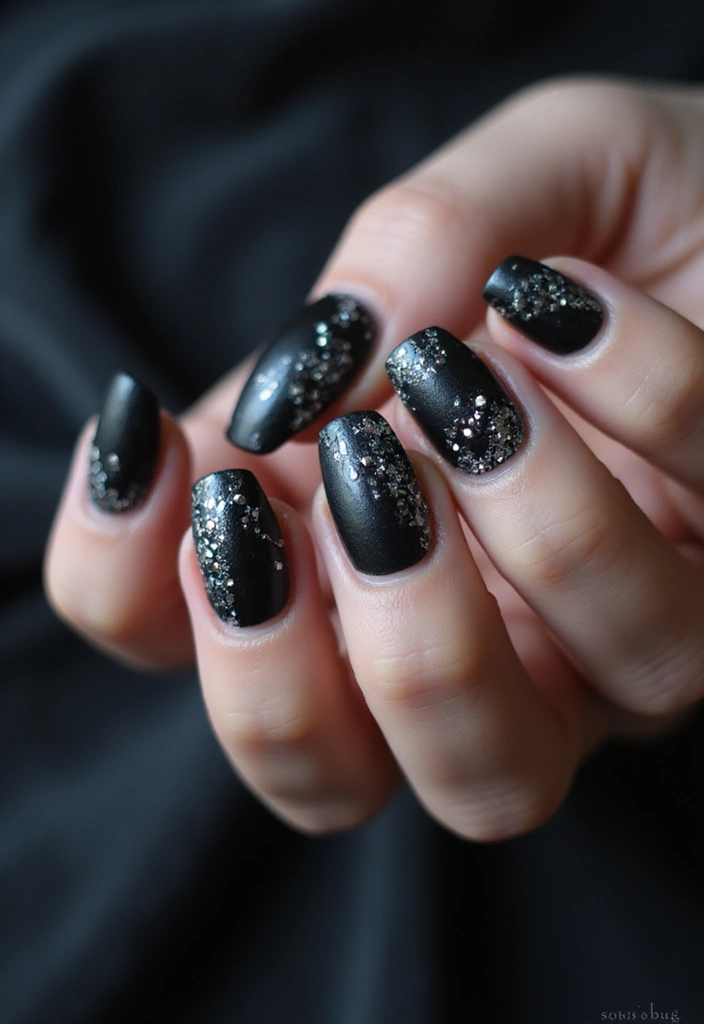
Give your nails some edge with Edgy Leather-inspired designs!
This trend incorporates dark colors along with stud and glitter accents for a bold statement.
Start with a matte black base, and create leather texture using a textured top coat. Add studs and sprinkle glitter on top for a rock ‘n’ roll vibe.
to consider:
– Use a makeup sponge for applying texture evenly.
– Pair with metallic accents for a more striking look.
21. Classy Gradient

Achieve sophistication with a Classy Gradient nail art design!
This sleek style combines a gradient effect with glitter for a polished look.
Select two colors that complement each other, like deep red and soft pink. Blend them for a gradient effect and finish with glitter for that elegant touch.
Helpful tips:
– Use a nail sponge for an even gradient.
– Select a glitter that matches or contrasts with your gradient colors for a cohesive look.
22. Pop Art Fun
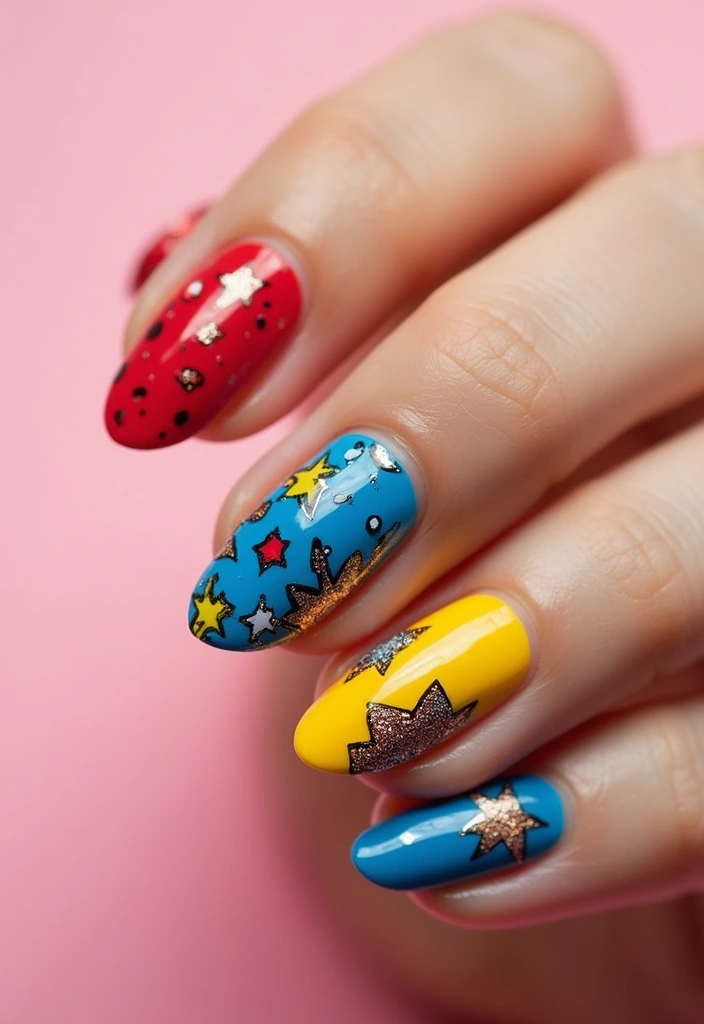
Bring some fun into your nails with Pop Art designs!
Use vibrant colors and comic-themed patterns with glitter for that eye-catching effect.
Start with a bright base color and use black for outlines. Apply glitter on notable areas like speech bubbles for added sparkle.
Creative ideas:
– Mix in bold patterns like polka dots or stripes for a more playful look.
– Experiment with different pop art characters or themes for personalization.
Unleash your inner artist with Pop Art nails! Vibrant colors and sparkling accents create a playful canvas that tells your unique story. Remember, every nail is a chance to express your creativity – so let those spark-filled sparks shine!
23. Frosted Tips
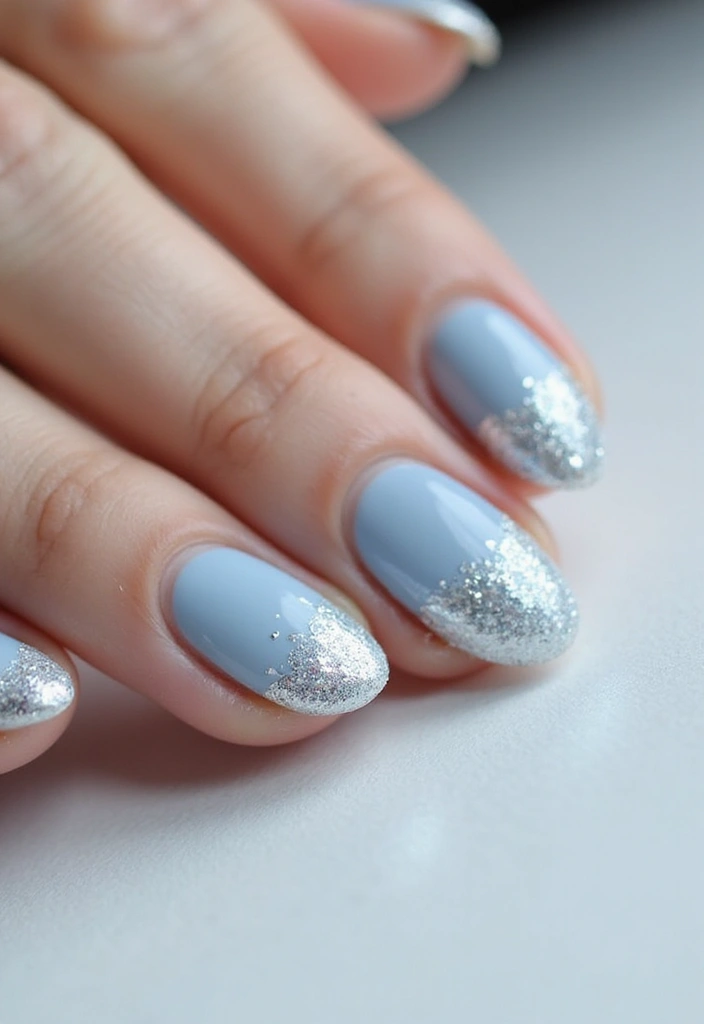
Add an icy vibe with Frosted Tips nail art!
This design features a frosty look with a light color base and glittery tips to mimic frost.
Start with a muted pastel or white base and add fine glitter to the tips for that sparkling frosty effect.
Helpful suggestions:
– Use a glossy top coat over the glitter for a shiny finish.
– Try experimenting with different base colors for a unique twist.
24. Celebration Confetti
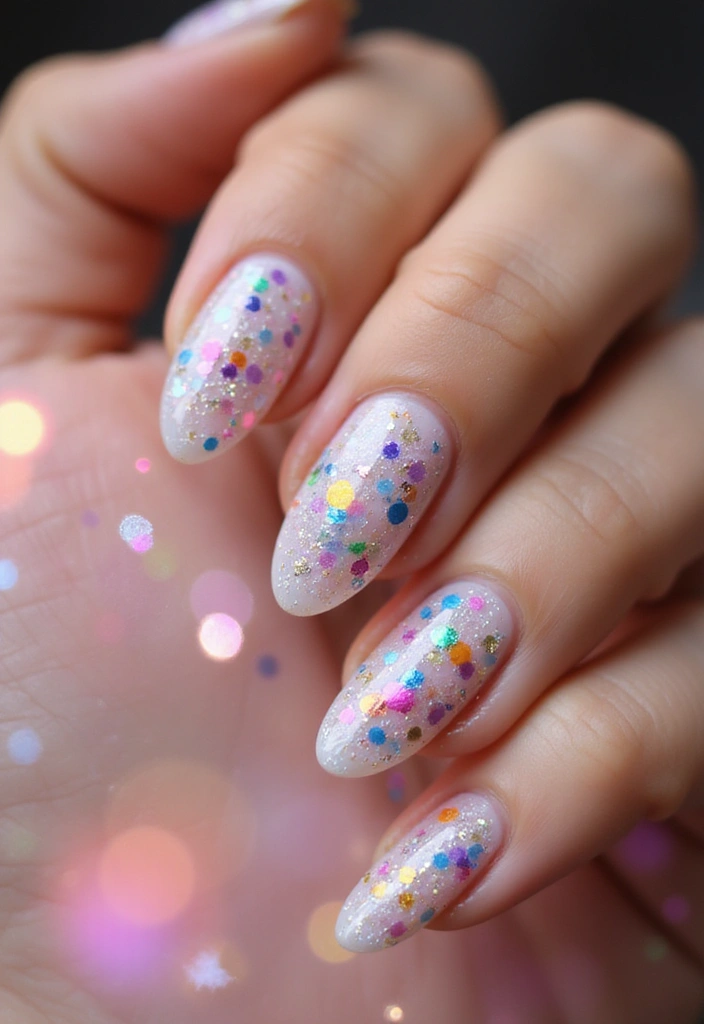
Get ready to party with Celebration Confetti nails!
This vibrant design features a mix of colors and confetti glitter for a festive look.
Start with a clear or nude base and use a variety of bright polishes to create colorful confetti designs. Add chunky glitter for an extra celebratory effect.
Unique tips:
– Mix different sizes of glitter for a playful texture.
– Use nail tape to create sections for added variety.
25. Enchanted Forest
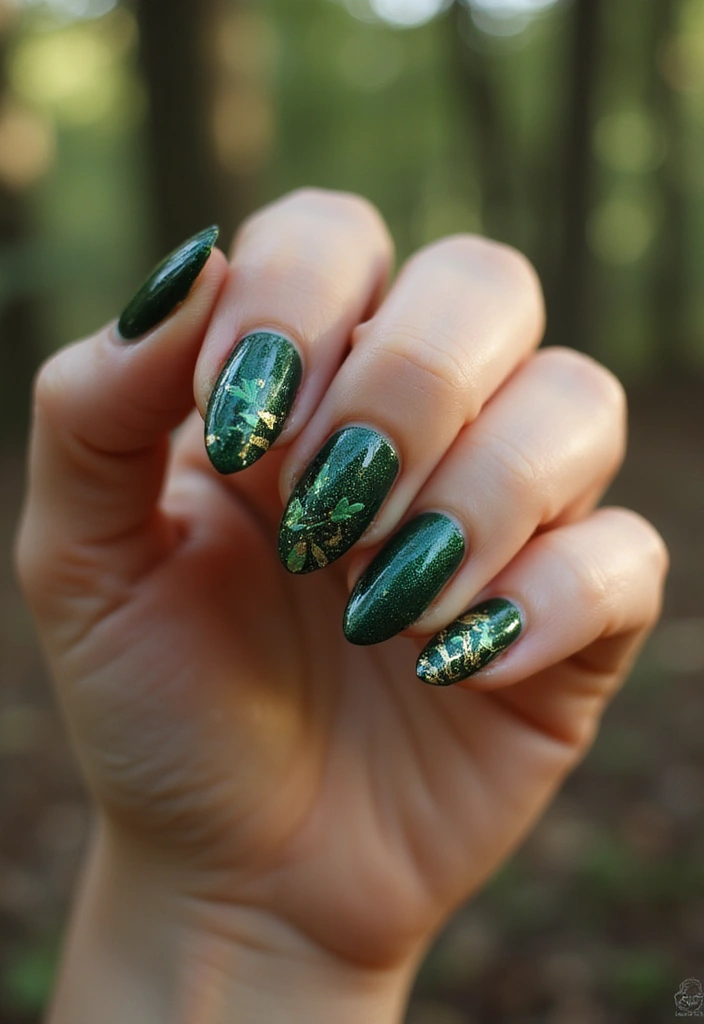
Immerse yourself in the magic of an Enchanted Forest with this nail art!
Using rich greens and browns, along with glitter, create designs that evoke nature and fantasy.
Start with a deep green base. Add tree patterns and sprinkle with glitter to depict twinkling lights in the forest.
Creative insights:
– Use a fine brush for intricate details like leaves and branches.
– Consider adding small animal decals for an enchanting touch.
26. Playful Stripes
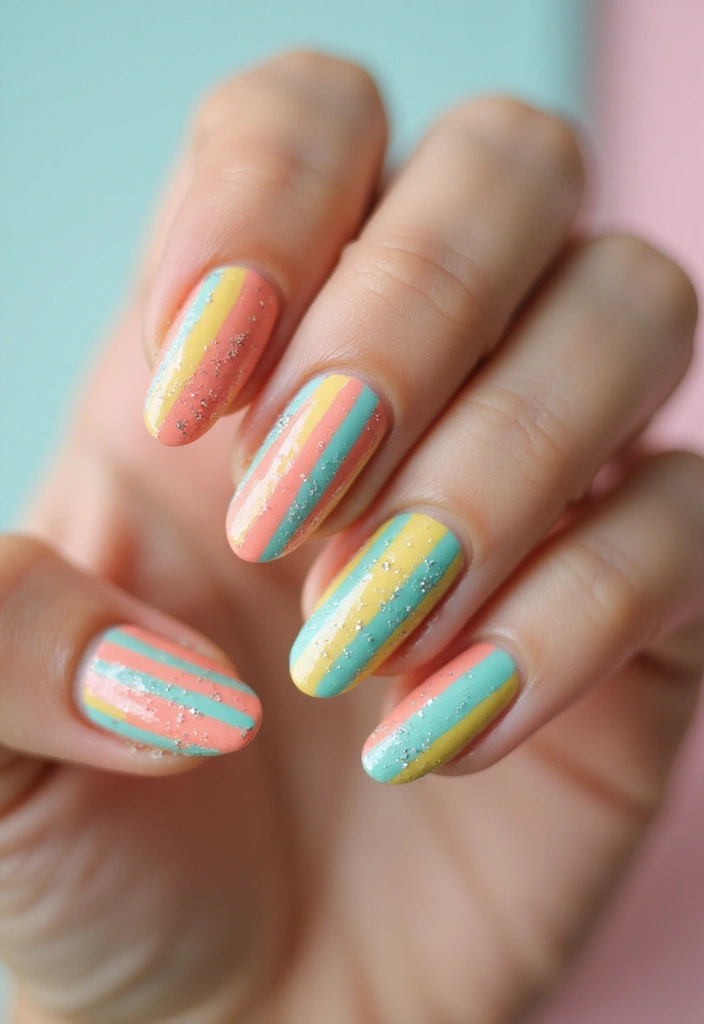
Stripes are timeless and can be playful too!
This nail art design features alternating colored stripes with glitter accents for a fun twist.
Choose a base color and use thin striping tape to create even lines. Paint different colors between the lines and sprinkle glitter for a sparkling finish.
Suggestions to try:
– Mix up the thickness of the stripes for a unique look.
– Experiment with matte and glossy finishes within the stripes.
Stripes are more than just lines; they’re a canvas for creativity! Add sparkle between vibrant colors and watch your nails shine with playful personality!
27. Mysterious Smoke
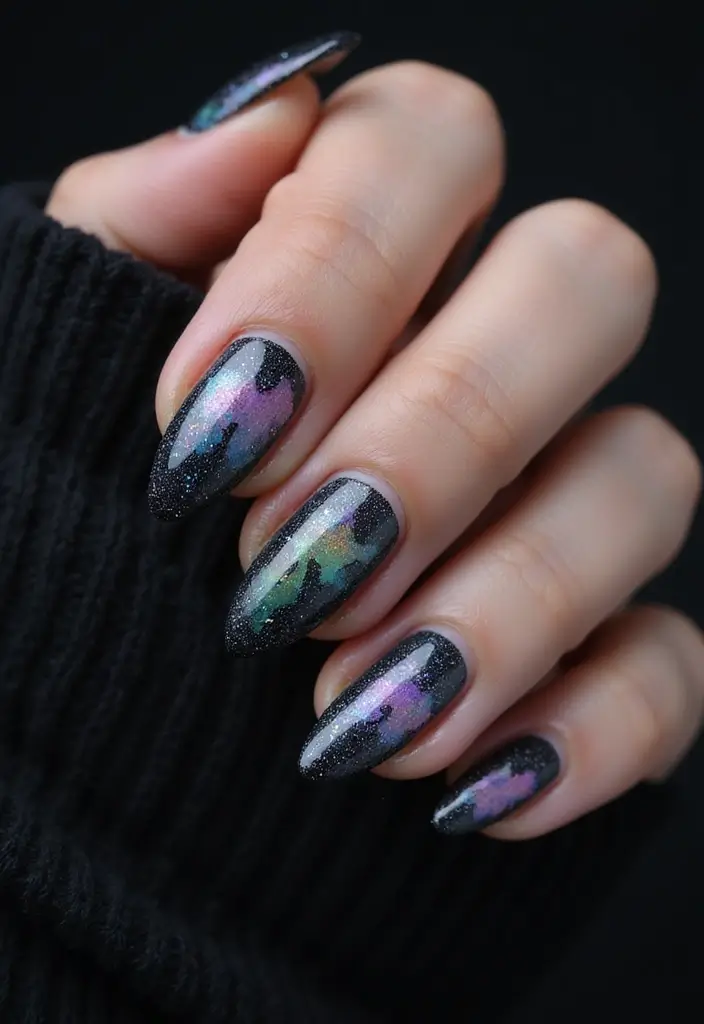
Create a mystique with the Mysterious Smoke nail design!
This alluring style features dark colors blended with soft pastels and embedded glitter to create a smoky effect.
Begin with a deep black or navy base. Use a sponge to blend in soft shades of grey or lilac and add glitter to enhance the look.
Creative ideas:
– Use a matte top coat for the base for a more dramatic effect.
– Incorporate small gems to mimic mystical smoke patterns.
28. Candy Cane Delight
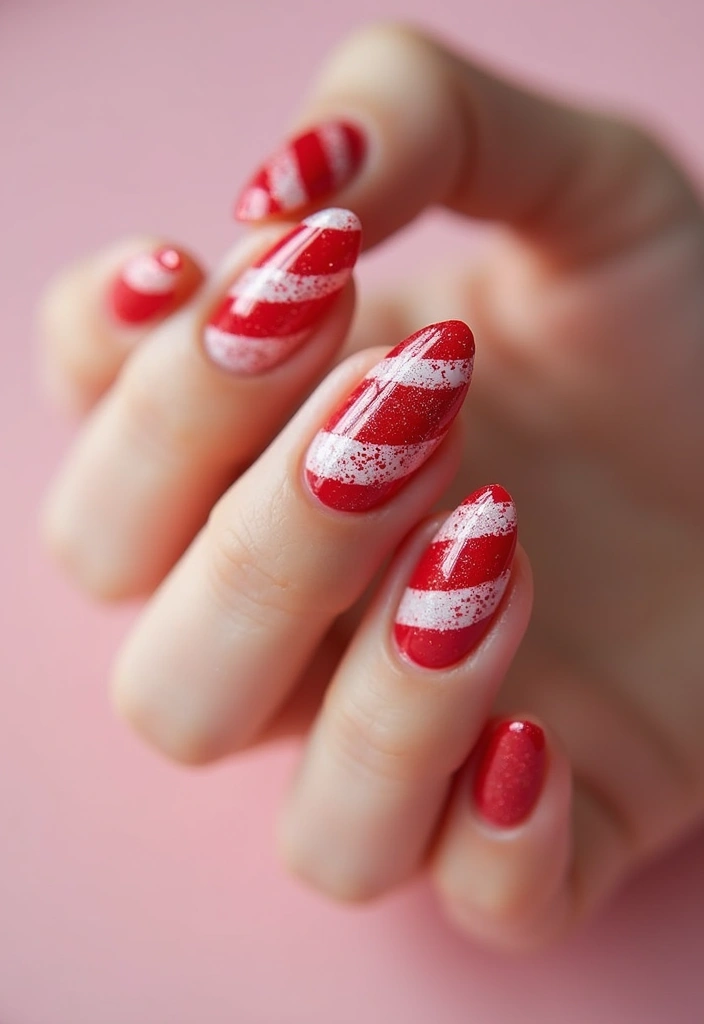
Get festive with Candy Cane Delight nail art!
This design features classic red and white stripes with glittery accents, perfect for the holiday season.
Start with a white base and paint diagonal red stripes. Add a sprinkle of fine glitter on top for that sweet touch.
Creative suggestions:
– Use a matte finish on the red for contrast with the glossy white.
– Consider adding tiny rhinestones to mimic candy cane decorations.
29. Elegant Peacock
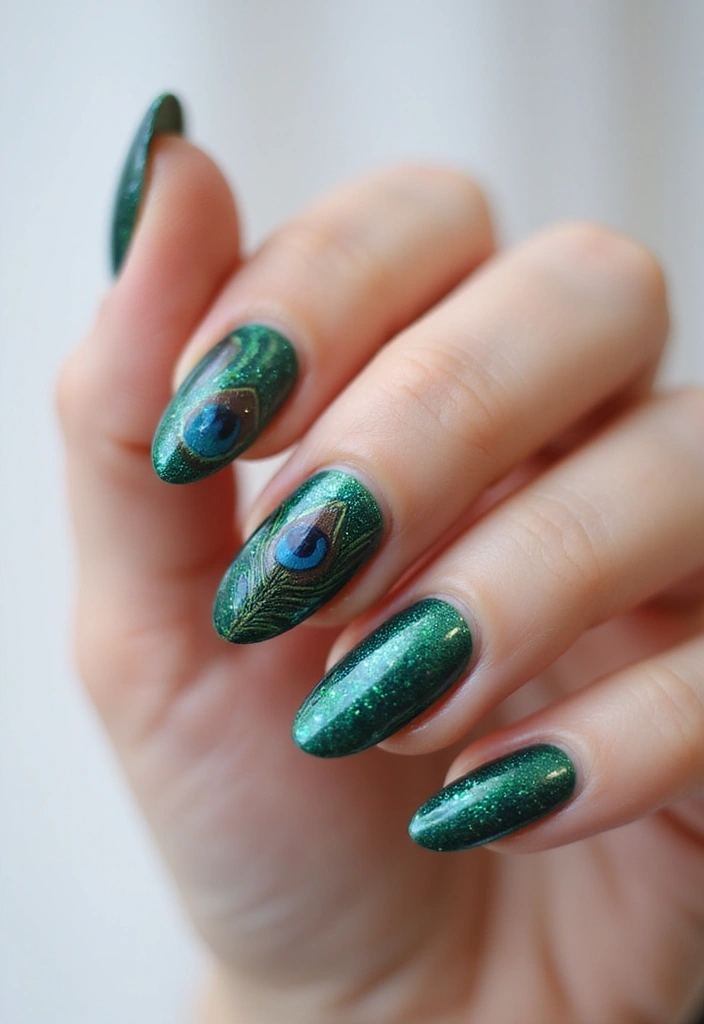
Add a touch of luxe with the Elegant Peacock nail art!
This design features stunning green and teal colors with glitter accents to evoke the beauty of peacock feathers.
Start with a deep teal base, and create feather-like patterns with a fine brush. Add gold glitter to highlight the edges for that peacock shimmer.
Suggestions for success:
– Use a shiny top coat to enhance the colors.
– Consider adding small feather charms for extra elegance.
30. Sparkling Sunset
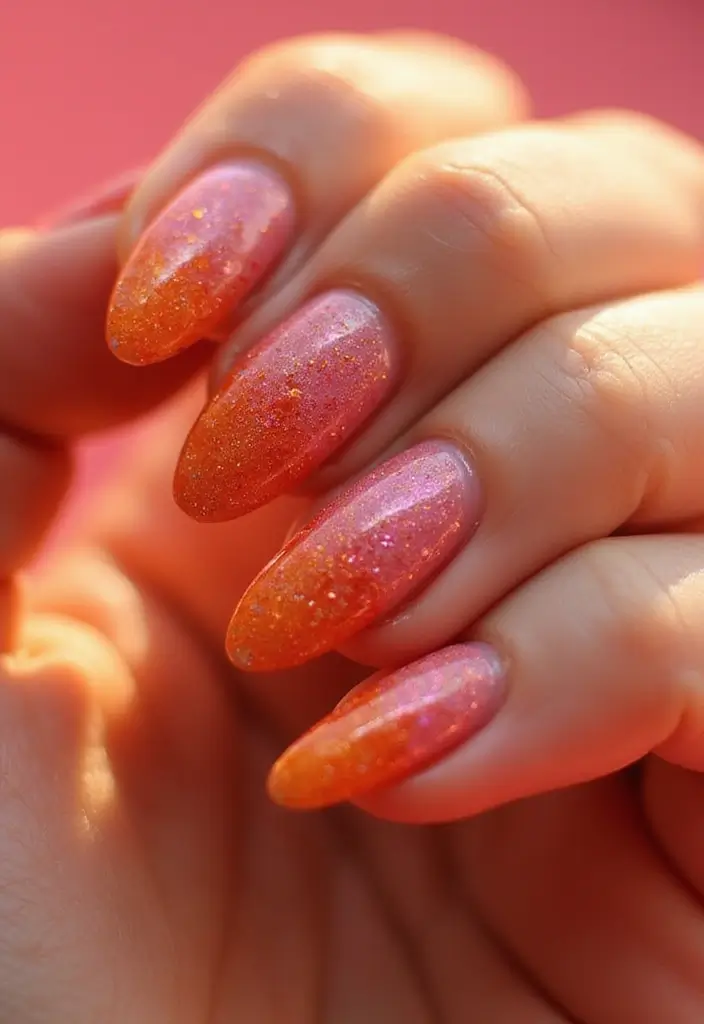
Capture the beauty of dusk with Sparkling Sunset nail art!
This design incorporates warm colors like orange, pink, and yellow to depict a sunset, topped with glitter for that dazzling effect.
Start with a light base and blend the colors using a sponge to create the sunset gradient. Sprinkle glitter on top for the sparkle of fading light.
Helpful tips:
– Use a glossy top coat to enhance the shine.
– Blend in a bit of dark purple at the tips for depth.
31. Shimmering Snowflakes
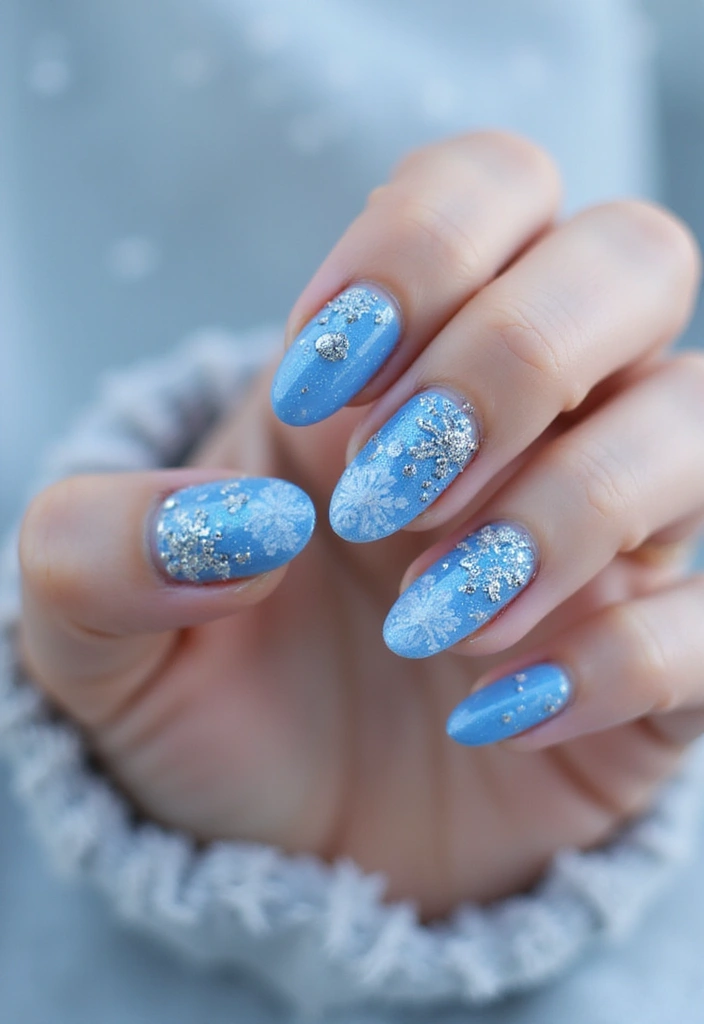
Get into the winter spirit with Shimmering Snowflakes nail art!
This design features cool colors like icy blue and silver, perfect for the season.
Start with a light blue base and use a fine brush to paint snowflake designs. Add glitter to the snowflakes to make them sparkle like real snow.
Creative insights:
– Use rhinestones for the centers of the snowflakes for extra allure.
– Consider using a matte finish on the base for contrast.
32. Fiery Flames
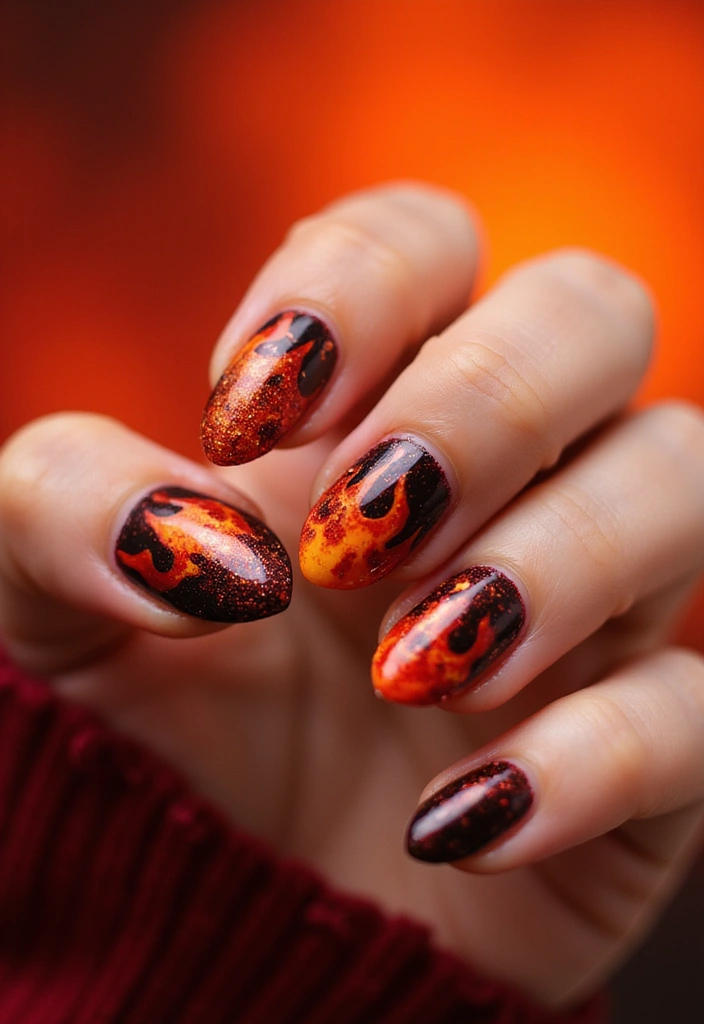
Unleash your inner fire with Fiery Flames nail art!
Using bold red, orange, and black, you can create a fierce look that’s sure to turn heads.
Start with a red base and use a sponge to blend orange and black at the tips to create flame patterns. Top it off with glitter to mimic the flickering of flames.
to consider:
– Use nail tape for clean lines when creating flames.
– Consider adding gold or silver accents for a dramatic flair.
33. Midnight Sparkle
Embrace the night with Midnight Sparkle nail art!
This design incorporates deep shades with glittery stars for a captivating look.
Start with a navy base and blend in lighter shades of blue. Add tiny star patterns with a fine brush and sprinkle glitter for that starry night effect.
– Use nail studs in star shapes for added dimension.
– A matte top coat can enhance the depth of the colors.
Dare to dazzle with Midnight Sparkle! Transform your nails into a starry night canvas and let your creativity shine bright—because every detail counts in capturing that enchanting allure!
34. Polished Lace
Add a touch of sophistication with Polished Lace nail art!
This design combines a clean base with intricate lace patterns and glitter accents.
Start with a neutral base color and use a fine brush to create lace designs in white or cream. Add glitter to the edges of the lace for that polished touch.
– Layer a glossy top coat for a more elegant finish.
– Experiment with different lace designs for unique looks.
35. Flirty Bows
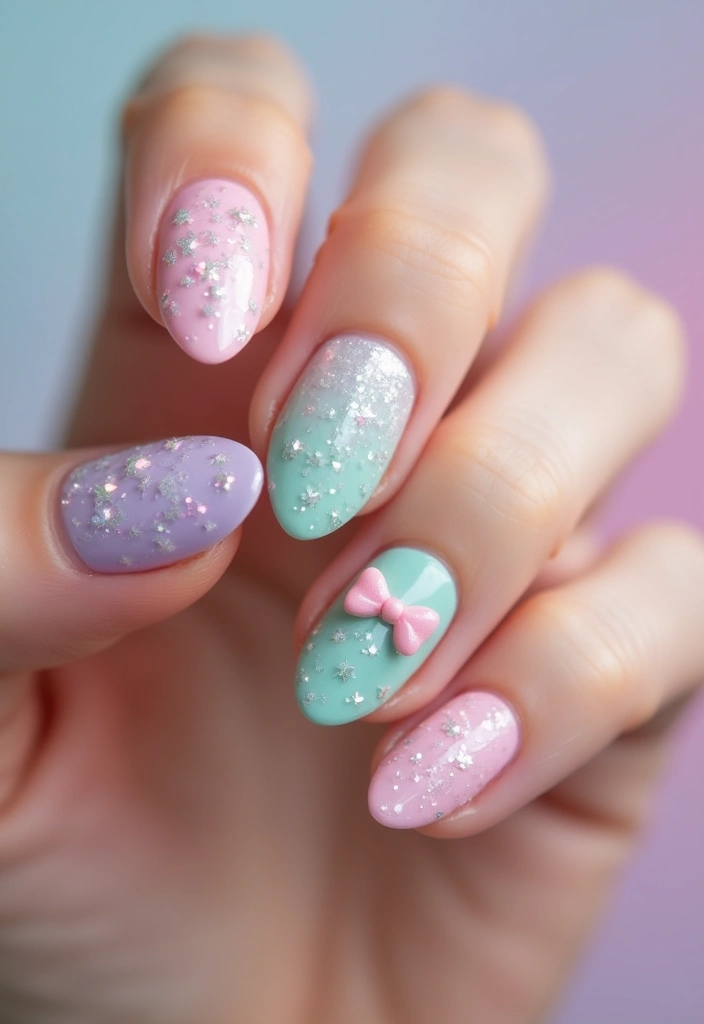
Bring some playful fun with Flirty Bows nail art!
This design features cute bow patterns in pastel colors adorned with glitter accents.
Start with a light base, then create bow shapes with different colored polishes. Finish with glitter in the center of each bow for that flirtatious sparkle.
Helpful tips:
– Use a dotting tool for neat bow shapes.
– Consider alternating colors between nails for added variety.
36. Dazzling Hearts
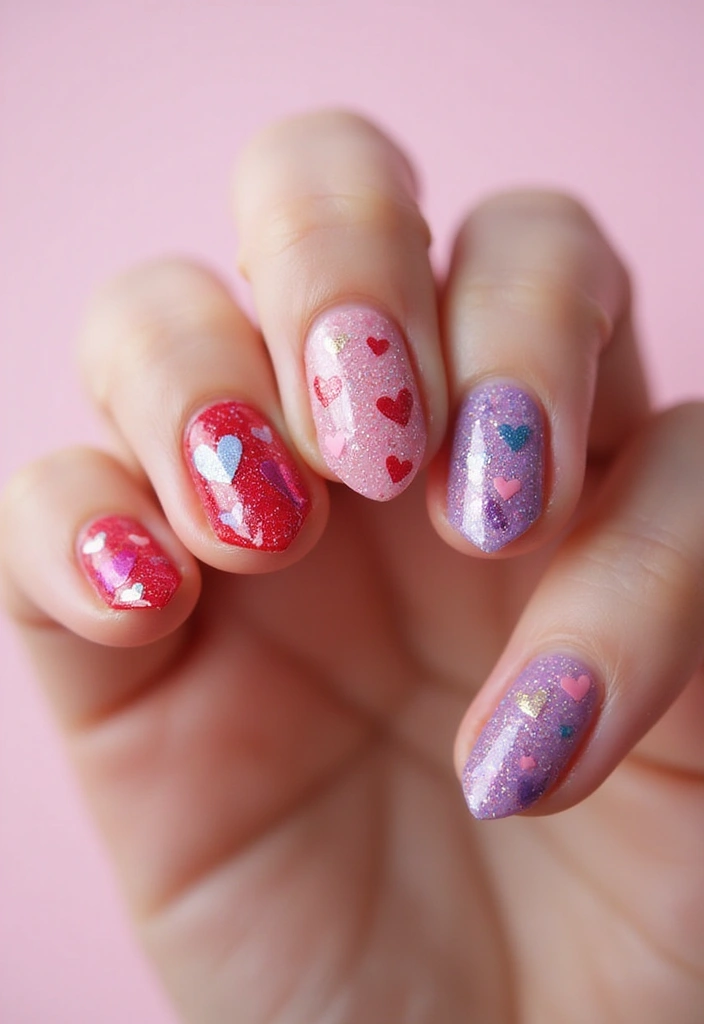
Spread some love with Dazzling Hearts nail art!
This charming design features colorful hearts adorned with glitter for a lovely look.
Start with a nude base and paint hearts in various colors, then add glitter for that dazzling touch.
Unique suggestions:
– Use a fine brush for intricate heart designs.
– Incorporate tiny rhinestones for a more romantic feel.
37. Serene Waters
Embrace tranquility with Serene Waters nail art!
This design features calm blue tones and delicate water patterns with glitter accents.
Start with a soft blue base, then use a sponge to create gentle waves. Add glitter in specific areas to mimic sunlight reflecting on water.
Creative tips:
– Experiment with different shades of blue for depth.
– Incorporate small aquatic-themed decals for added charm.
38. Celestial Glow
Channel celestial vibes with Celestial Glow nail art!
This design features hues of midnight blue and gold, resembling a starry universe with glittery accents.
Start with a dark blue base, blending in gold accents and tiny star patterns. Sprinkle glitter over the top to enhance the celestial aesthetic.
Suggestions to try:
– Use glow-in-the-dark polish for a unique twist.
– Consider adding moon designs for extra flair.
39. Tropical Paradise
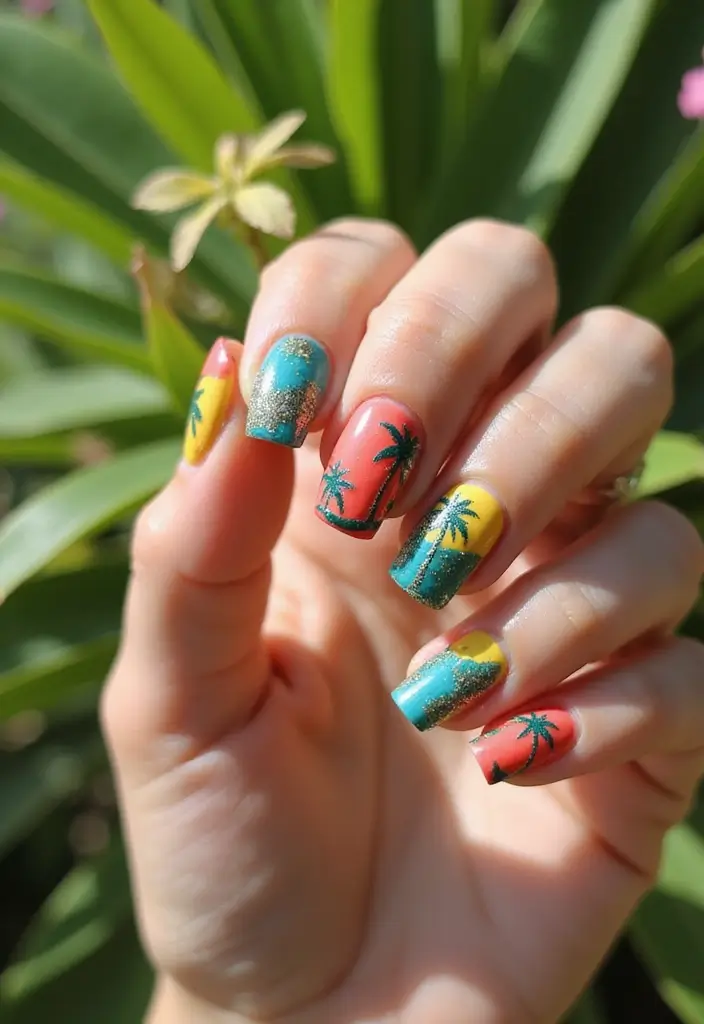
Escape to a Tropical Paradise with this nail art!
This design features vibrant colors and palm tree silhouettes adorned with glitter.
Start with a bright base color, such as turquoise or coral, and paint palm trees with black polish. Add glitter to mimic the sun’s reflection for a sunny vibe.
Fun ideas:
– Use neon colors for a bright tropical look.
– Incorporate tropical fruit decals for additional flair.
40. Rainbow Splatter
Have some fun with Rainbow Splatter nail art!
This playful design features a splash of colors with glitter for a joyful vibe.
Start with a white base and use a toothbrush or straw to splatter vibrant colors across the nails. Finish with glitter for that added sparkle.
Creative tips:
– Use contrasting colors for a more vibrant look.
– Experiment with the distance from which you splatter for varying effects.
41. Rustic Luxe
Embrace a combination of rustic and lux vibes with Rustic Luxe nail art!
This design features earthy colors with gold glitter accents for a luxurious feel.
Start with a taupe or beige base and use a fine brush to create abstract designs. Add gold glitter to certain areas for that luxe touch.
Helpful suggestions:
– Use a matte top coat for the base for added sophistication.
– Experiment with different abstract patterns for individuality.
42. Dreamy Clouds

Create a whimsical look with Dreamy Clouds nail art!
This design features soft blue and white clouds with glitter for an ethereal feel.
Start with a light blue base and use a sponge to apply white shapes for clouds. Finish with glitter for a sparkling effect.
Unique ideas:
– Incorporate tiny star decals for a night sky theme.
– Experiment with different shades of blue for depth.
43. Glamour Waves
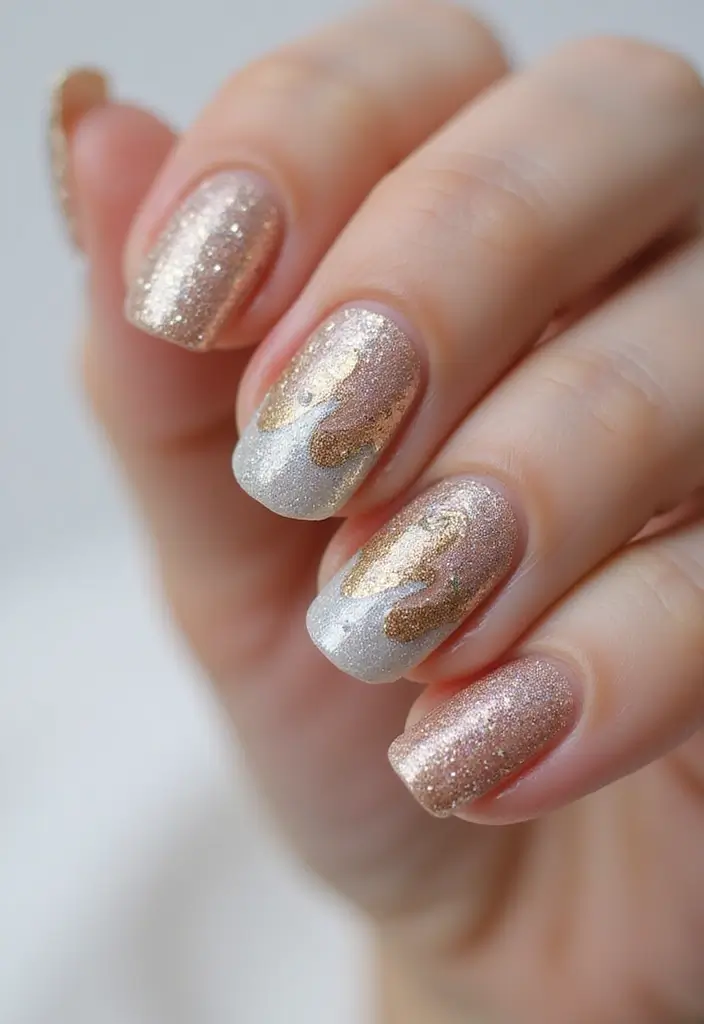
Make waves with Glamour Waves nail art!
This design combines shimmering shades of gold and silver with glitter for a glamorous touch.
Start with a gold base and use a sponge to apply silver accents in wave patterns. Add glitter to the silver areas for that glamorous sparkle.
Creative insights:
– Use a fan brush for neat waves.
– Consider adding rhinestones for extra flair.
44. Holiday Cheer
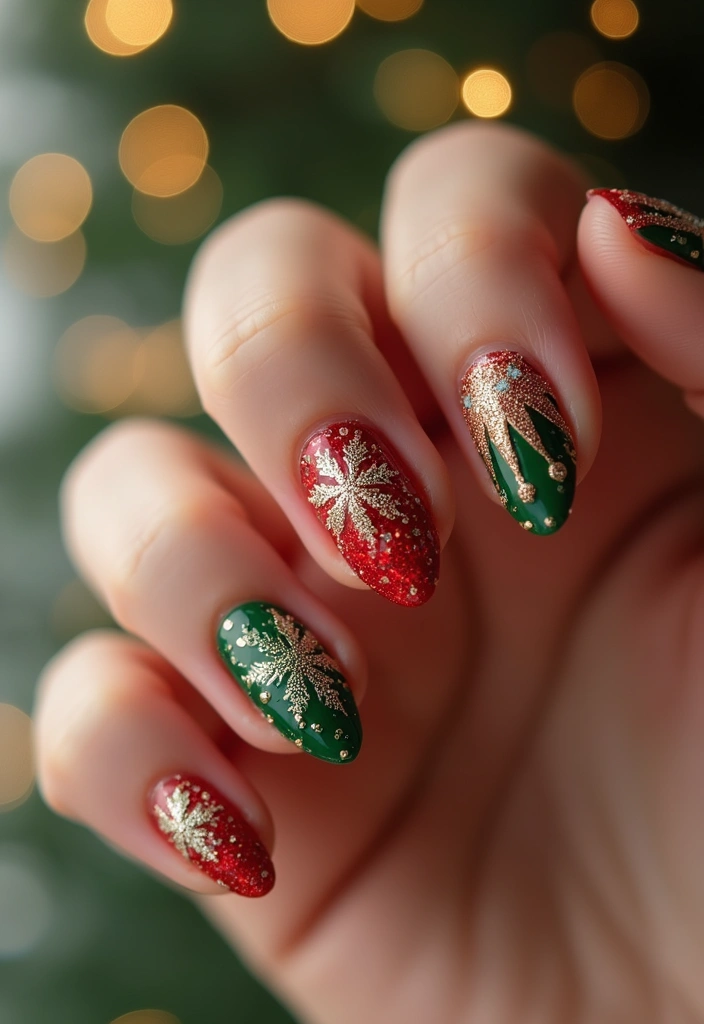
Get festive with Holiday Cheer nail art!
This design combines traditional holiday colors with glitter for a joyful spirit.
Start with a red or green base and create patterns like candy canes, snowflakes, or Christmas trees adorned with glitter.
Suggestions:
– Use a fine brush for intricate designs.
– Add glitter to highlight specific areas for an extra festive touch.
45. Starry Blossoms
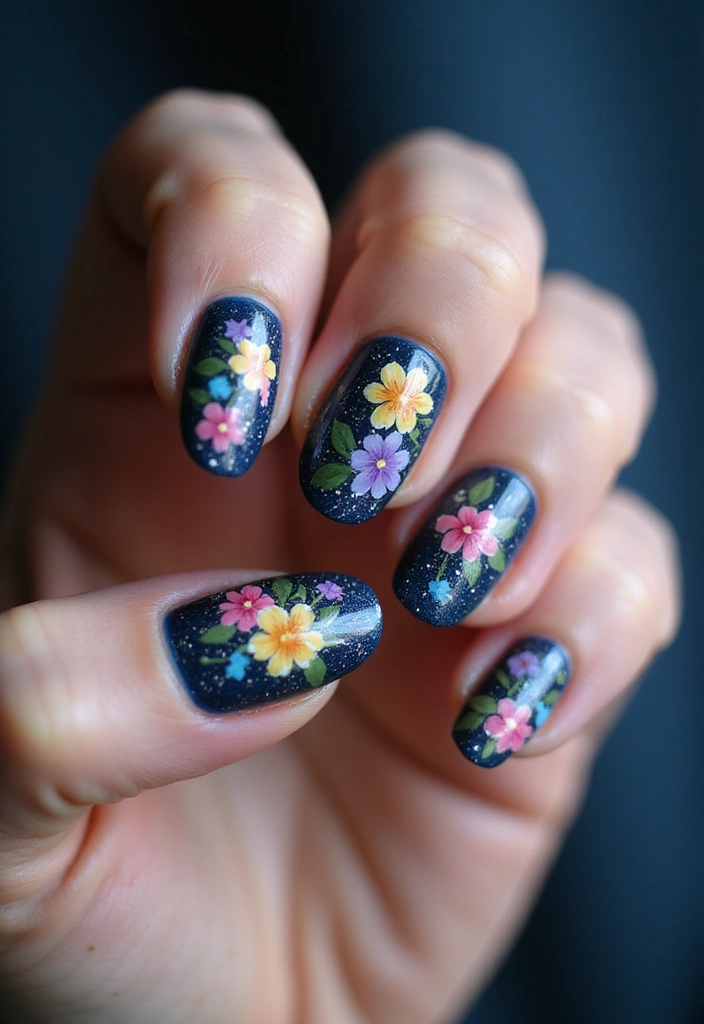
Celebrate the beauty of nature and stars with Starry Blossoms nail art!
This enchanting design features floral patterns paired with starry backgrounds and embedded glitter.
Start with a dark base and paint flowers in bright colors. Add tiny stars and glitter to create a whimsical night bloom.
Unique ideas:
– Experiment with different floral shapes and sizes for variety.
– Consider using glow-in-the-dark elements for a magical touch.
Conclusion
Nail art with embedded sparkles and glitter effects can take your beauty game to the next level.
With endless possibilities, there’s a design to match every personality and occasion.
So grab your favorite polishes and let your creativity shine with these unique nail art inspirations!
Frequently Asked Questions
What Are Some Trendy Nail Art Designs That Incorporate Sparkles?
If you’re looking to jazz up your manicure, there are countless trendy nail art designs that incorporate sparkles! From the mesmerizing Galaxy Dreams to the playful Bright Confetti, you can find inspiration in designs that range from elegant to whimsical. Each style can be customized with your favorite colors and sparkly accents, allowing your creativity to shine through!
How Do I Choose the Right Nail Art Design for My Personality?
Choosing the right nail art design is all about expressing your unique style! If you’re fun and playful, consider designs like Rainbow Connection or Whimsical Dots. For a more sophisticated look, styles like Chic Marble or Polished Lace might suit you better. Don’t be afraid to mix and match elements from different designs to create something uniquely you!
What Supplies Do I Need to Create Spark-Filled Sparks Nail Art at Home?
Creating your own spark-filled sparks nail art at home is easier than you think! You’ll need a base coat, your chosen nail polish colors, glitter, and possibly some nail art tools like dotting tools or striping tape. Don’t forget a top coat to seal in your designs and add extra shine! With these supplies in hand, you’re ready to dive into the world of creative nail ideas.
How Can I Make My Glitter Nail Art Last Longer?
To ensure your glitter nail art lasts, start with a high-quality base coat and finish with a durable top coat. Make sure to allow each layer to dry thoroughly before applying the next. Additionally, avoid soaking your nails in water for long periods and keep your hands moisturized to prevent chipping. These tips will help your trendy manicure styles stay vibrant and sparkly for longer!
Are There Any Nail Art Designs That Are Easy for Beginners?
Absolutely! There are plenty of unique nail patterns that are beginner-friendly. Designs like Ombre Glitter and Frosted Tips are simple yet stunning. You can achieve these looks with just a few colors and a sponge or brush. Don’t hesitate to start with basic designs to build your confidence before trying more intricate styles!