Looking to sprinkle some color into your nail routine? Nail polish is more than just a beauty staple; it’s a canvas for creativity! From vibrant hues that pop to eco-friendly formulas that are kind to the planet, there’s so much to explore.
In this vibrant collection, you’ll find 35 nail polish ideas that will inspire your next manicure. Embrace the colorful nail trends that elevate your style while staying true to your eco-conscious values. Whether you’re aiming for a simple DIY nail art design or something bold and intricate, this list has it all. Let’s dive into a world of coated creativity and discover the vibrant nail colors that will brighten your day!
1. Rainbow Ombre
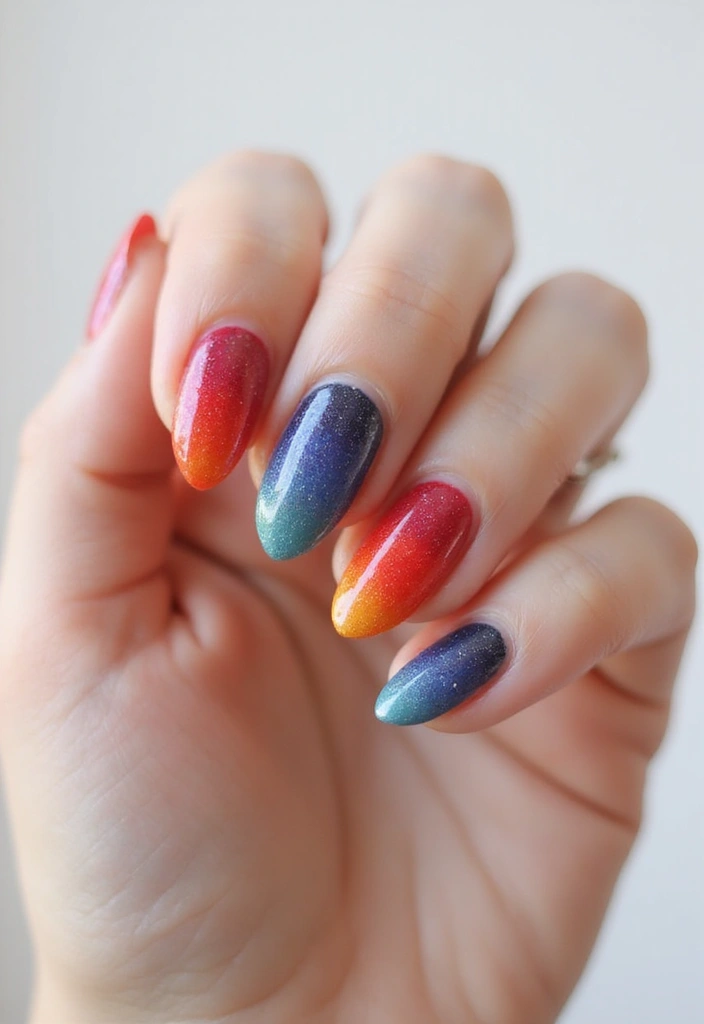
Nothing says fun quite like a rainbow ombre manicure! Start with a base coat of white nail polish to let the colors shine. Using a makeup sponge, dab on your favorite vibrant shades, blending them together to create a seamless gradient effect.
This technique not only looks fabulous but also allows you to express your personality through colors. From fiery reds to cool blues, the options are endless! Make sure to seal your masterpiece with a top coat for a glossy finish.
for success:
– Choose shades that complement each other for the best effect.
– Practice the sponge technique on a piece of paper before applying on your nails.
– Don’t be afraid to experiment with different color combinations to find your perfect ombre.


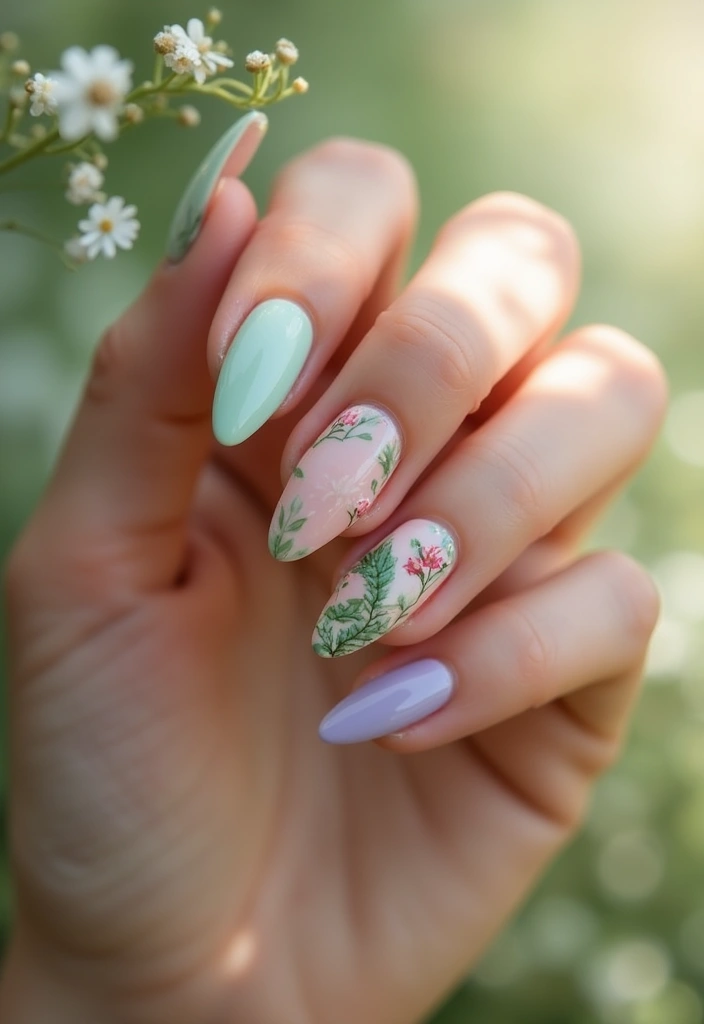
2. Floral Nail Art
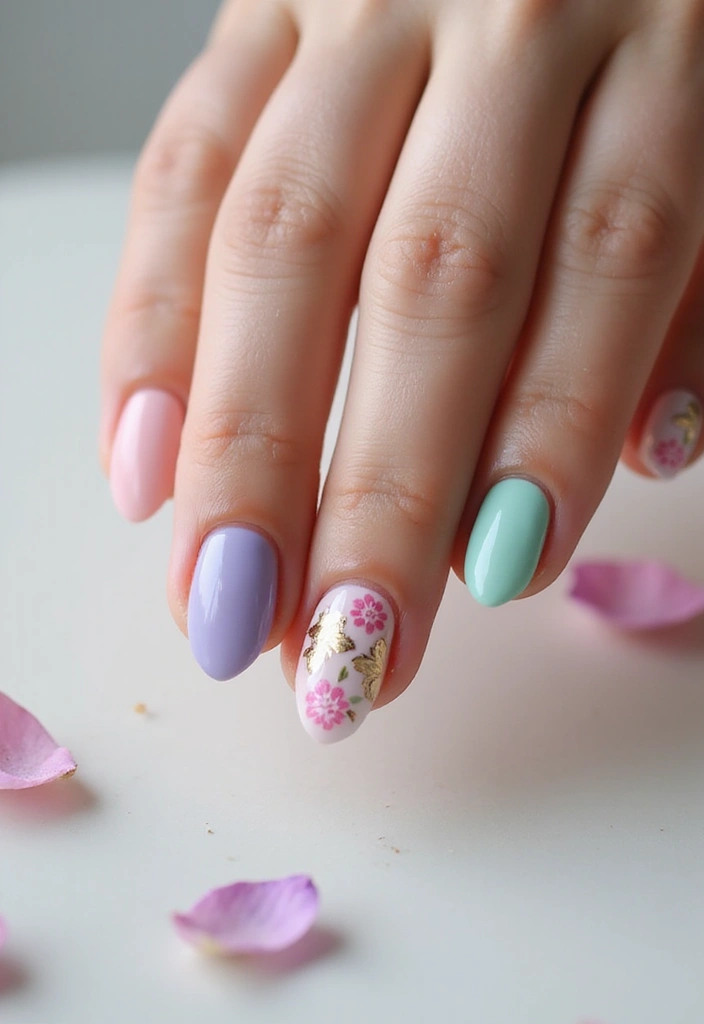
Embrace nature with stunning floral nail art! Start with a solid base color, then use a fine brush or nail dotting tools to create delicate flowers. Choose shades like pastel pinks, yellows, and greens to create a soft, whimsical look.
This design is perfect for spring and summer, and it brings a touch of fresh beauty to your nails. You can keep it simple with one or two flowers on each nail, or go all out with a full bouquet! Don’t forget to add leaves for a more completed look.
DIY Tips:
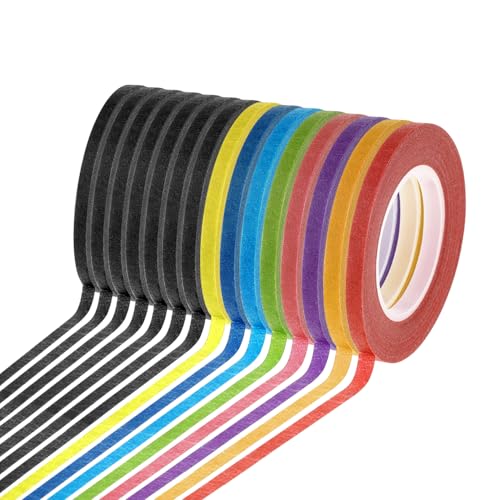
– Use striping tape to create clean lines around your floral designs.
– Practice flower designs on paper before attempting on your nails.
– Finish off with a matte top coat for a trendy finish!


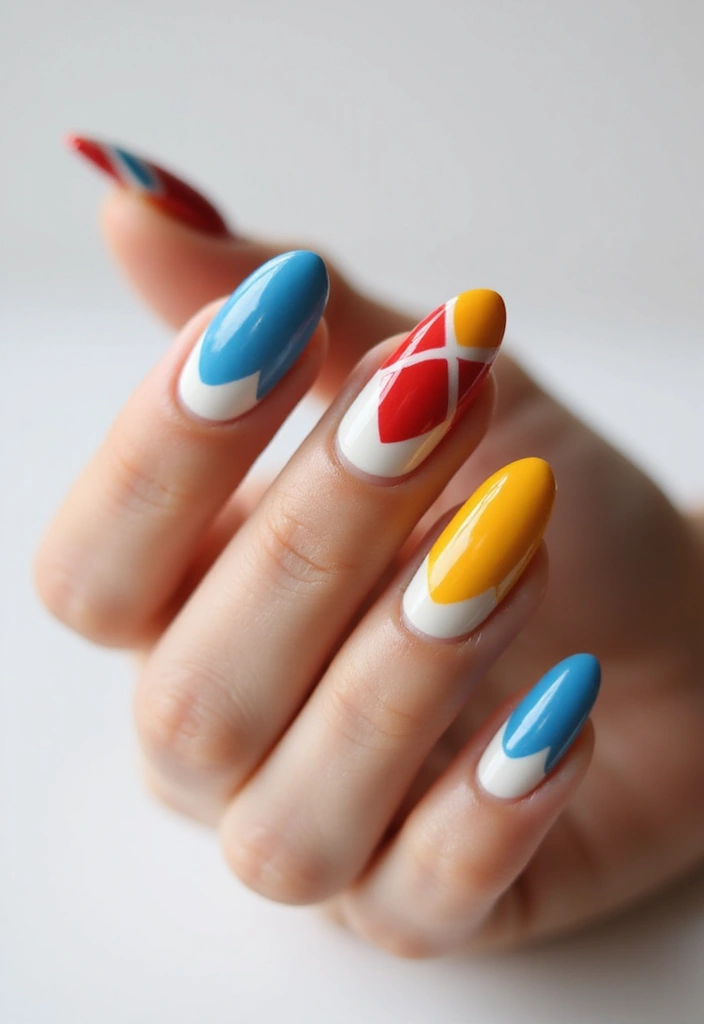
3. Geometric Designs

Get your creative juices flowing with geometric nail designs! These patterns can be both chic and modern, allowing you to mix and match colors and shapes. Start with a neutral base coat and use tape to create triangles, lines, or any shape that inspires you.
Once you’ve created your design, fill in the shapes with colorful polishes of your choice. Pro tip: Using a matte top coat can make the colors even more striking.
Creative nail ideas:
– Incorporate metallic polishes for a futuristic look.
– Use contrasting colors for added depth.
– Experiment with different shapes like chevrons or stripes to keep your design fresh.


4. Marble Effect

Achieve a stunning marble effect on your nails just like a pro! To start, apply a base coat of white or light gray polish. Then, using a thin brush or toothpick, swirl in contrasting colors (think blacks, greens, or even golds) to mimic the look of marble.
This design is elegant, and each set of nails will look unique! Seal it all in with a shiny top coat to enhance the marble look.
DIY manicure tips:
– Use a water marbling technique for a more intricate look.
– Keep a damp cloth handy to clean up any spills around the nail bed.
– Try different color combinations to find your favorite marble look.


5. Neon Pop
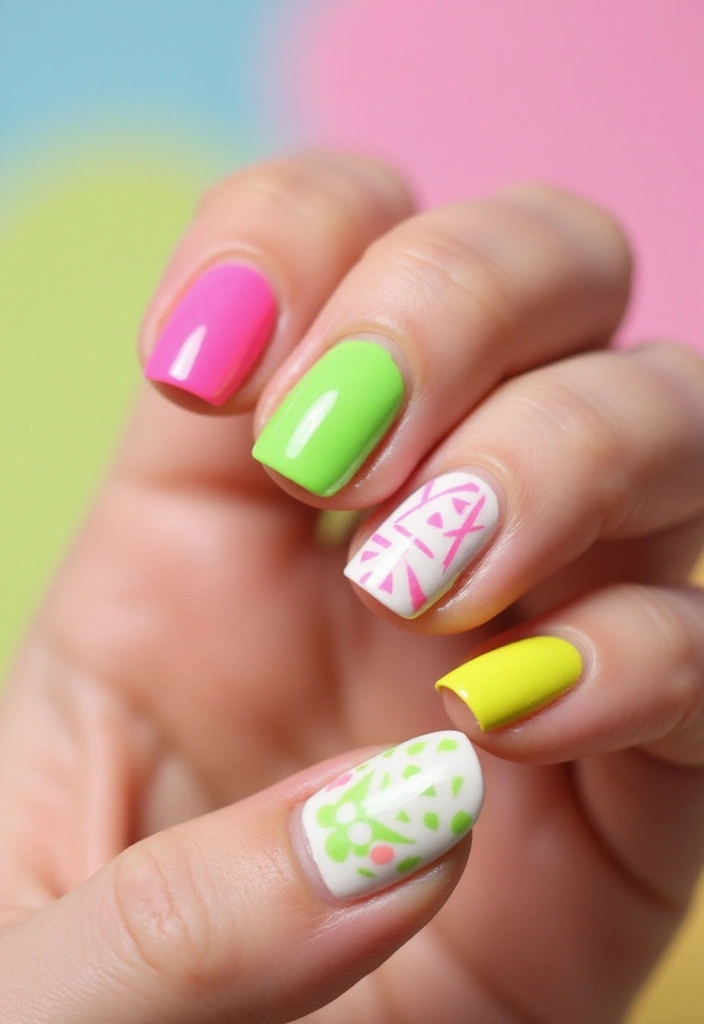
Bring on the bold with neon nail polish! These eye-catching colors are perfect for a fun night out or just to add some excitement to your day.
Choose a bright neon shade like electric pink, lime green, or vibrant orange to make your nails stand out. Pair them with a simple design, like dots or stripes, or go all out with full neon nails! Don’t forget to use a white base to make the colors pop even more.
– Neon colors often require two coats for full opacity.
– Use a matte top coat for a trendy twist.
– Mix and match neon colors for a playful gradient effect.


6. Metallic Warrior

Get that luxe feeling with stunning metallic nail polish! The shiny, reflective qualities of metallic colors like gold, silver, and rose gold add a glamorous touch to any outfit.
For a chic look, apply a solid metallic color to all nails or go for a half-moon design by painting just the base of the nails. You can even mix metallic and matte finishes for a stylish contrast!
Creative nail ideas:
– Add glitter to the tips for a festive feel.
– Try layering different metallic shades for a unique look.
– Consider using a top coat with a matte finish for an unexpected twist.


7. Tie-Dye Fun
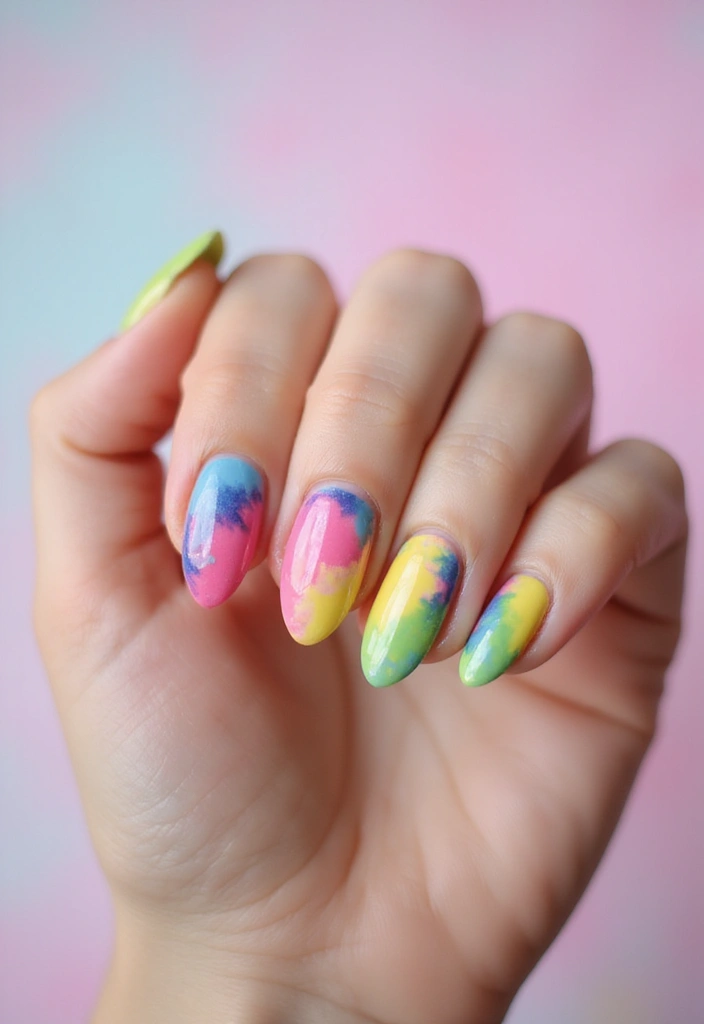
Revive the retro tie-dye trend with your nails! This fun design lets you use multiple colors and create a unique swirl effect. Start with a base coat, then use a sponge to dab on various bright colors, blending them into one another.
The more colors, the better! Top it off with a clear coat to ensure the design stays vibrant over time.
and ideas:
– Use a toothpick for fine details or to enhance the swirling effect.
– Keep the color palette limited for a more cohesive look.
– Pair with colorful accessories to make your nails the center of attention!
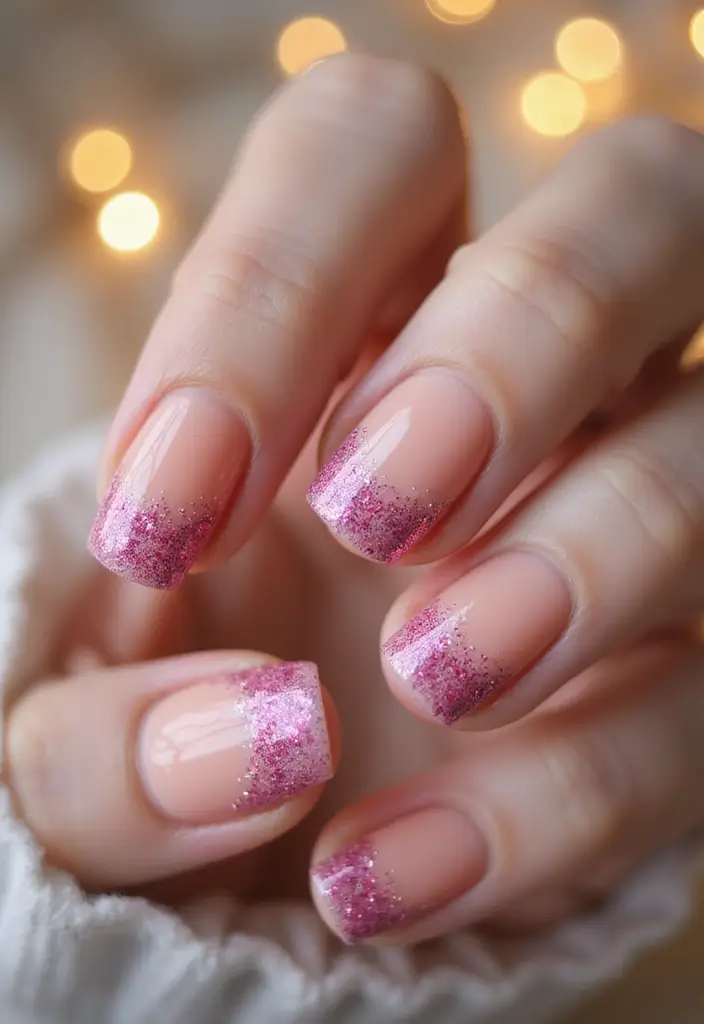
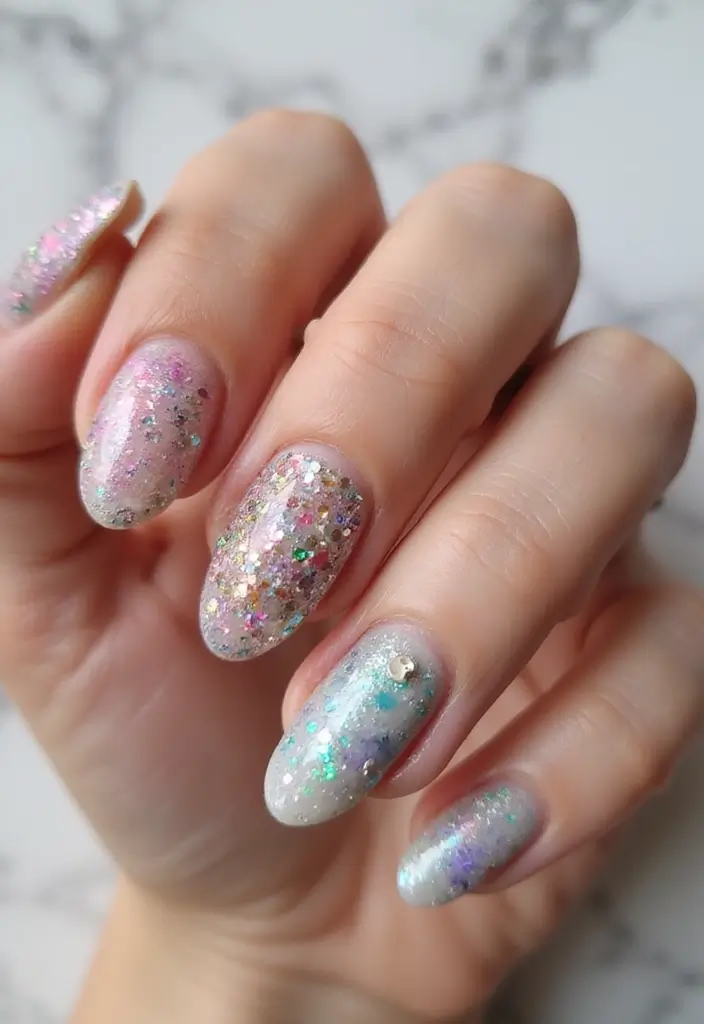
8. Glitter Galore
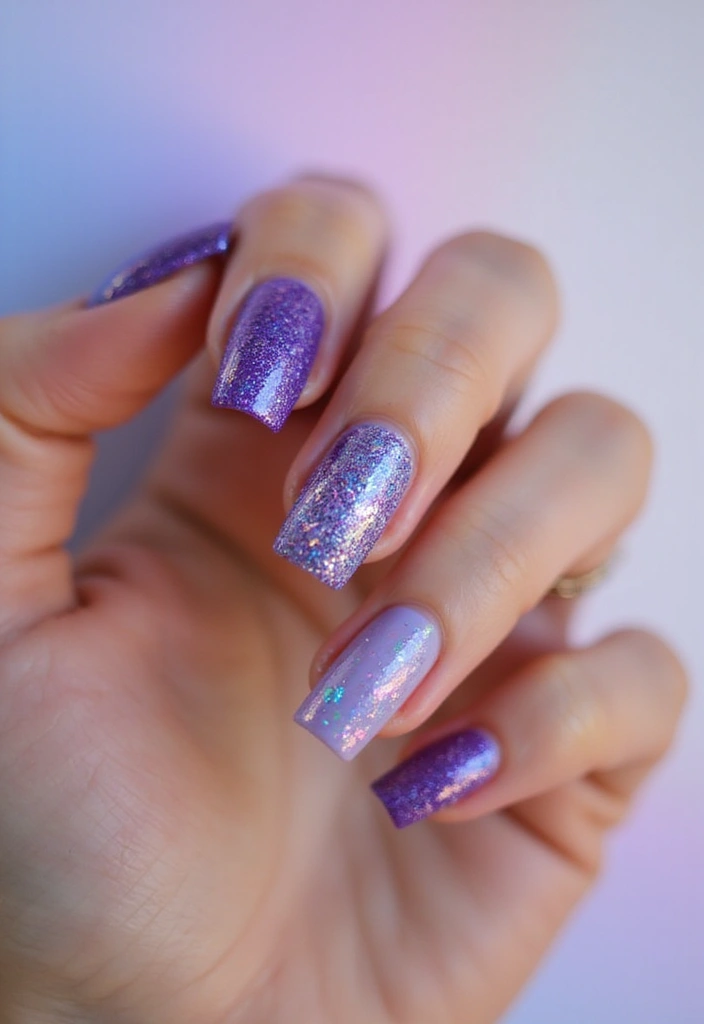
If you love a little sparkle, glitter nails are the way to go! Start with a solid base color and simply add glitter polish on top. You can go for an all-over glitter look or focus on just the tips for a chic ombre effect.
For a more playful design, try different sizes of glitter for an eye-catching texture. Glitter nail polish can also be layered over other colors for a unique finish.
DIY manicure tips:
– Apply a thicker coat of glitter polish for maximum sparkle.
– Use a top coat for a smoother finish.
– Mix different glitter colors for a fun, custom effect.


9. Earthy Tones

Embrace the beauty of nature with a palette of earthy tones. Think muted greens, browns, and soft taupes that reflect the outdoors. This trend is perfect for those looking to keep their nails stylish yet understated.
You can mix and match these colors in a variety of designs, like stripes or polka dots, or simply paint each nail a different shade for a cohesive look. These tones are versatile and can be worn year-round, making them a staple in eco-friendly nail trends.
to consider:
– Use a matte top coat for an elegant finish.
– Experiment with textures by adding a sand-like polish for added depth.
– Pair your nails with earthy-toned outfits for a complete look.


10. Color Block
Color blocking is all about making a statement! Select two or three bold colors to create distinct blocks on your nails. Use tape to get sharp edges and clean lines. This design is entirely customizable and perfect for expressing your individuality.
Try pairing warm colors with cool hues for a striking contrast, or stick to similar shades for a more subtle effect. The best part? Color blocking is a trend that works well for both short and long nails.
Practical tips:
– Allow each layer to dry completely before adding the next color.
– Experiment with different shapes like triangles or squares to keep things fresh.
– Consider adding small jewels or stickers for an extra flair.


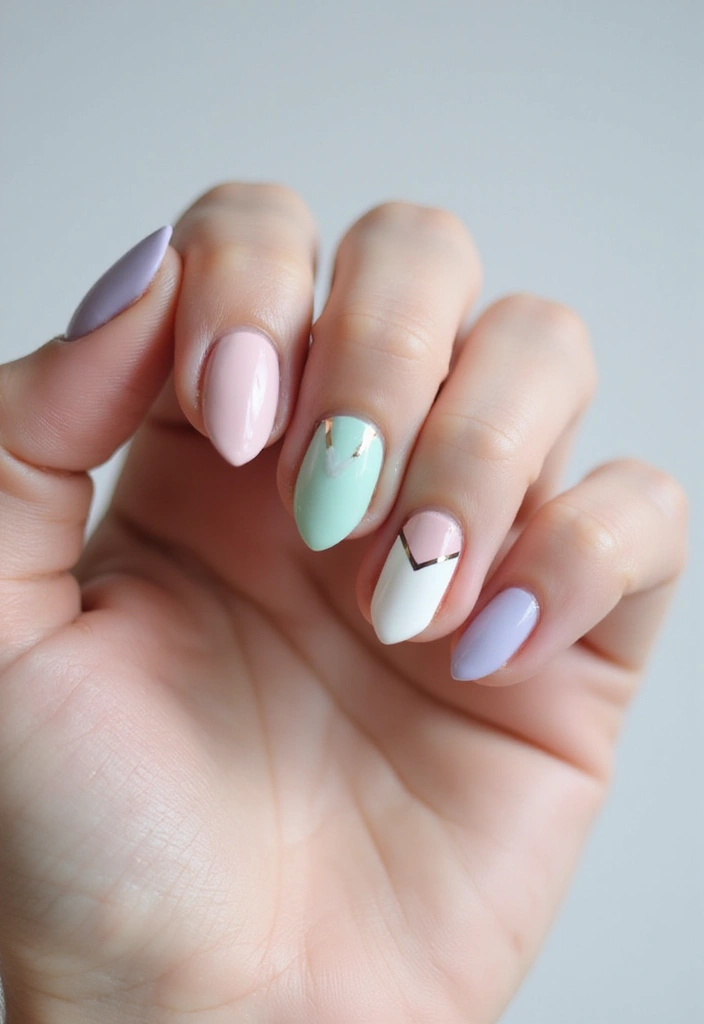
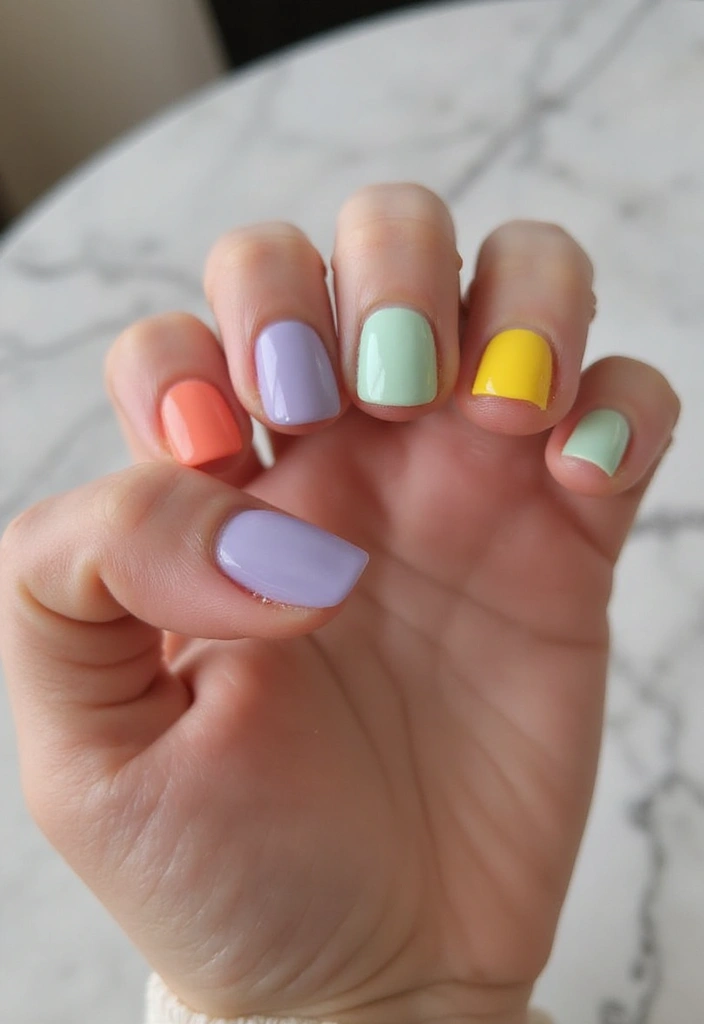
11. Pastel Dreams
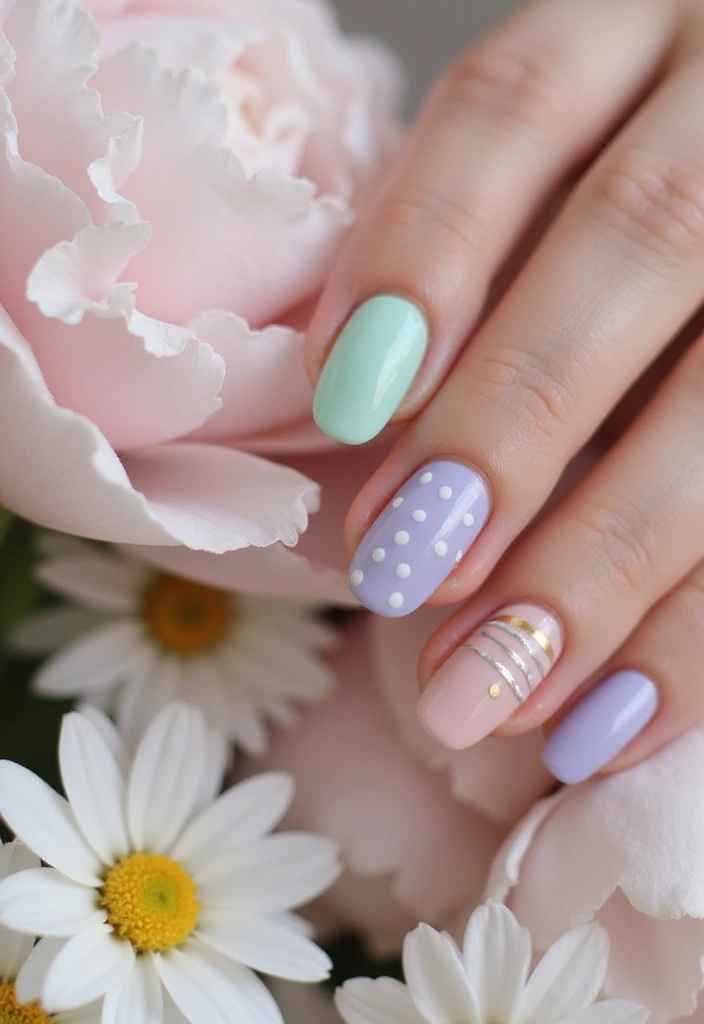
Soft, pastel colors are in! These shades are perfect for spring and summer, creating a fresh and dreamy vibe for your nails. Think soft pinks, light blues, and mint greens. Simple designs like a single accent nail or even polka dots can complement the pastel base.
A matte finish can give this look a modern twist, making it ideal for everything from casual outings to more formal events.
for pastel perfection:
– Apply two coats for an even, vibrant finish.
– Use white as a base for better opacity.
– Consider using a pastel color wheel for inspiration to mix and match.
Pastel hues are not just colors; they’re a mood! Embrace soft pinks, light blues, and mint greens for a dreamy vibe. Remember: a matte finish can elevate your look for any occasion!


12. Gradient Glitter
Elevate your glitter game with a gradient glitter design! Start with a solid base color and apply glitter polish from the tips of your nails, fading it down towards the cuticle. This look is not only stunning but also easy to achieve.
Choose a single glitter polish or mix different shades for a more intricate effect. This design is perfect for parties or festive occasions and pairs beautifully with simple outfits.
Creative ideas:
– Try contrasting colors at the base and tip for a unique look.
– Use a sponging technique for a softer transition between glitter and base color.
– Finish with a glossy top coat to make the glitter shine even more.


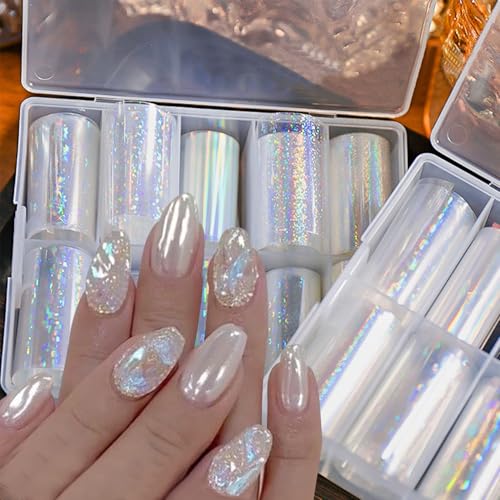
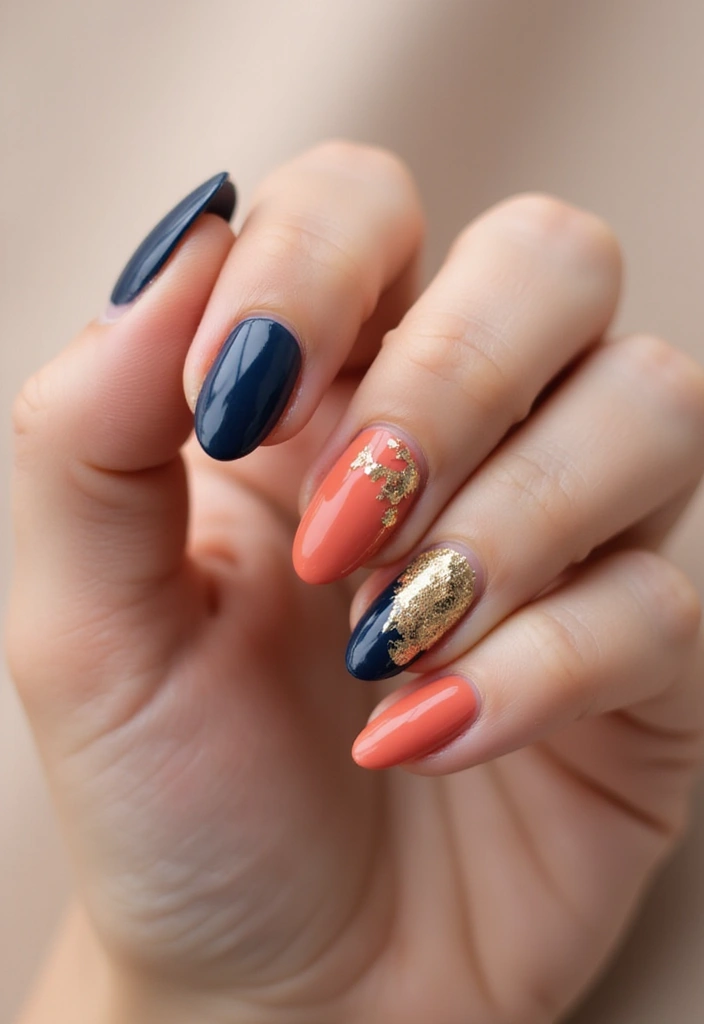
13. Nail Foils
Nail foils can add a chic touch to your manicure! Using nail foil requires a little more technique but the results are incredibly rewarding. Start with a base coat, apply adhesive, and once it’s tacky, press the foil onto your nails.
You can create a full foil design on all nails or use it as an accent on one or two nails. The shiny, reflective surface instantly elevates any look.
for using foils:
– Ensure the adhesive is sticky enough before applying the foil.
– Experiment with different foil colors and patterns.
– Seal your design with a top coat for longevity.


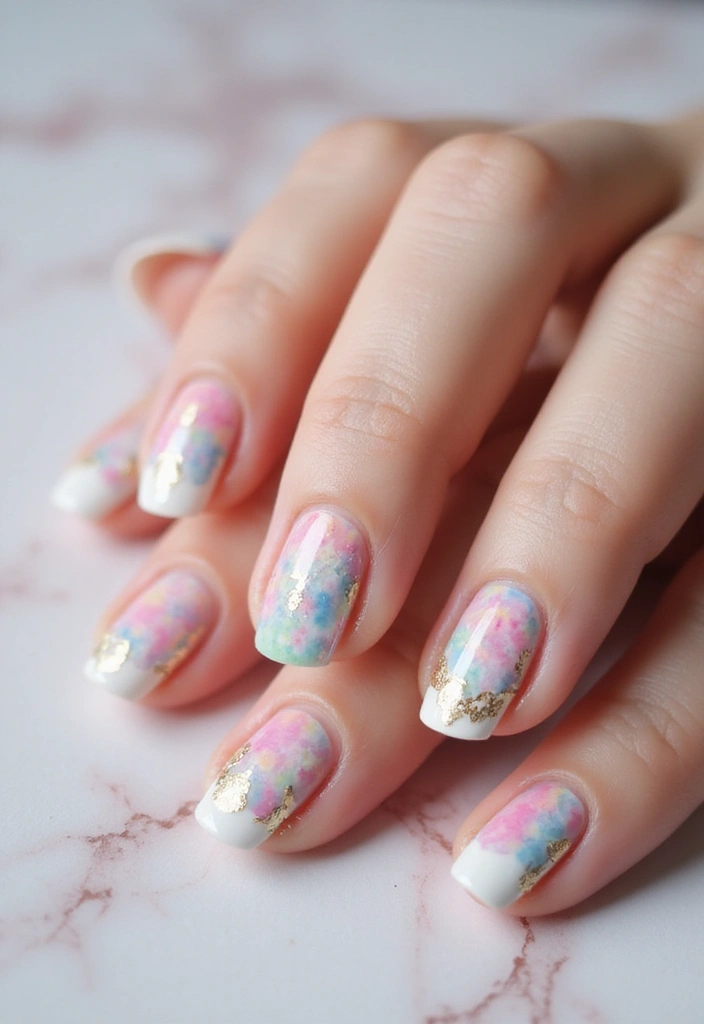
14. Watercolor Splashes
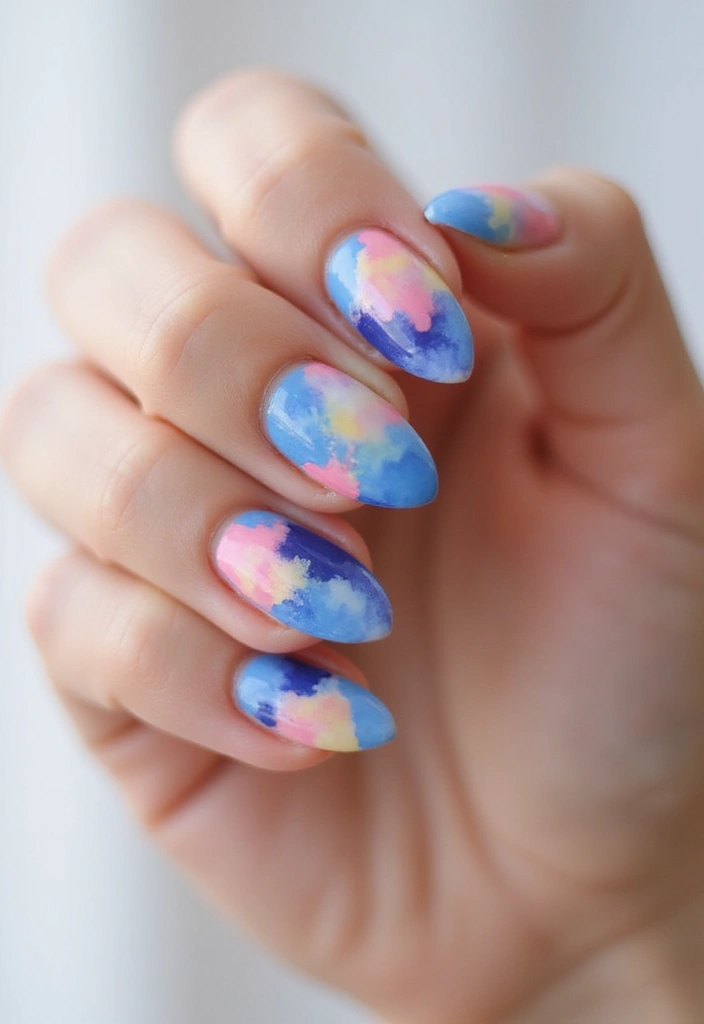
Create a dreamy watercolor effect on your nails with a simple technique! Start with a white or light base to mimic watercolor paper, then use a dotting tool or brush to apply diluted polish in various colors. Blend them slightly for that washed-out look.
This artistic style is perfect for those who love abstract designs. The beauty of watercolor nails is that no two designs will ever be the same!
DIY tips for watercolor nails:
– Use a clear top coat to keep the colors vibrant.
– Experiment with different techniques, like splattering or swirling, for distinct effects.
– Pair with minimalist outfits to make your nails stand out.
15. Half & Half Design
The half & half design is perfect for those who can’t choose between two colors! Simply divide your nail in half and paint each side a different color. This look can be done vertically or horizontally, and even diagonally for a more edgy style.
You can keep it classic with neutral tones or go bold with two striking shades. This trend is super customizable, making it a fun way to show off your personality.
Nail art tips:
– Use tape to create clean lines.
– Mix textures by using a matte polish on one side and a glossy finish on the other.
– Think about adding nail art stickers for even more flair.


16. Striped Elegance
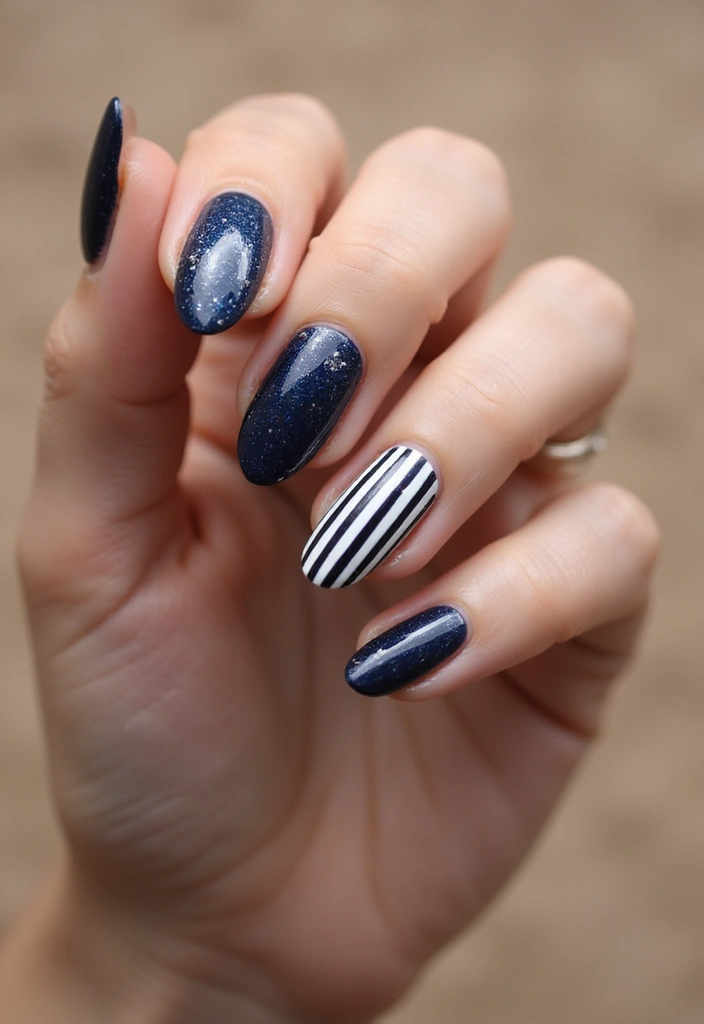
Stripes never go out of style! Whether they’re vertical, horizontal, or diagonal, this design is perfect for adding sophistication to your nails. Start with a base color, and then use nail tape or a thin brush to create stripes in your choice of colors.
Pairing bold stripes with neutral shades can create a classy look that is perfect for any occasion. For a more playful vibe, mix in different colors or even patterns like polka dots.
for striped nails:
– Let each layer dry completely before applying the next.
– Use a quick-dry top coat to seal your design.
– Consider contrasting finishes, such as matte stripes on a glossy base.


17. Seasonal Designs
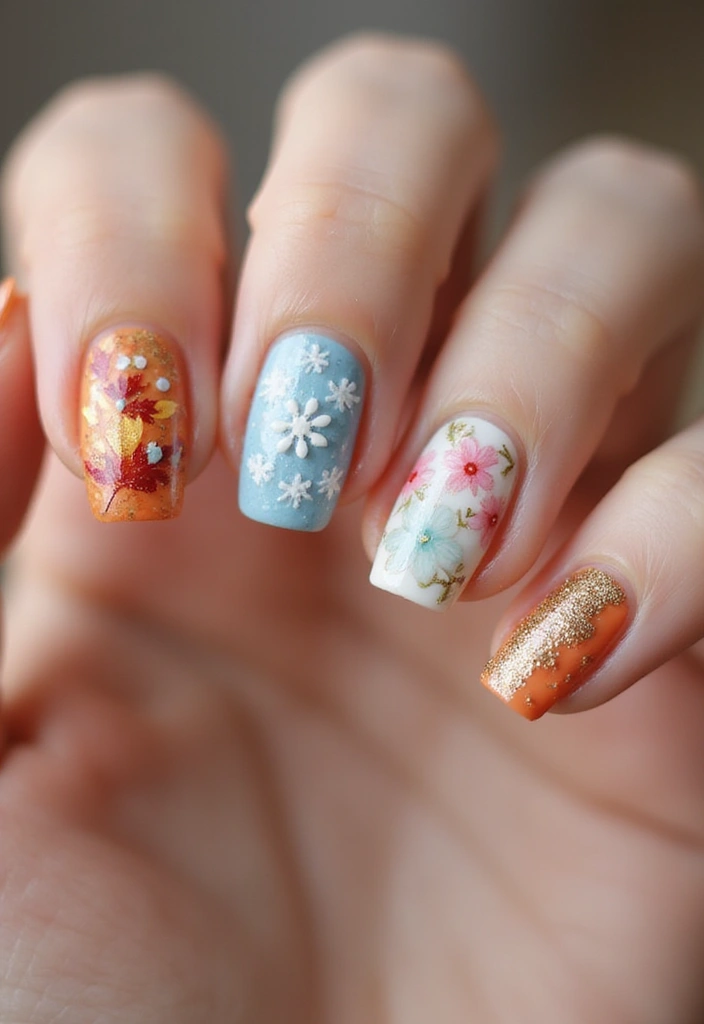
Celebrate the seasons with thematic nail designs! Whether it’s autumn leaves, winter snowflakes, spring blooms, or summer sunsets, seasonal designs allow you to switch up your nails throughout the year.
For autumn, try deep oranges and browns with leaf designs, while winter can be celebrated with icy blues and silver snowflakes. Spring nail art can feature pastel flowers, and summer might call for bright sun designs.
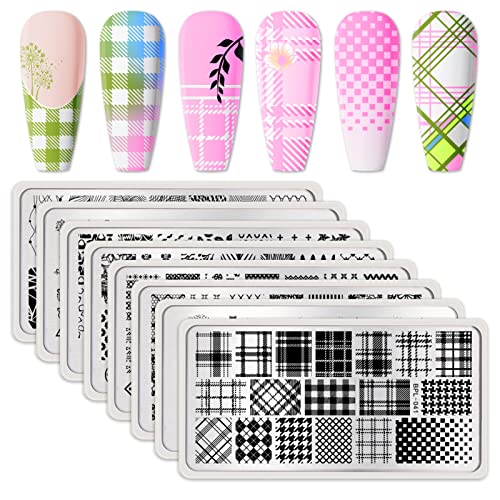
Creative nail ideas:
– Use stamping plates for intricate seasonal patterns.
– Keep your color palette seasonal to complement the designs.
– Consider using textures like matte finishes for a seasonal twist.


18. Minimalist Chic
Sometimes less is more! Minimalist nail art is all about simplicity and elegance. Stick to neutral or light colors and add small designs like dots, lines, or tiny shapes. This style is perfect for the office or any occasion where you want your nails to look polished without being over the top.
You can choose to have one accent nail with a bolder design for a stylish twist.
for minimalist nails:
– Use a fine brush for precise designs.
– Stick to a limited color palette for a unified look.
– Consider matte finishes for an understated elegance.
Less can be more! Embrace minimalist chic nail art with subtle designs and neutral tones for a polished look that speaks volumes without saying a word.


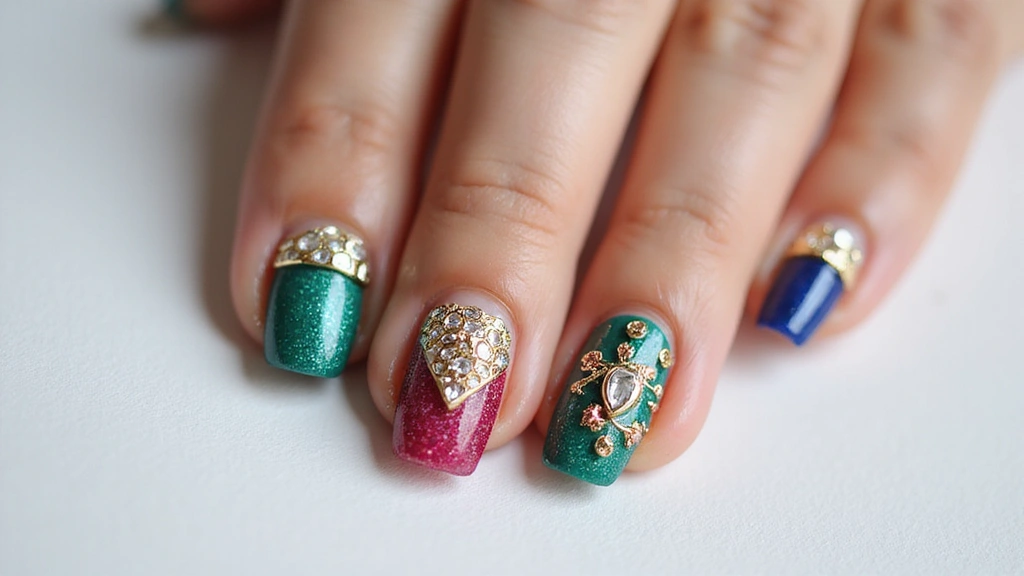
19. Jewel Tones
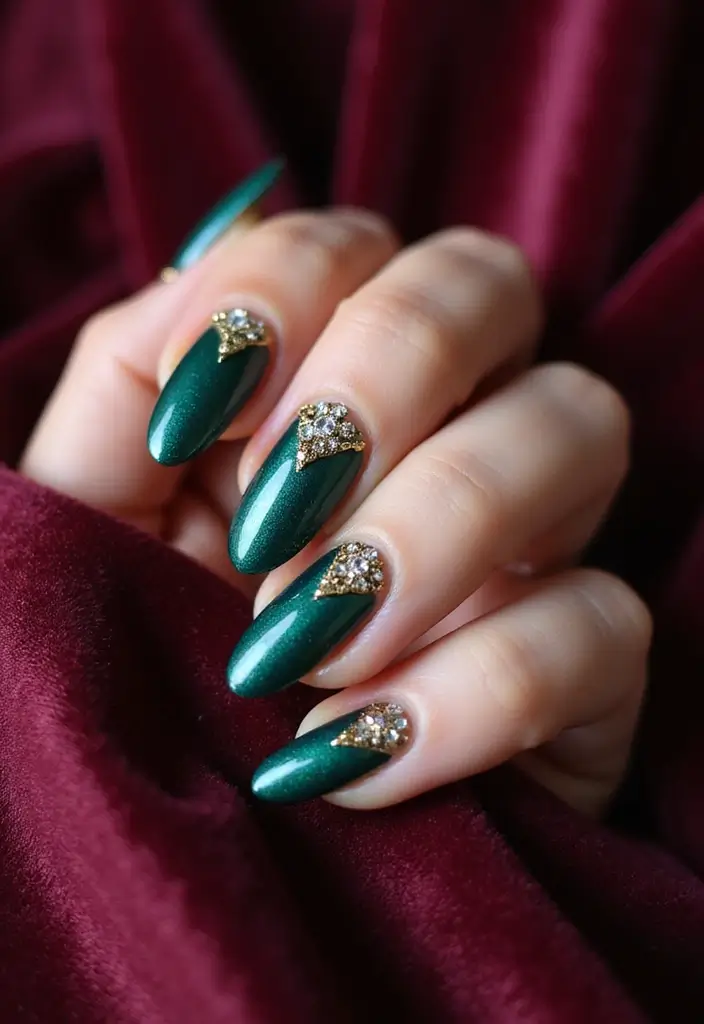
Bring out your inner royalty with rich jewel tones! Colors like emerald green, sapphire blue, and ruby red are perfect for those who want to make a statement. These deep hues can be used as solid colors or in intricate designs.
Consider using a metallic or shimmer polish for added depth and shine. Jewel tones work beautifully for evening events or formal occasions, bringing a touch of elegance to your look.
Nail art tips:
– Pair jewel tones with gold or silver accents for a luxe vibe.
– Use a glossy top coat for maximum shine.
– Try layering different jewel tones for a unique look.


20. Colorful French Tips
Put a twist on the classic French manicure with colorful tips! Instead of the traditional white, opt for bright, fun colors that reflect your personality. You can choose to paint just the tips or use a gradient effect for a more modern take.
This style allows for endless creativity, from pastel hues for a softer look to neon colors for a bold statement. It’s perfect for those who love the elegant shape of French tips but want to add a pop of color.
for colorful French tips:
– Use nail tape for clean lines.
– Experiment with different shapes for the tips, like a zigzag or chevron.
– Finish off with a glossy top coat to enhance the colors.


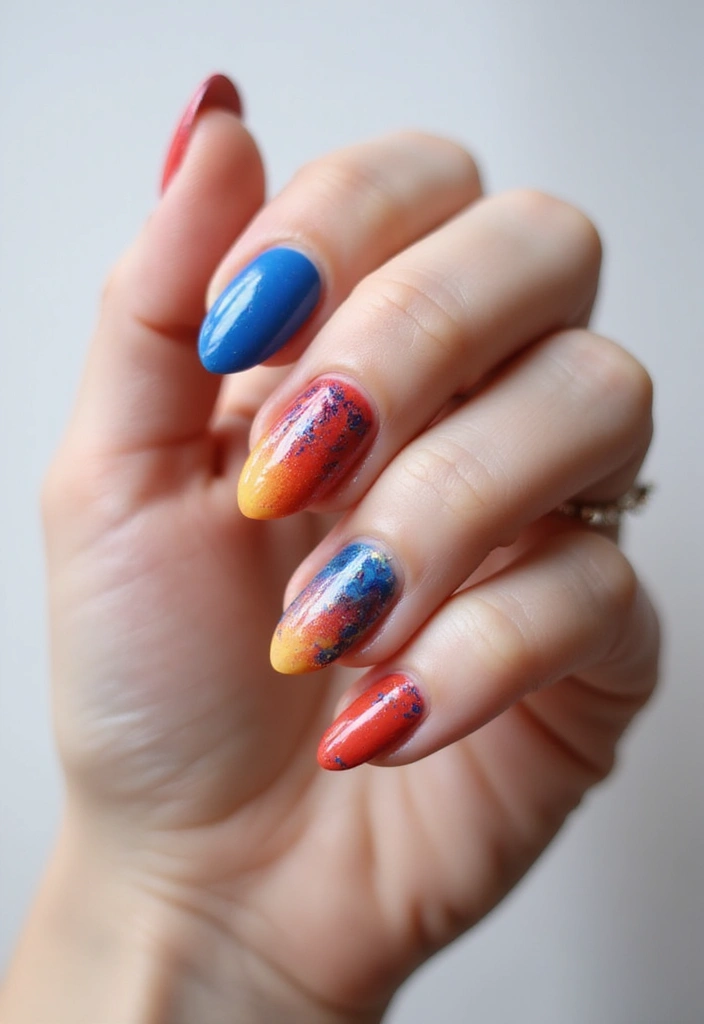
21. Artistic Splatter
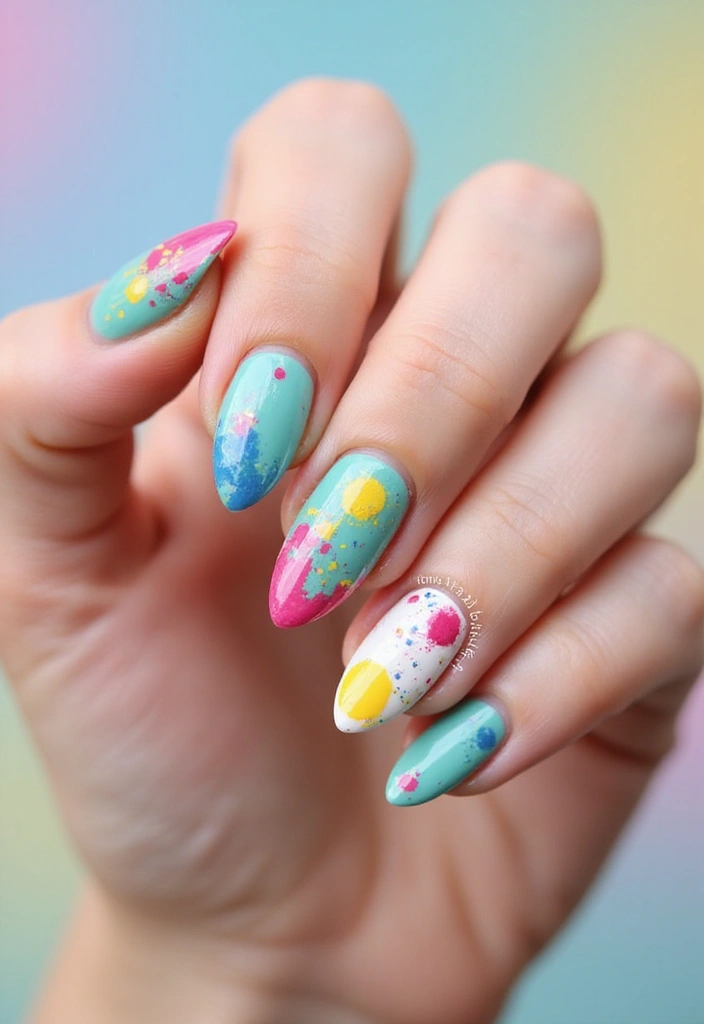
Embrace your inner artist with a splatter design! This fun and messy technique allows for a playful take on nail art. Start with a base coat and then use a thin brush to splatter different colors on top. The result is a vibrant and eclectic design that celebrates spontaneity.
You can use bright colors for a fun, youthful look or stick to more subdued tones for a chic vibe. Each set of nails will be unique, making this style a true expression of creativity.
DIY tips:
– Consider using a toothbrush for a fun splatter effect.
– Cover your skin with tape to prevent mess.
– Seal with a clear top coat for longevity.
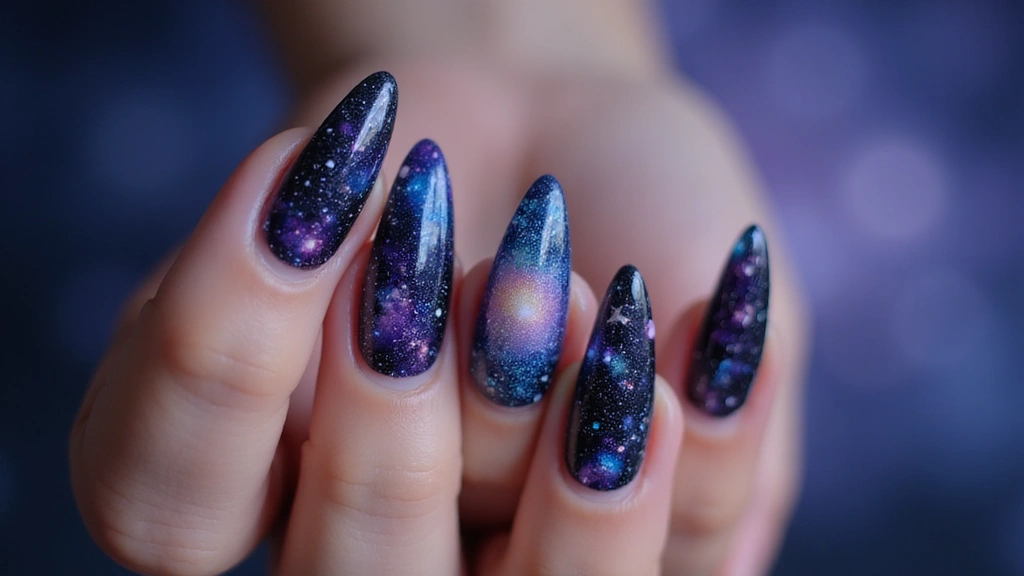
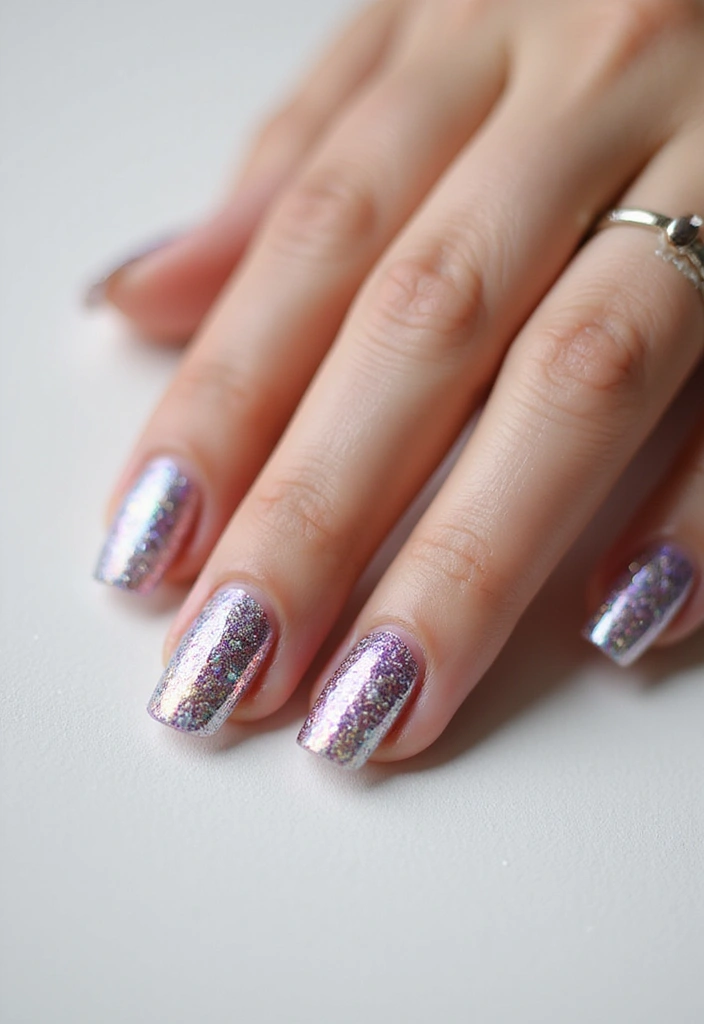
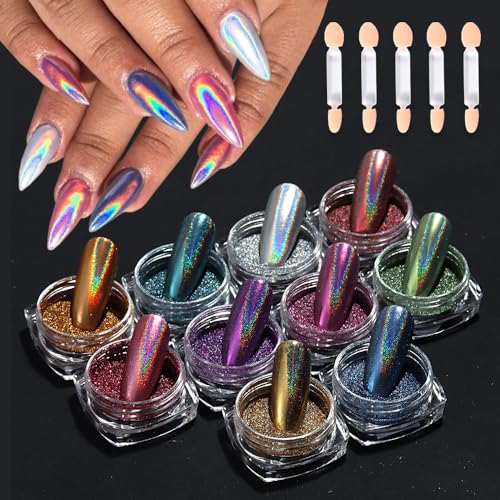
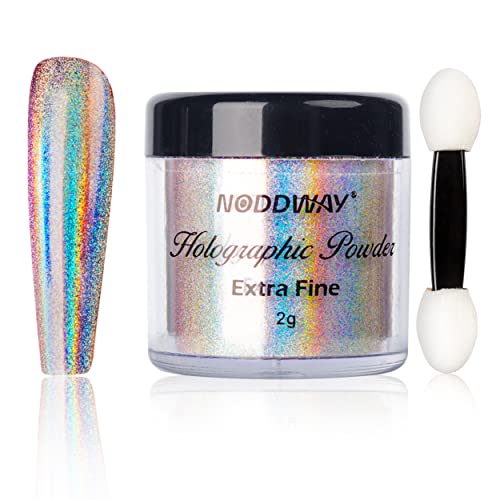
22. Holographic Shine
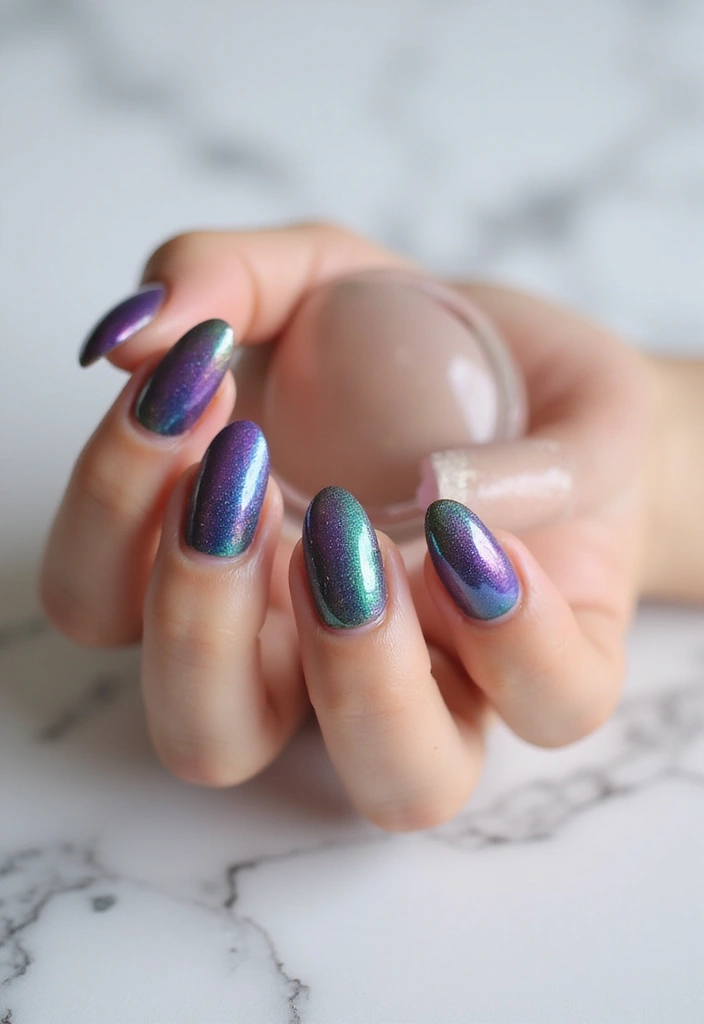
Catch the light with holographic nail polish! This dazzling trend reflects a spectrum of colors, creating an eye-catching effect. Apply a holographic base coat for an out-of-this-world look.
These polishes can be worn solo for a stunning shine or layered over other colors for a unique twist. They’re perfect for parties and special occasions.
for holographic nails:
– Ensure your base polish is dry before applying holographic polish for the best effect.
– Pair with minimal designs to let the polish shine.
– Use a high-gloss top coat to enhance the holographic effect.


23. Colorful Swirls

Create a fun and whimsical look with colorful swirls! Start with a light base coat, then use a thin brush to add swirling patterns in your choice of colors. This playful design can be as abstract or as structured as you like.
Swirling different colors together can create a tie-dye effect, while maintaining clean lines can give a more polished look. This design is perfect for summer and spring, adding a cheerful vibe to your nails.
Nail art tips:
– Use a dotting tool for finer details.
– Practice your swirls on paper before applying on nails.
– Finish with a glossy top coat for a stunning shine.


24. Vintage Vibes

Capture the charm of vintage styles with retro-inspired nail designs. Think polka dots, stripes, and muted colors that bring a nostalgic feel. Start with a soft base color, then incorporate designs like dots or lines for that classic look.
This trend works beautifully with pastel colors or even muted jewel tones for a sophisticated take on vintage.
Creative tips:
– Use nail stickers for easy application of vintage designs.
– Pair with vintage-inspired outfits for an authentic feel.
– Consider matte finishes for a true retro vibe.


25. Bold and Bright
Feeling adventurous? Go for bold and bright colors that are sure to turn heads! Choose your favorite vibrant colors and don’t be afraid to mix and match. A full set of vibrant nails can be a statement all on its own, or you can pick one or two nails to showcase intricate designs.
This trend is perfect for those who love to express themselves through color and creativity.
for bold nails:
– Make sure to use a good base coat to avoid staining.
– Choose colors that complement each other for a cohesive look.
– Seal with a high-gloss top coat for an eye-catching shine.
26. Decorative Confetti
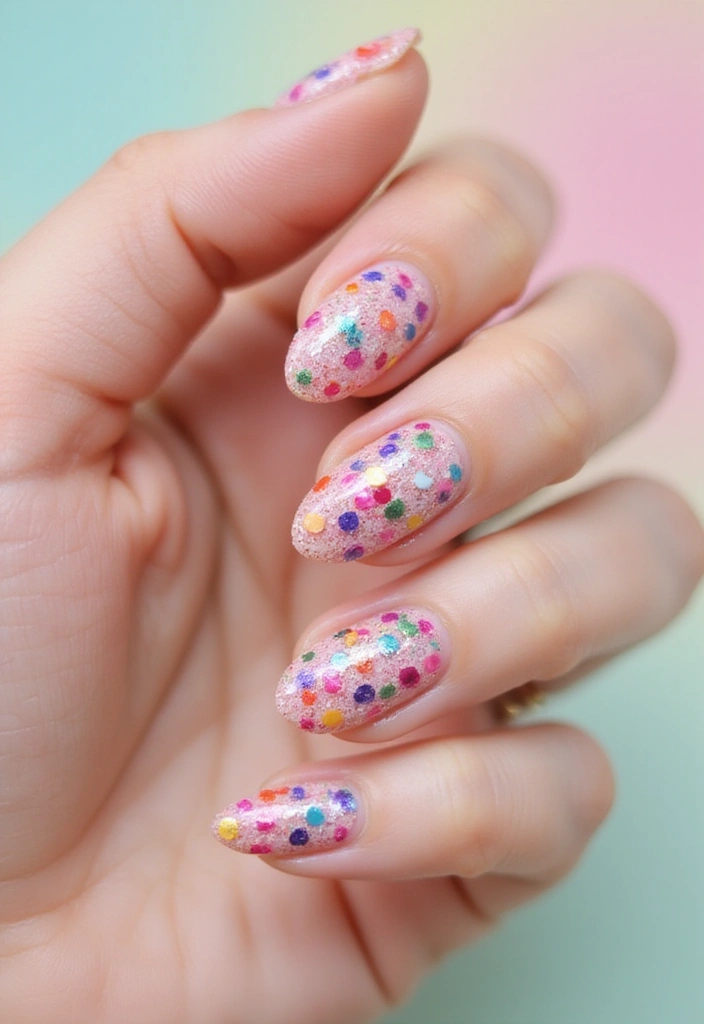
Add a touch of whimsy with decorative confetti! Using clear nail polish as a base, sprinkle in colorful confetti pieces and seal them for a fun and festive look. This design is perfect for parties or special occasions where you want to stand out!
You can use confetti pieces in various shapes and colors to match your outfit or mood.
Nail art tips:
– Ensure the confetti is securely sealed with a top coat.
– Consider using a sponge to apply the confetti for an even distribution.
– Mix different colors and shapes for a playful effect.
27. 3D Nail Art
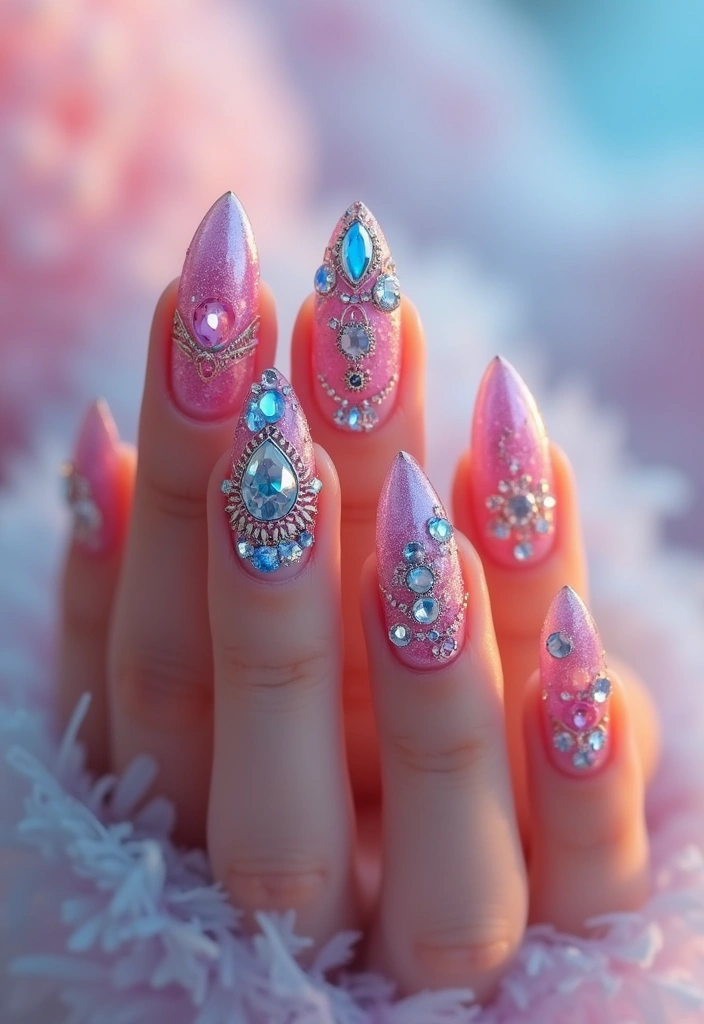
Take nail art to the next level with 3D designs! This eye-catching trend uses embellishments like rhinestones, gems, or charms to create dimension on your nails. Start with a base coat and then apply your chosen embellishments with nail glue or a clear polish for hold.
This style is perfect for special occasions, making your nails a true focal point.
Practical tips:
– Use a tweezer for precise placement of small gems.
– Consider using a top coat to secure the 3D elements.
– Keep the base colors simple to let the 3D designs stand out.


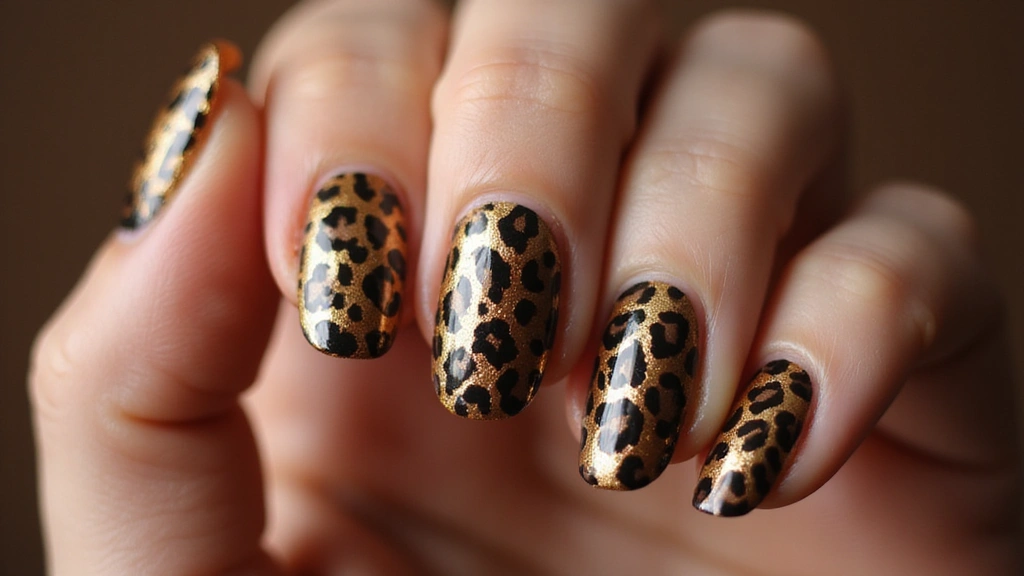
28. Animal Prints
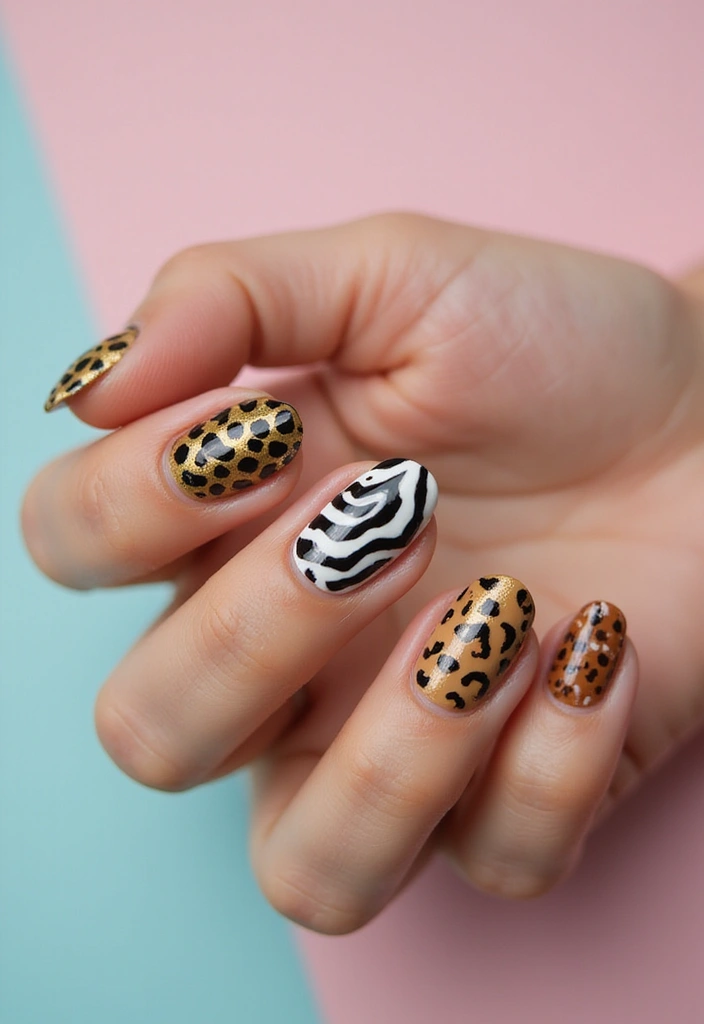
Channel your wild side with fun animal print nails! Leopard spots, zebra stripes, or even snake skins can be recreated with a little practice. Start with a solid base color, and use a fine brush or dotting tool to add your animal print designs.
This trend can be bold and vibrant or soft and muted, depending on your color choices.
DIY tips:
– Use a white base for bright animal prints to really pop.
– Experiment with different colors to create unique animal designs.
– Seal with a clear top coat for a professional finish.

29. Seasonal Sparkle
Celebrate each season with themed sparkle designs! Use glitter polishes that match the season; think icy blues and whites for winter, bright pastels for spring, fiery oranges and reds for autumn, and vibrant shades for summer.
Choose one color for your base and layer on the glitter for a stunning effect! This design adds a touch of magic to your nails, making them perfect for any occasion.
for seasonal sparkle:
– Use a clear base to prevent glitter from getting too dense.
– Consider applying glitter at the tips for a gradient effect.
– Seal with a glossy top coat for longevity.


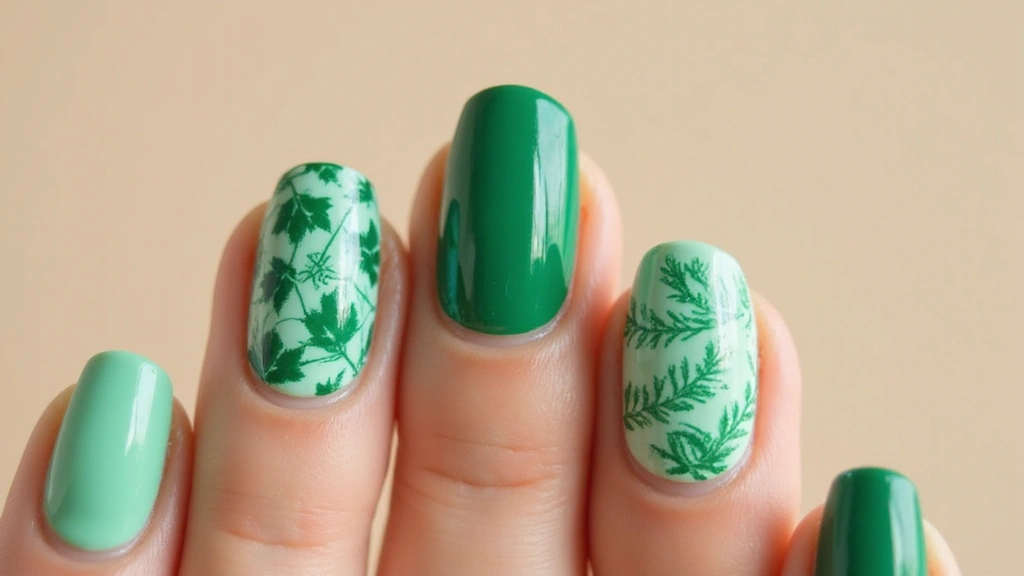
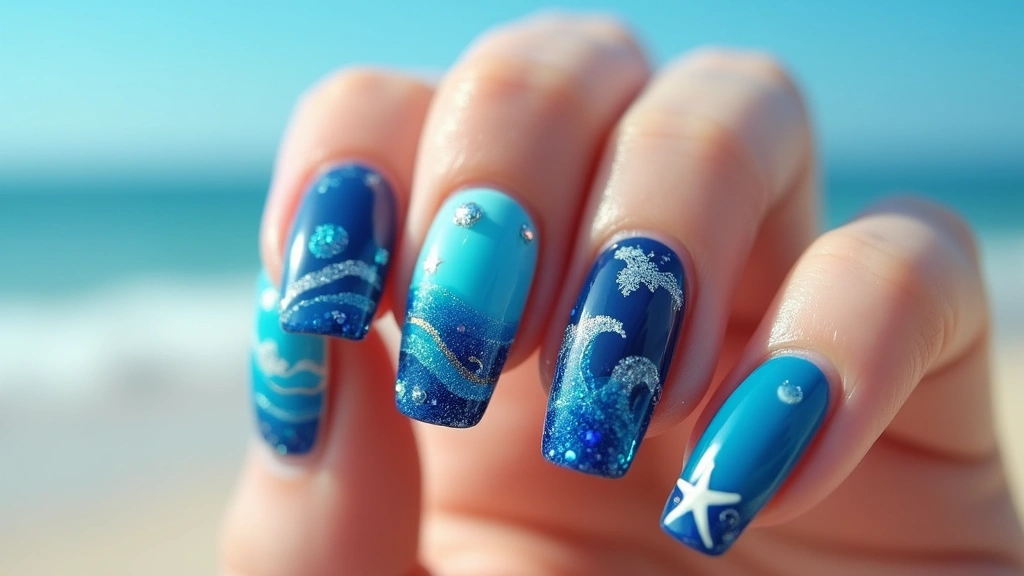
30. Nature-Inspired
Let nature be your muse with nature-inspired nails! Use colors and designs that mimic flowers, leaves, or even sunsets. Earthy tones combined with floral designs can create a stunning look that’s perfect for any season.
You can paint flowers directly on your nails or use nail stickers for an easy and beautiful effect. Nature-inspired nails are not only charming but also express a connection to the great outdoors.
Creative tips:
– Use fine brushes for detailed floral designs.
– Experiment with layering colors for depth.
– Consider adding a matte finish for a more natural look.


31. Sweet Treats
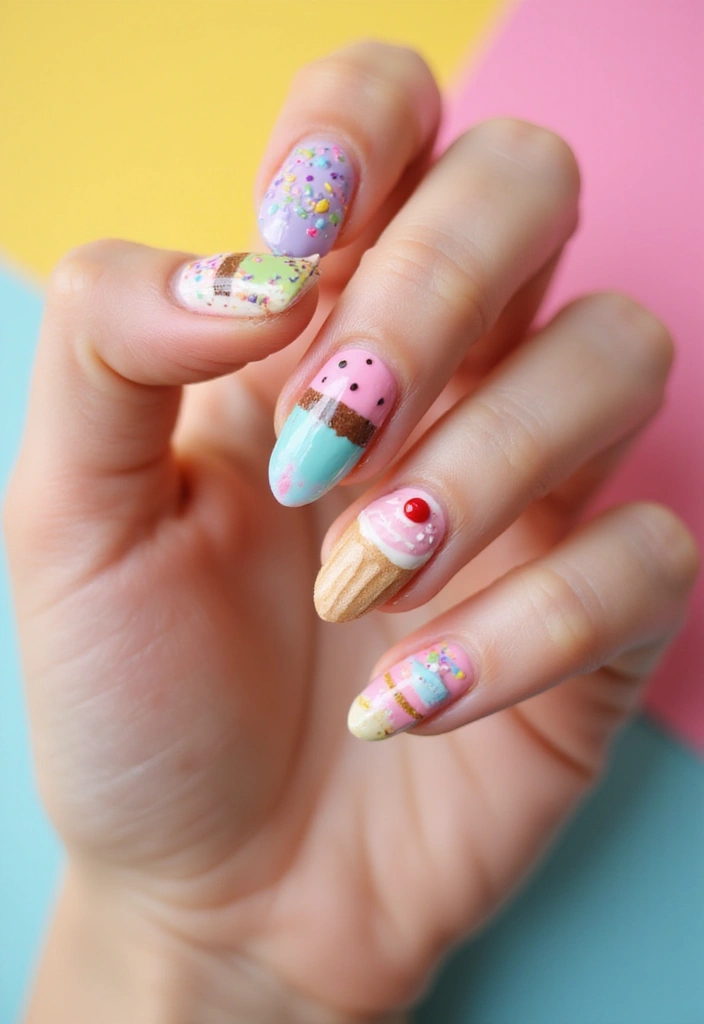
Indulge your sweet tooth with dessert-inspired nail designs! From cupcakes to ice creams, these playful designs are perfect for those who love all things sweet. Start with a light base color and use a fine brush to paint delicious treats on your nails.
This fun nail art style is perfect for summer and can bring a smile to anyone who sees it!
for sweet treat designs:
– Use vibrant colors to make the desserts pop.
– Keep the designs simple for easier application.
– Consider using nail stickers for quick and easy designs.


32. 80s Neon Glam
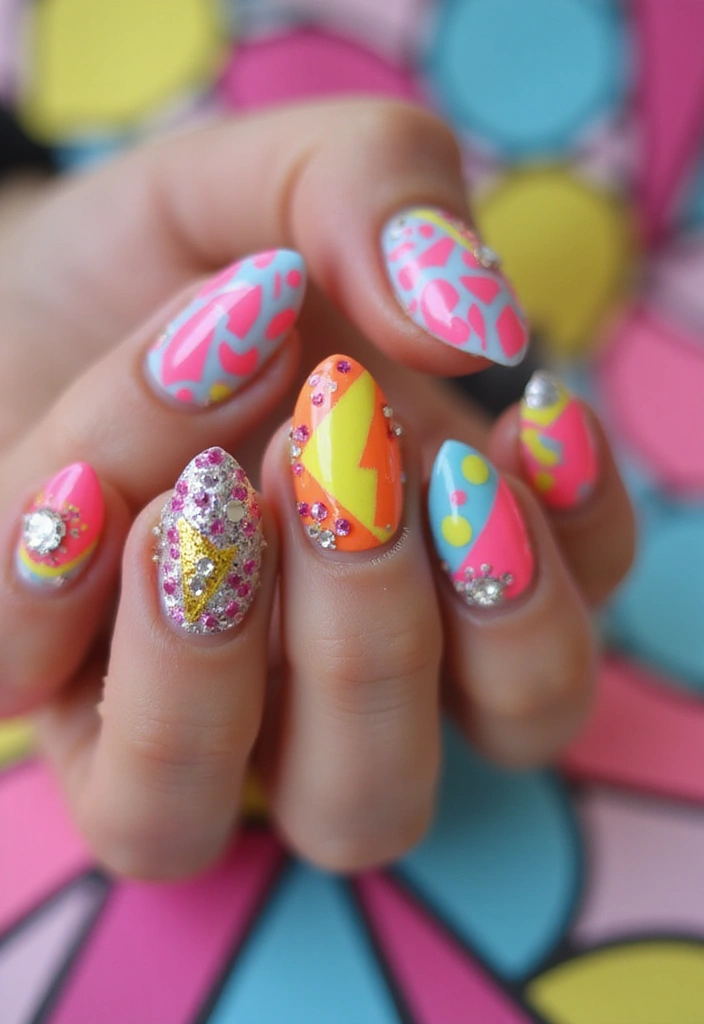
Take a step back in time with 80s neon glam nails! Bright, bold colors were all the rage, and you can recreate that vibrant look today. Opt for electric pinks, greens, and blues, and don’t shy away from layered designs.
Add accessories like rhinestones or nail stickers for that extra flair and sparkle typical of the era. This design is perfect for parties and festivals!
Nail art tips:
– Use a matte top coat for a more retro feel.
– Experiment with patterns like checkers or stripes from the era.
– Remember: the brighter, the better!


33. Ethereal Glow
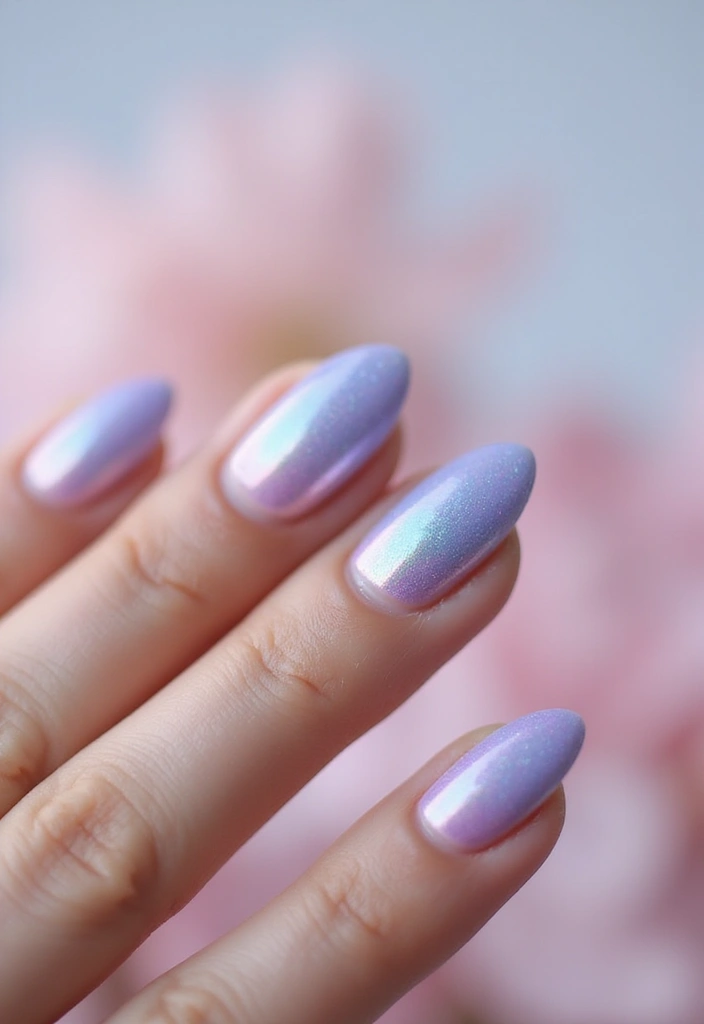
Channel an ethereal vibe with soft, glowy hues! Think iridescent polishes that catch the light beautifully. You can layer sheer colors for a soft wash or use a holographic top coat for extra dimension.
This delicate style is perfect for any occasion where you want your nails to look effortlessly chic.
for creating an ethereal look:
– Use a white base for the colors to really shine.
– Experiment with layering different shades for a unique effect.
– Keep designs simple to maintain that soft elegance.


34. Modern Abstract

Get creative with modern abstract designs! This style allows for freedom of expression. Start with a base color and use different tools to create abstract shapes and patterns. Mix colors, play with lines, and don’t be afraid to let your creativity shine!
This artistic approach can be both stunning and therapeutic, allowing you to experiment without strict rules.
Nail art tips:
– Use a fine brush for detailed work and a sponge or dotting tool for larger areas.
– Mix different finishes to add depth and intrigue to your designs.
– Consider using complementary colors for a cohesive look.
Unleash your inner artist with modern abstract nail designs! Mix colors and shapes for a stunning expression of creativity—you might just find it’s the most fun therapy session you’ve ever had!

35. Customized Nail Art

Take nail art to a personal level by customizing your designs! Whether it’s your favorite quote, a symbol that means something to you, or even a mini portrait, your nails can truly reflect who you are.
Use fine brushes for detailed work or nail stickers for simpler designs. This trend allows for endless creativity and personalization, making your nails a true expression of self.
for customized nails:
– Consider using water decals for intricate designs without the fuss.
– Choose a color palette that resonates with you.
– Seal your designs with a top coat for protection.
Make your nails a canvas for self-expression! Custom designs can showcase your personality, whether it’s a heartfelt quote or a cherished symbol. Embrace coated creativity and let your nails tell your story!


Conclusion: Nail Your Look with Color and Creativity
With these 35 colorful nail polish ideas, there’s no shortage of creativity to explore! Each design offers a unique way to express yourself, whether it’s through bold colors or intricate patterns.
Don’t forget: nail art is all about having fun and embracing your personal style. So gather your polishes, get creative, and let your nails become a canvas for your imagination!
Frequently Asked Questions
What are some eco-friendly nail polish options for colorful designs?
If you’re looking to keep your nails vibrant while being kind to the planet, eco-friendly nail polishes are a fantastic choice! Many brands now offer non-toxic formulas that are free from harmful chemicals like formaldehyde and toluene. Check out brands that specifically market their products as eco-friendly or vegan, as they often have a range of colorful nail trends that don’t compromise on quality or style!
How can I create a DIY manicure at home with vibrant nail colors?
Creating a stunning DIY manicure at home is easier than you think! Start by gathering your supplies: a base coat, your favorite vibrant nail colors, a top coat, and any additional tools for designs like brushes or sponges. Remember to prep your nails by cleaning and filing them first. Apply a base coat to protect your nails, then get creative with your chosen colors using techniques like ombre, striped elegance, or even floral nail art. Finish with a top coat for a glossy shine!
What are some trending nail art designs for this season?
This season, colorful nail trends are all the rage! You can explore designs like geometric patterns, tie-dye fun, or even seasonal designs that reflect the time of year. Pastel hues are perfect for spring, while rich jewel tones shine in the fall. Don’t forget to mix and match techniques to create a unique look that showcases your personal style!
How do I achieve a perfect marble effect on my nails?
Achieving a stunning marble effect is all about layering and technique! Start with a solid base coat, typically in a light color like white or light gray. Then, drop contrasting colors onto the nail and use a thin brush or toothpick to swirl them together gently. The key is to not overmix, as you want to maintain that beautiful marbled look. Finish with a top coat for a smooth, glossy finish that highlights your creative nail ideas!
What are some tips for maintaining colorful nails?
To keep your colorful nails looking fresh and vibrant, start with a quality base coat to prevent staining. Regularly apply a top coat to protect your design and add shine. Avoid harsh chemicals when cleaning, and consider wearing gloves to extend the life of your manicure. Additionally, be sure to moisturize your cuticles and hands to keep everything looking healthy. With these DIY manicure tips, your nails will be the talk of the town!