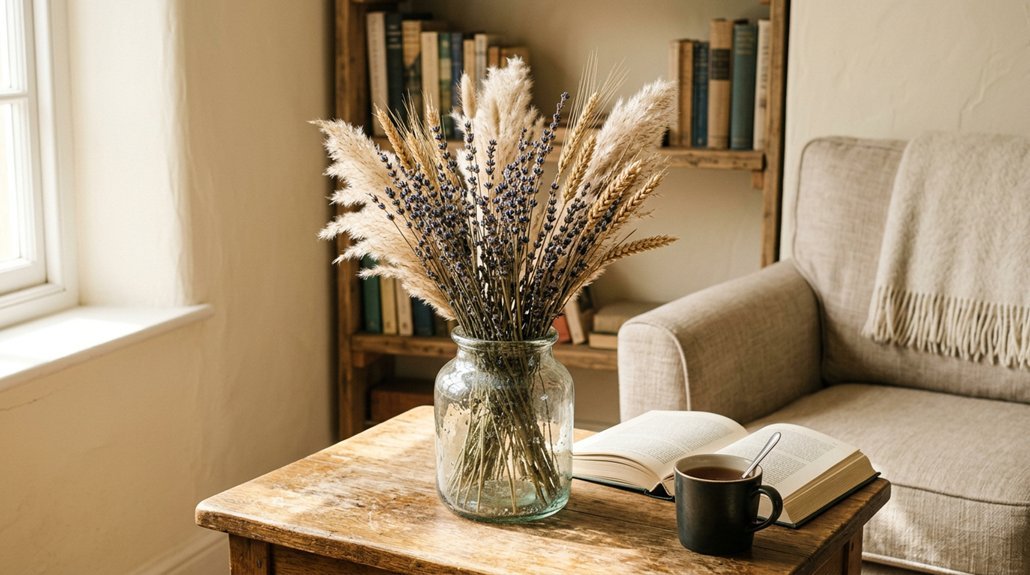
Arranging dried flowers might feel like rocket science, but you’ll master it faster than you think. You’ll need the right blooms, a sturdy vase, and a bit of patience.
Start by choosing your flowers, then build layers from back to front. Rotate as you go, trim stems gradually, and don’t overthink it. The result is a centerpiece that lasts months without water. Ready to transform dead plants into living room gold?
Choose Your Dried Flowers and Gather Essential Tools
The right dried flowers can make or break your arrangement, so you’ll want to pick wisely before you start. You’ll need a mix of focal blooms like hydrangea, greenery such as eucalyptus, and fillers including baby’s breath or amaranth. Grab some with long, straight stems; they’re easier to work with.
Dry each type separately in small bunches so nothing stays damp and spoils. Before arranging, you’re trimming stems to similar lengths and stripping extra foliage for a clean base. Gather your tools: sharp scissors or secateurs, your vase, and maybe a flower frog to anchor fragile pieces.
Group everything by role, focal blooms, greenery, fillers, then picture how colors and textures will look together. Planning now saves frustration later.
Recommended Products
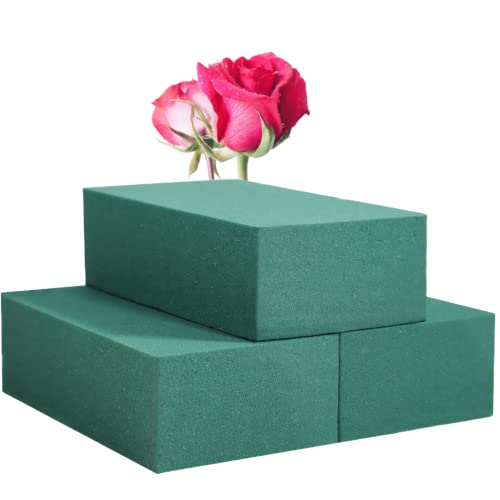
High-Quality Floral Foam Blocks: Our pack includes 3 green floral foam blocks (6"L x 3.00"W x 1.75"H), perfect for floral arrangements and crafts. Our green foam for flower arrangements has strong absorption and is ideal for fresh and silk flowers, artificial flower arrangements, and plant displays.

🌷【PREMIUM FOAM BLOCKS- Premium supplier for florists and flower arrangement lovers】- 4 PCS small floral foam blocks are included, each them measures about 3.15 inch X 1.6 inch. The dry floral foam is soft, durable and safe,quickly to absorb water. This is a small size flower foam, please make sure you have confirmed the size before purchase!

🌼 Round Floral Foam Blocks – Pack of 6 Includes six premium round floral foam blocks (3” x 1.5”) designed for beautiful flower arrangements, DIY crafts, weddings, parties, and home décor projects.
Match Your Vase Size to Your Dried Flower Bouquet
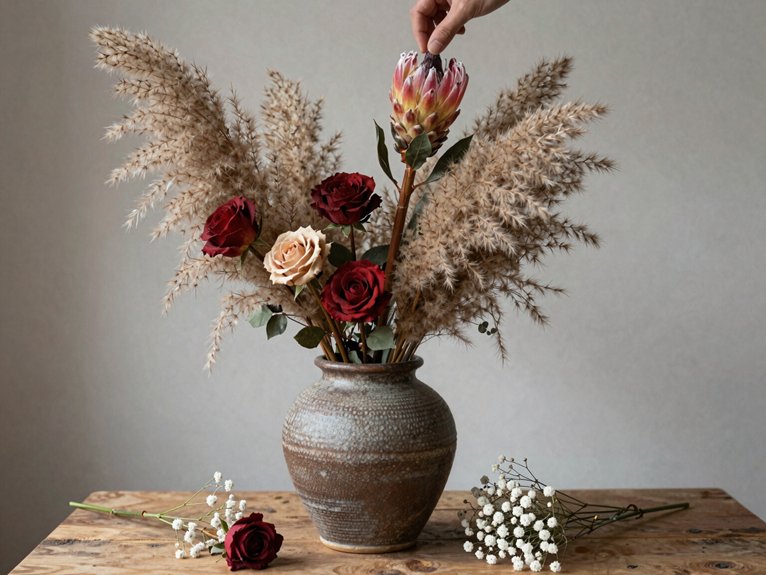
What’s stopping your dried flowers from looking like a magazine spread? You’ve probably got the wrong vase size for your dried flower bouquet. Nailing arrangement balance starts with proportion: your vase should sit at roughly one-third of the total height, with stems extending 1.5 to 2 times taller.
Got a big, dramatic bunch? Grab a wide-mouth, opaque vase that’ll anchor those tall focal flowers and let filler flowers breathe. Working with a petite posy? Stick to a narrow-neck vessel, trim those stems short, and skip excess greenery that’ll crowd the design.
Remember: your vase size dictates how many stems you’ll use and how stable your piece feels, especially for taller builds. Match the bouquet height and width to your surface and room, and you’ll nail visual balance every time.
Recommended Products

Perfect Fit for Regular Mouth Jars: These mason jar toppers feature an inner diameter of 2.38 inches and outer diameter of 2.75 inches, designed to fit standard regular mouth mason canning jars, bottles, and cups securely.


🌸【Two Sizes】You will get two 2.2-inch and two 3.2-inch silicone flower arranging grids. The 2.2-inch flower arrangement holder fits vase openings of 2.2–2.5 inches, and the 3.2-inch one fits 3.0–3.5 inches. Improper sizes will affect installation. Please measure your vase first.
Prep Your Dried Flower Vase: Foam or Wire
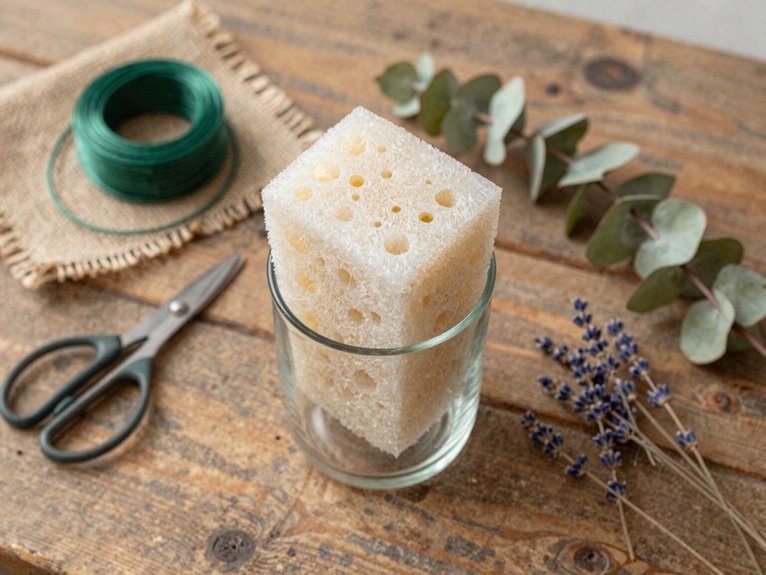
You need a solid base to keep those dried stems from flopping around, so you’ll choose between foam or wire depending on your style and patience level. Foam gives you that grab-and-stay security, but you’ll poke holes first so you don’t snap delicate stems pushing them in blind. Wire’s messier to shape, yet it breathes better and won’t crumble if you change your mind mid-arrangement.
Recommended Products

This floral wire is ideally suited for arts and crafts projects. It is used for everything from jewellery making to securing wedding bouquets.

【High Quality】These floral wire stems are made with high-quality iron wire inside and wrapped with a layer of green plastic outside, making them resistant to rust. These floral wire stems are exquisitely crafted, sturdy yet flexible, and have a beautiful color, making them ideal for creating floral projects

22 GAUGE: Diameter:0.03 inch.Standard 22 gauge wire,thick enough.16 in/40 cm in length.200 pieces wire in the package.Metal core.
Choosing Your Base
Where exactly should your dried flowers stand tall? You’ll want a vase whose height hits roughly one-third of your overall arrangement. This ratio keeps things balanced, letting your stems extend 1.5 to 2 times the vase height without toppling over.
For dried flowers, grab an opaque vase; it’ll hide any messy mechanics inside. Wide mouths handle bigger bouquets, while narrow necks cradle small posies.
Before you start, drop a flower frog or simple grid into the bottom. This base secures your stems upright so nothing shifts.
Begin building your arrangement with larger focal flowers first. These establish your height and structure, creating the backbone you’ll fill in later. Get this foundation right, and everything else falls into place naturally.
Foam Versus Wire
Once you’ve got your vase sorted, you’ll need to decide how you’re going to keep those stems in place, and this choice matters more than you’d think. For your dried flower arrangement, you’ve got two main paths: floral foam or a wire setup.
Floral foam gives you serious stem stability, especially for taller vase arrangements. You’ll puncture it with a chopstick, then push stems directly in. It’s reliable, but there’s a catch: you’re locked in. Shortening stems or changing colors gets messy fast.
A wire grid, built from chicken wire or a vintage flower frog, keeps things flexible. You get easy rearranging stems without destroying your base. Stems stay put, but you can lift them out, adjust, and try again.
Pick foam for complex, permanent pieces. Choose wire if you like tweaking your design.
Trim Stems to Lengths That Fit Your Vase
How tall should your dried stems stand? You’ll want to trim stems so your dried flowers reach 1.5 to 2 times the vase height. This creates that balanced silhouette you’re after.
Grab your shears and trim stems at an angle, varying the stem lengths for a layered arrangement that doesn’t look stiff or artificial. Hold each stem against the vase before cutting to confirm it hits your intended focal point without crowding the opening.
Apply the third-rule ratio by keeping your overall arrangement roughly one-third taller than the vase itself for visual stability. You’ll place taller pieces toward the back or center, shorter ones at the edges, building an organic shape that feels naturally gathered rather than forced.
Recommended Products

Complete Bridal Package: this wedding package includes 4 hair pins and 1 hair comb, providing you with all the elements needed to create a cohesive bridal hairstyle; Whether you're the bride or a member of the bridal party, this complete set ensures you have the suitable finishing touches and can be kept for a long time

Warm Earth Tone & Cream Neutral Design: This 17'' dried flower bouquet features a timeless, cozy palette of cream white, warm tan, and forest green, accented with soft golden yellow and terracotta tones. The natural, earthy hues create a calming, inviting vibe that fits seamlessly with neutral, bohemian, farmhouse, and cottagecore decor styles.

❤This natural mixed dried flower bouquet contains 10 types of dried floral materials, including peacock blue pampas grass, natural pampas grass, sea lavender, hydrangea, eucalyptus leaves, baby's breath, and eucalyptus leaves.
Build Your Dried Flower Base With Foliage First
A solid base makes or breaks your dried arrangement, so you’ll start with the green stuff, not the stars of the show. Grab your foliage and push in the tallest stems toward the back or sides; this establishes height and creates depth before any dried flowers enter the picture. You’re building a framework here, not a finished piece.
Angle these initial stems in one direction to set the “best face” of your display, guiding where viewers should look. Keep rotating your vase as you work; arrangement balance depends on symmetry from every angle. Layering comes next, interspersing shorter pieces among the tall ones to craft a rounded silhouette rather than something boxy and stiff. This foliage foundation supports everything that follows.
Recommended Products

Home Decor Ceramic Vase --- More than a vase for flower, this ceramic vase can as utensil holder or wonderful home décor, as its 100% hand-painted surface makes each vase unique.This vase is perfect forarranging artificial plants, pampas grass or fresh flowers and plants, can be arranged individually or in combination, as a room decor, home decor, living room decor, farmhouse decor, table decor, bookshelf decor,entryway decor, kitchen decor, boho decor, house decor, office decor,shelf decor and more.

Multiple Use: This clear vase is great for tulip,rose,sunflower,hydrangeas and other fresh beautiful a bunch of flowers.Also can be filled with dried flower,artificial flowers,branches or other vase fillings.

【Ceramic Material】 This rustic ceramic vase crafted from high quality ceramic, suitable for indoor and outdoor occasions. This long-lasting high-quality ceramic flower vase will decorates your beloved home year after year, bringing you good and peaceful mood.
Add Filler Flowers for Texture and Fullness
Now that your foliage framework holds steady, you’re ready to bring in the supporting cast. The filler flowers transform sparse stems into something lush and intentional.
Tuck dried fillers like baby’s breath and caspia throughout your arrangement. These airy blooms add texture and fullness without stealing attention. Nestle foliage sprigs of eucalyptus between clusters to create breathing room.
Vary your stem lengths, keeping some fillers taller toward the back and shorter ones up front for layered depth. Rotate the vase as you work so you’re filling gaps evenly on all sides. Don’t crowd them. Space fillers in different directions, trim stems to fit snugly around existing elements, and break up dense patches for a balanced, rounded shape.
Recommended Products

This package contains one 3" x 6" green FloraFōM vase insert.

CUSTOMIZED YOUR SHAPE-You can cut floral foam into any shape you want. Including love shapes,cones, spheres, triangles, caged, bouquet holders, and so on

🌼 Round Floral Foam Blocks – Pack of 6 Includes six premium round floral foam blocks (4” x 1.4”) designed for beautiful flower arrangements, DIY crafts, weddings, parties, and home décor projects.
Place Focal Dried Blooms as Your Centerpiece
Where do you want the eye to land first? You’ll position your dried centerpiece here. Grab your focal blooms, dried hydrangeas work beautifully, and place them at the center of your vase arrangement. Face them toward the room’s main viewing angle.
You’re building a layered bouquet, so these need the tallest stem heights. Trim surrounding pieces shorter, letting your focal blooms hover slightly above everything else. This creates instant depth and a clear visual anchor.
Now weave in supporting foliage around them, smaller pieces that complement without competing. Stick to a balanced palette, whites and naturals or rich autumnal tones that let your centerpiece shine.
Check your angles from multiple spots. You’re establishing hierarchy here, making sure no filler steals the spotlight from your stars.
Recommended Products

Product Dimensions: The top length measures 5.11 inches, the bottom side is approximately 2.36 inches, and the height is about 2.9 inches. Due to the irregular shape of the flowerpot, slight size variations may occur

Specification: This Flower Frog measures 4.2x2.6x0.9 inch, the weight of the Japanese floral arranging pin frog is 1.4 pounds, the diameter of the needle is 1/16", the height is 9/16", the number of needles is 271

Rotate and Adjust for Shape and Balance
Once you’ve anchored your focal blooms at the center and built that initial layer of supporting stems, it’s time to physically move and inspect your work. Rotate your dried flower arrangements slowly, checking for fullness and balance from every angle. You’re looking for gaps, lopsided weight, or stems that stick out awkwardly.
Adjust by trimming stems to vary heights around the edges. Avoid that rigid, boxed look; aim for organic flow instead. Tuck in eucalyptus or other foliage to add depth and shadow, then step back and reassess the silhouette from multiple sides.
Break up dense clusters by repositioning stems and weaving in smaller filler flowers. Keep tweaking height and spacing until your arrangement settles into a rounded, natural contour with a visually even outline.
Recommended Products

Packaging: 100PCS green flower wire, diameter 0.078 inches, length 15.7 inches

Multiple Sizes and Colors: Our flower stems are 35cm long and come in three basic sizes - 50 pieces of 16 gauge (0.6 inches) 、50 pieces of 18 gauge (0.054 inches)and 100 pieces of 26 gauge (0.027 inches) - to give you the flexibility you need for a variety of craft projects. There are four vibrant colors to choose from: green, white, light green, and brown. With a large number and a variety of colors, these flower stems are perfect for adding a touch of color and creativity to any arrangement or craft

【Flexible & Strong – Ideal for Flower Arranging】Made of 2mm thick iron wire with a bendable yet sturdy design, these green floral wire stems are easy to shape without breaking. Perfect for flower arranging, wreath making, and DIY bouquet projects.
Add Finishing Touches: Final Texture Adjustments
You’ll want to finish your arrangement by tucking filler flowers into any remaining gaps, creating depth without crowding your focal blooms. Vary your stem heights so some flowers stand taller while others fall lower, giving you that natural, garden-picked look rather than a flat, uniform line.
Step back frequently to eyeball the overall silhouette, trimming as needed until the texture feels balanced from every angle.
Recommended Products

[Full Natural] - Selected from natural high-quality fresh Eucalyptus. There are 20 stems in the package, length is about 16''-17''. The stems cannot break easily. It is common for natural plants to have leaves of different sizes or some defects

Natural Scent: Crafted with delicate dried hydrangea petals and aromatic eucalyptus leaves, these exquisite sachets emit a gentle, natural scent perfect for any space. Use them as elegant bowl vase fillers, charming home fragrance sachets, or decorative accents to create a soothing ambiance.

🌺Premium Floral Arrangement | Measuring approx 16 inches in full length with a weight of 4.3 oz, this artificial flower bouquet is blended with roses, dandelions, daisies, eucalyptus, cedrus branches, hydrangea, chrysanthemums, hollyberries and matched leaves. Professionally designed by floral artists, it features full layers and a lifelike natural look.
Filler Flower Placement
How do you transform a sparse arrangement into something that looks professionally styled? You’ll insert filler flowers like baby’s breath or caspia around your focal dried flowers, tucking them into gaps to build a cohesive backdrop.
Balance texture by weaving greenery such as eucalyptus or dried grasses throughout; this prevents flat visibility and adds depth from every angle. Rotate your vase arrangement as you work, distributing fillers evenly while keeping your main blooms prominent at the front.
Trim stems in short increments, varying lengths within the filled area with edges slightly lower for a natural, rounded silhouette. Tuck pieces around taller stems until your bouquet reads dense yet airy, with no visible gaps remaining.
Stem Height Variation
Why settle for flat when you can build drama? You’ll transform your dried flowers into a captivating layered arrangement by mastering stem heights. Start by trimming structural stems 1.5–2× your vase height, then stagger everything else.
- Position tall structural stems at the back or center to establish your framework
- Add medium focal blooms and shorter filler blooms in front for depth and texture
- Rotate constantly while building to balance silhouette and prevent lopsided weight
Cut some stems in zigzag patterns rather than straight lines. This uneven approach creates natural movement. Finish by tucking short accents around edges to soften the outline. You’ll avoid that rigid, boxy look and achieve something lively instead.
Maintain Your Dried Flower Arrangement: Light, Dust, and Placement
Where should you put your finished arrangement so it actually lasts? For your dried flowers and vase arrangement, placement matters more than you’d think.
Avoid direct sunlight; harsh light exposure bleaches colors fast. Pick a cool, dry spot away from radiators, humid bathrooms, or drafty windowsills. Heat warps stems, moisture invites mold, and breezes trigger shedding.
Dust removal keeps your display crisp. Grab a hair dryer, set it to cool, and blast from about a meter away. Gentle air lifts grime without knocking petals loose.
Rotate your vase arrangement weekly so stems don’t flatten on one side. Don’t fuss with it daily; touching triggers breakage. Find the right spot, leave it be, and your dried flowers stay sharp for months.
Recommended Products

Diameter of product: The flower vase is 6.5-inch in height, 4.5-inch diameter in the opening, you will like this vase both style and size.

ELEGANT DESIGN: This modern white ceramic vase boasts a elegant and unique profile perfect for displaying dried floral arrangements or pampas grass.

Size: 1.8x3.3x6.4inch/4.5x8.4x16.2cm(mouth diameter x base diameter x height); Capacity: 500ml/17oz; Weight: about 340g of each one